How to Receive Firearms into the A&D Book
Use the Receive transaction in Orchid eBound to acquire firearms into your bound book from an outside FFL or source. This procedure covers both single serial number entry and batch serial number processing for high-volume acquisitions.
Steps
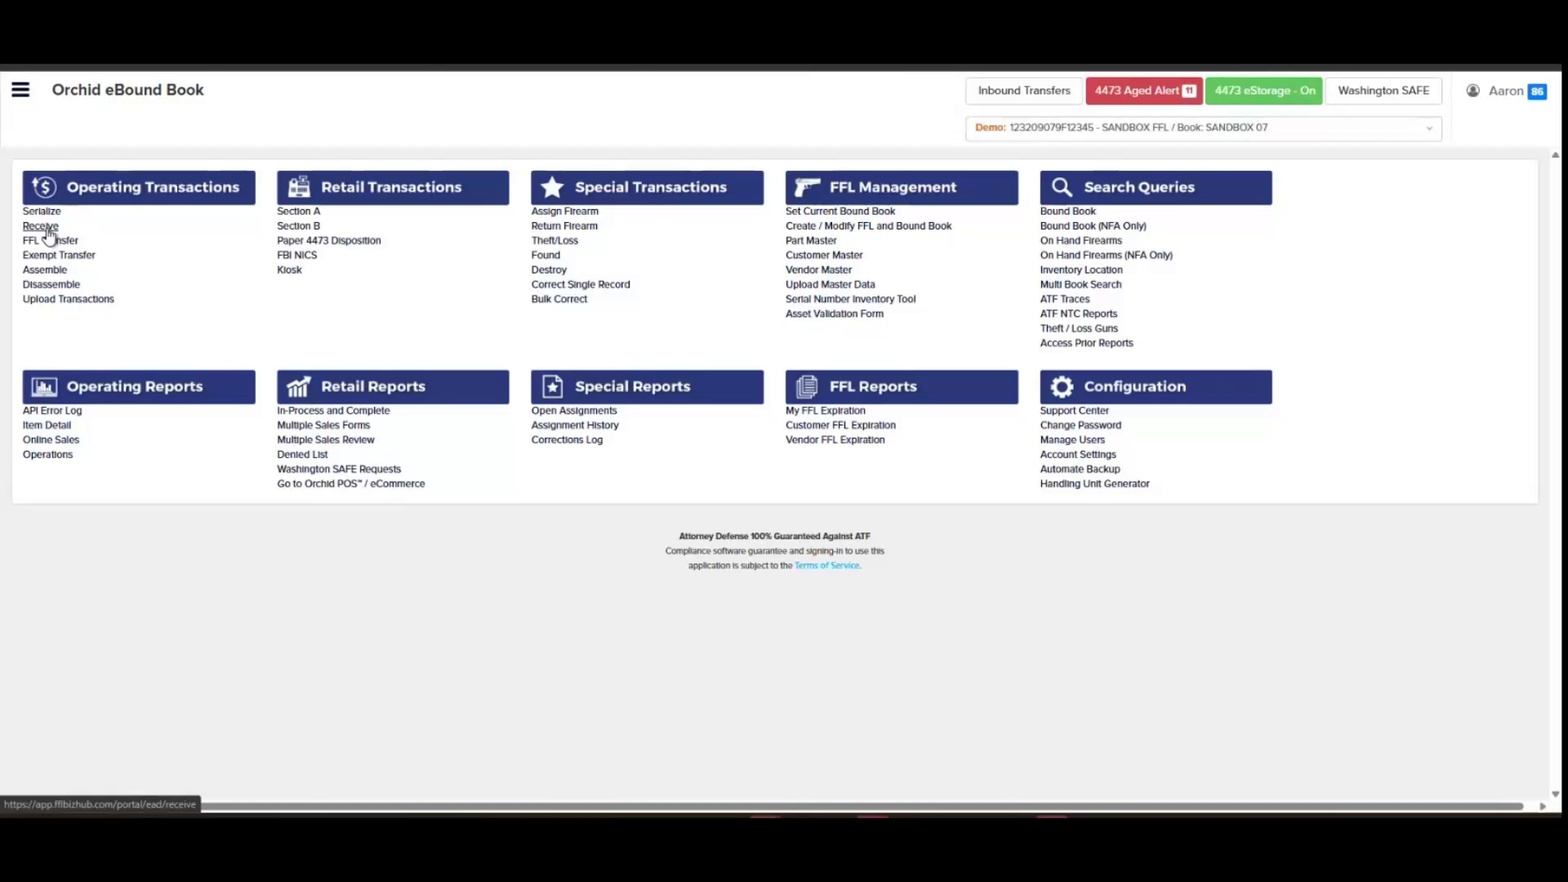
- Open the Receive transaction. From the Orchid eBound Book home screen, locate the Operating Transactions column and click Receive.
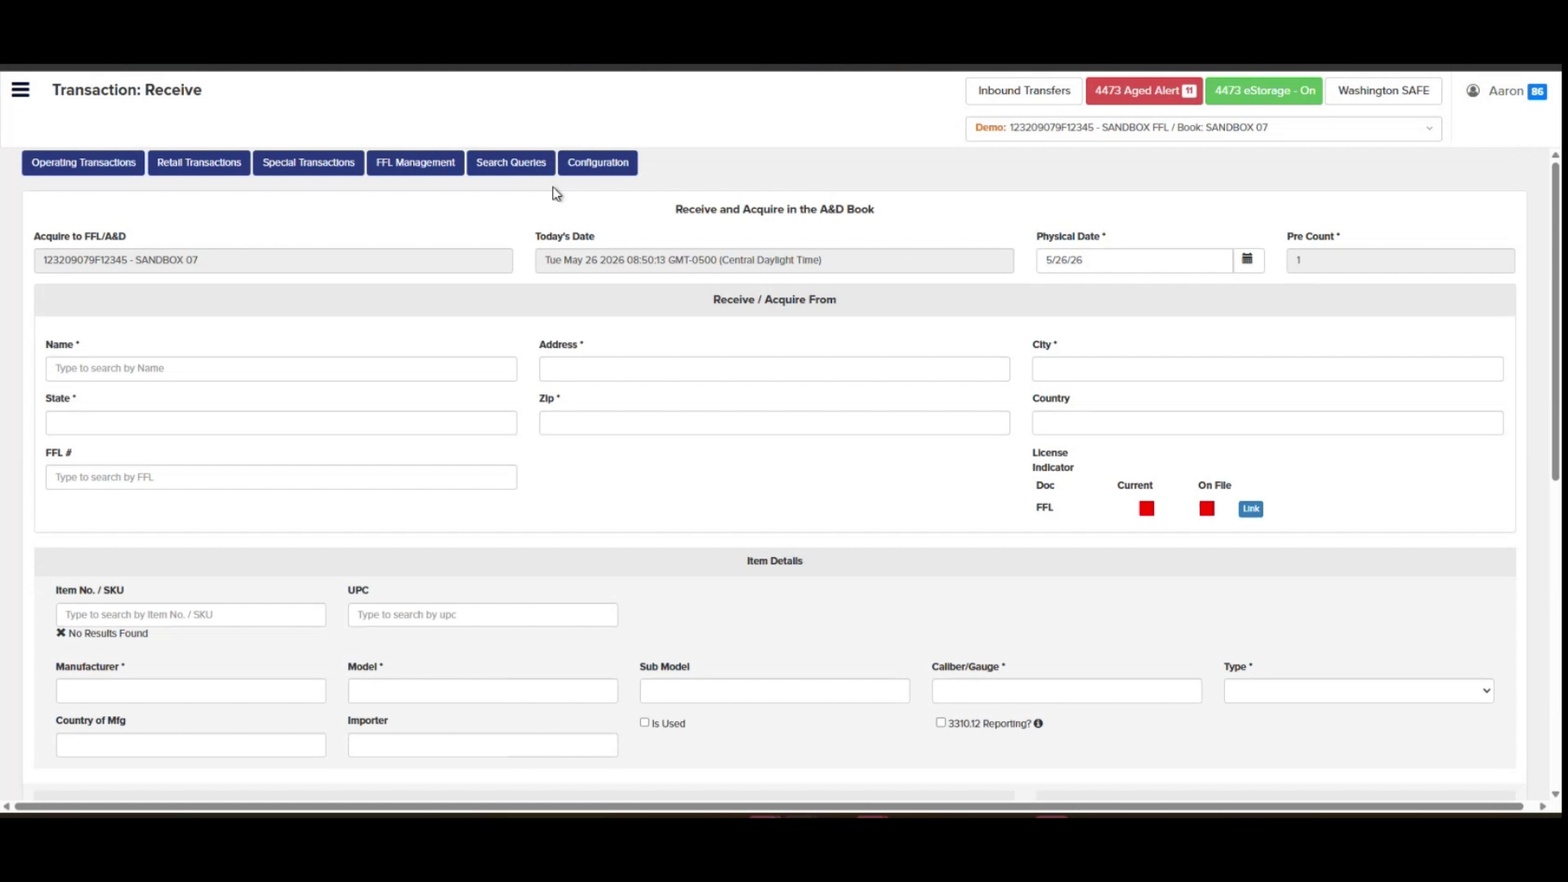
- Review the Receive and Acquire form. The Transaction: Receive screen opens, displaying the Acquire to FFL/A&D, Today's Date, Physical Date, and Pre Count fields at the top.
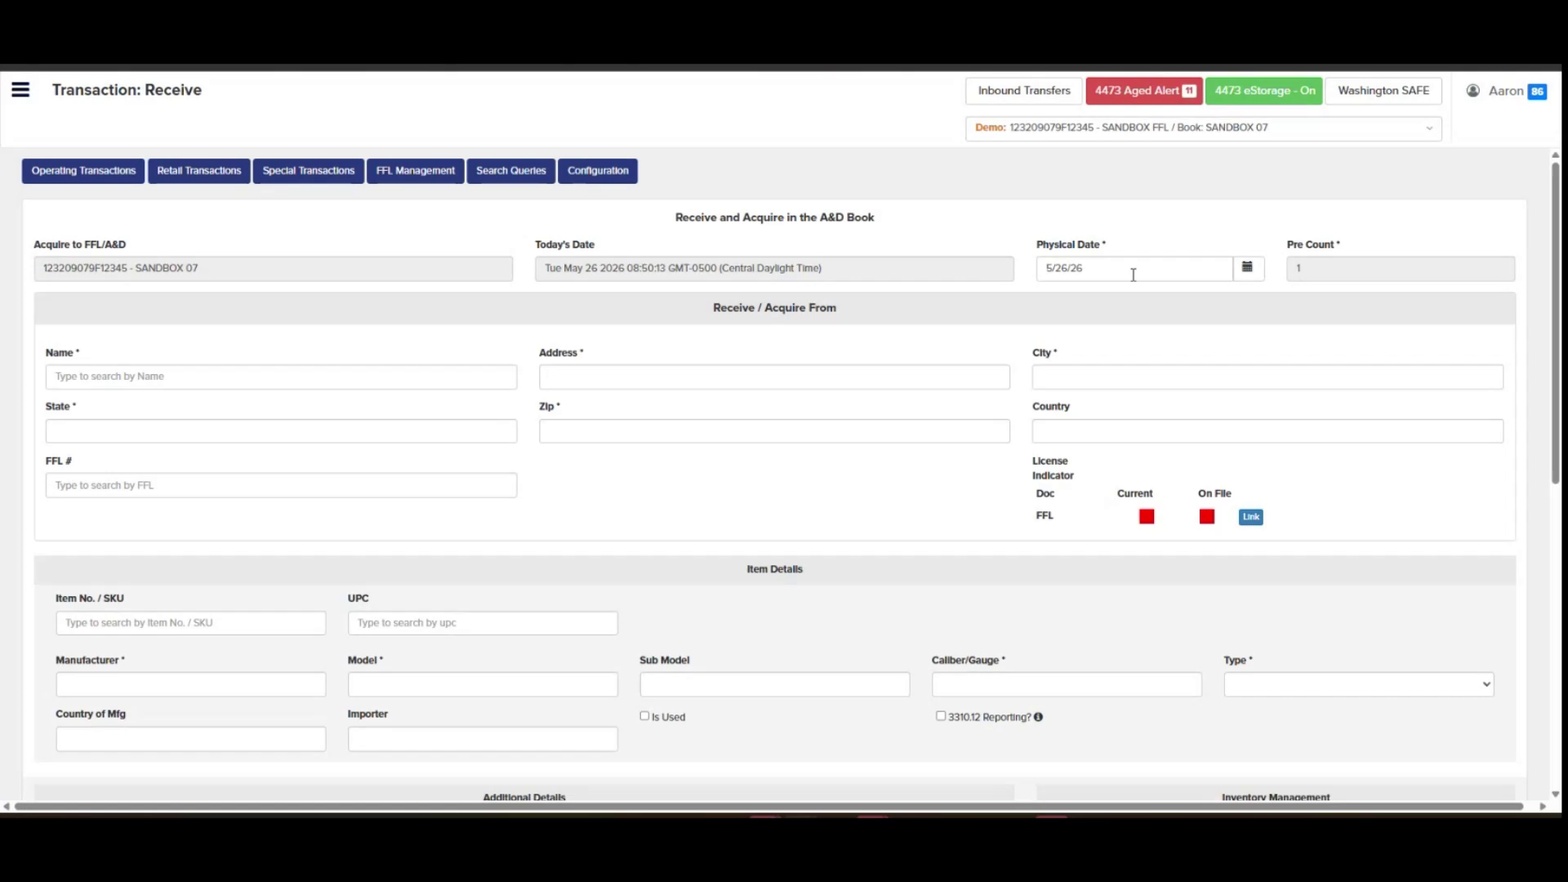
- Set the Physical Date. Click the calendar icon next to the Physical Date field to open the date picker. This is the date the firearm was physically received.
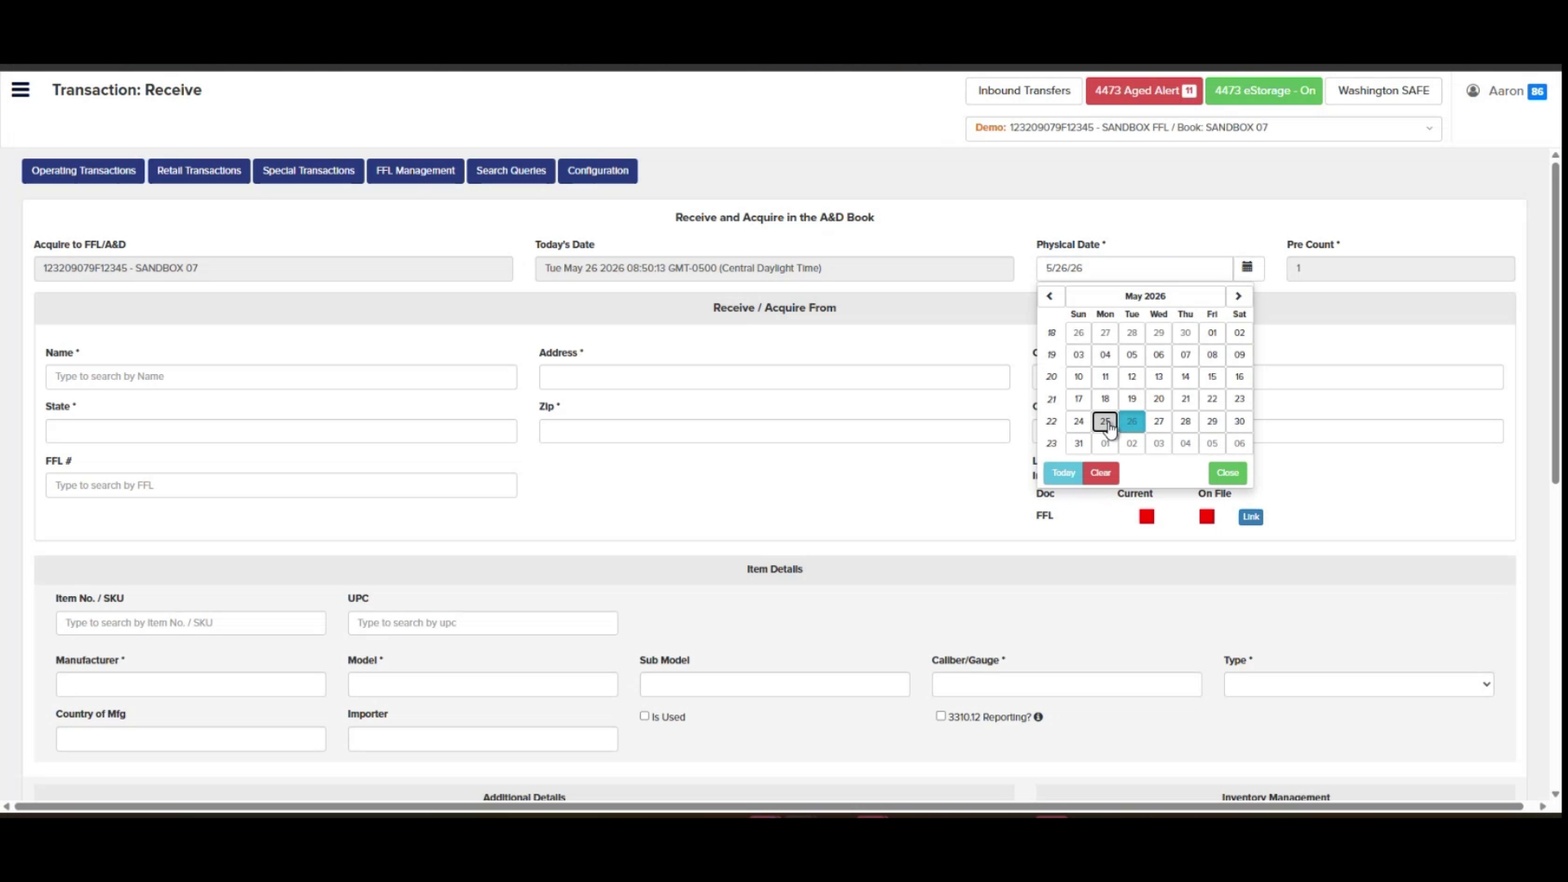
- Select the receive date. Click the appropriate date on the calendar. The selected date will populate the Physical Date field.
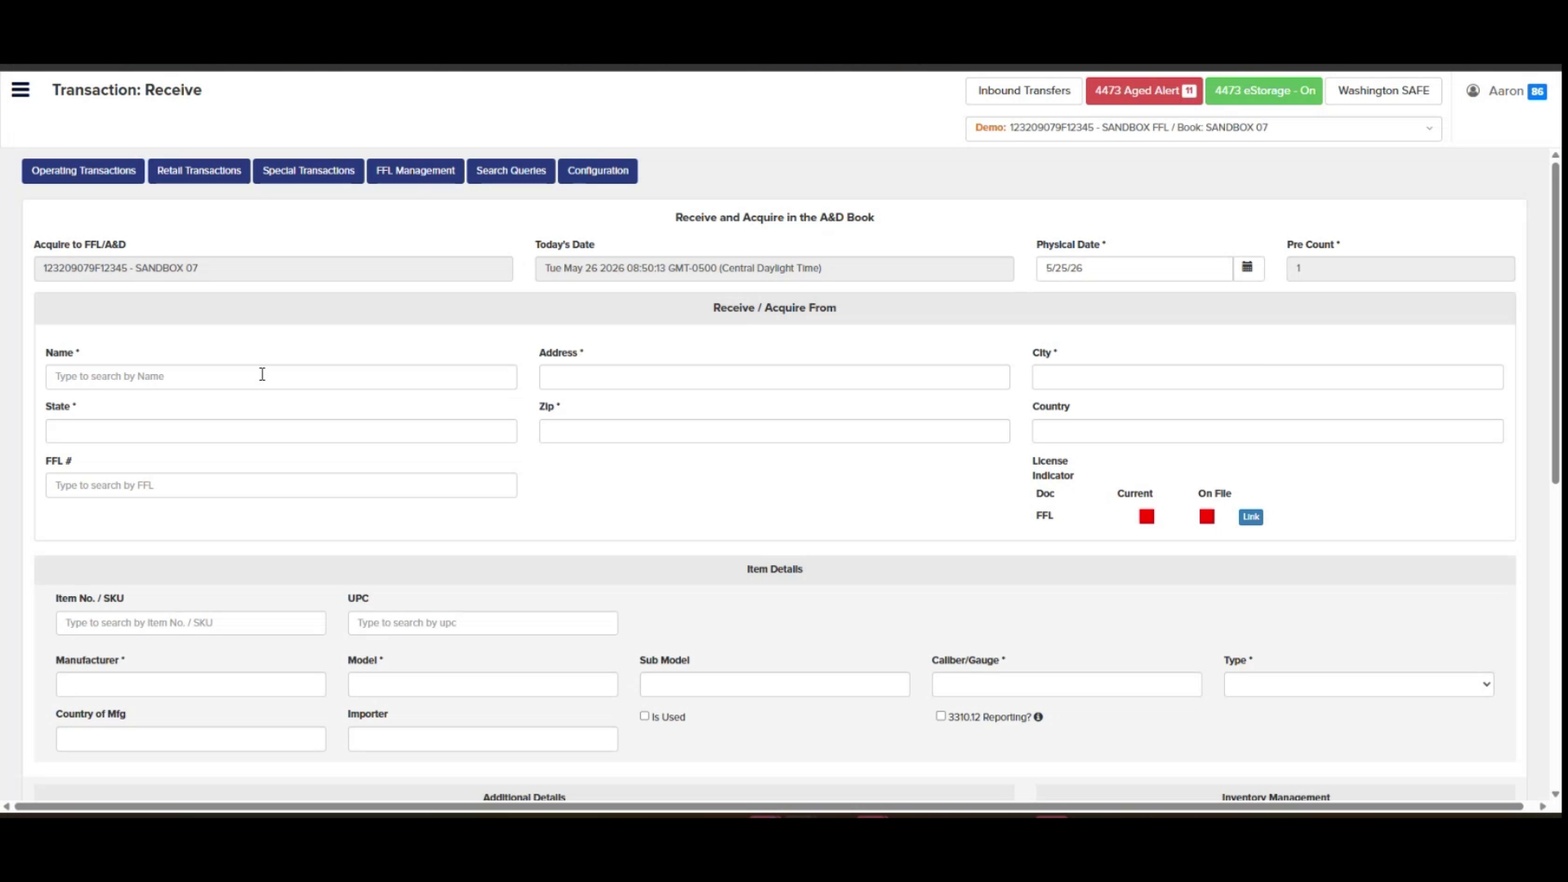
- Confirm the Pre Count. Verify the Pre Count field reflects the correct number of firearms being received in this transaction.
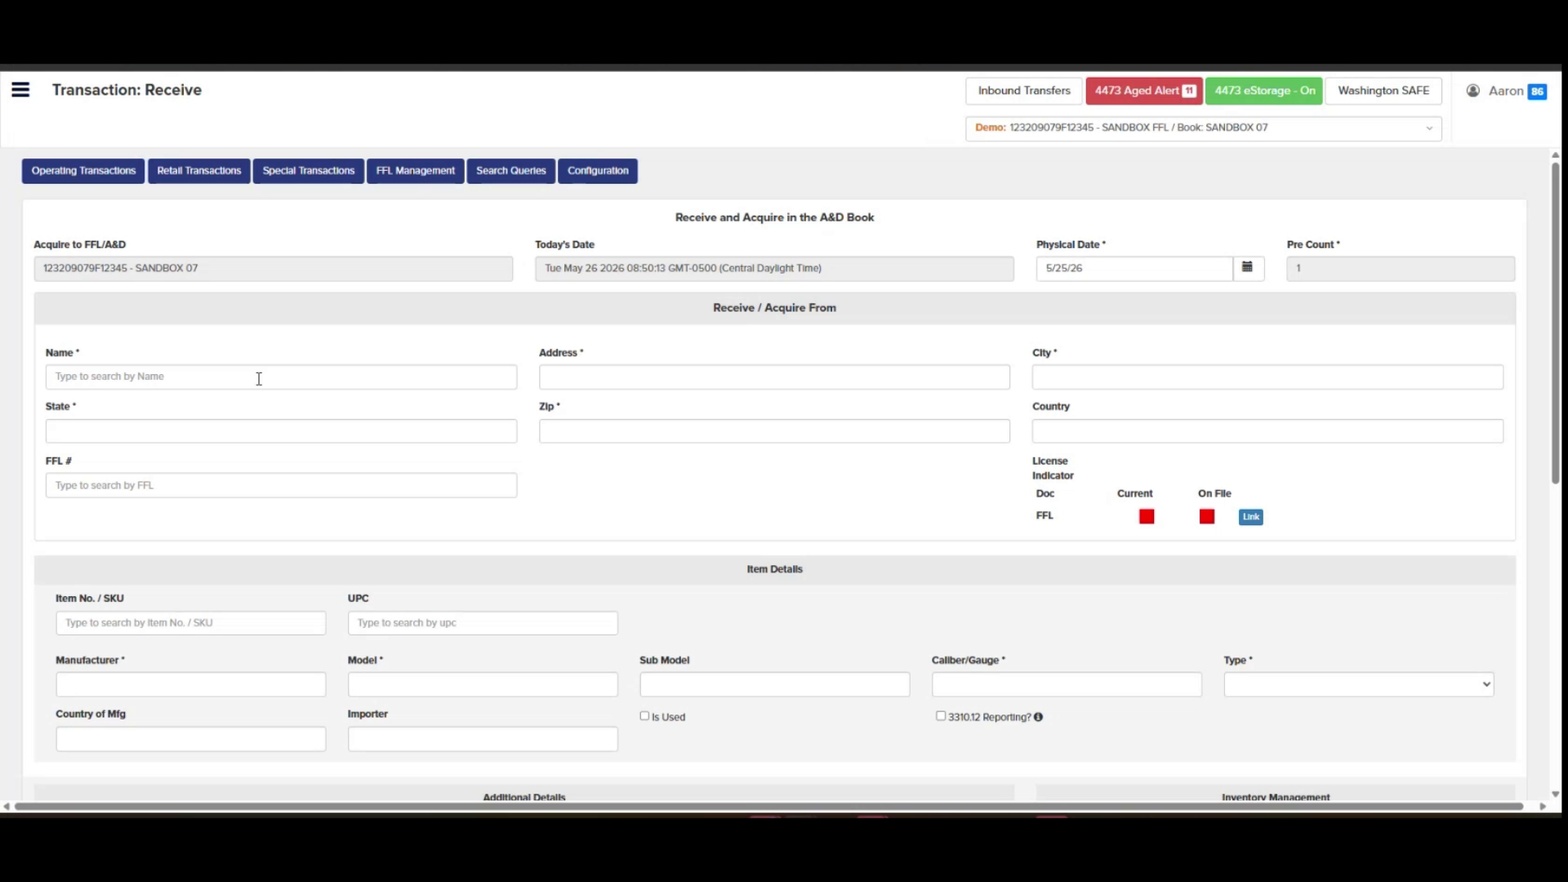
- Search for the source FFL by name. In the Receive / Acquire From section, click the Name field and begin typing the FFL name (e.g., "CZ-USA"). A dropdown of matching FFL EZ Check results will appear.
- Note: If receiving from a foreign vendor, use free-form entry for the name, address, city, state, and zip code. FFL number will be left blank.
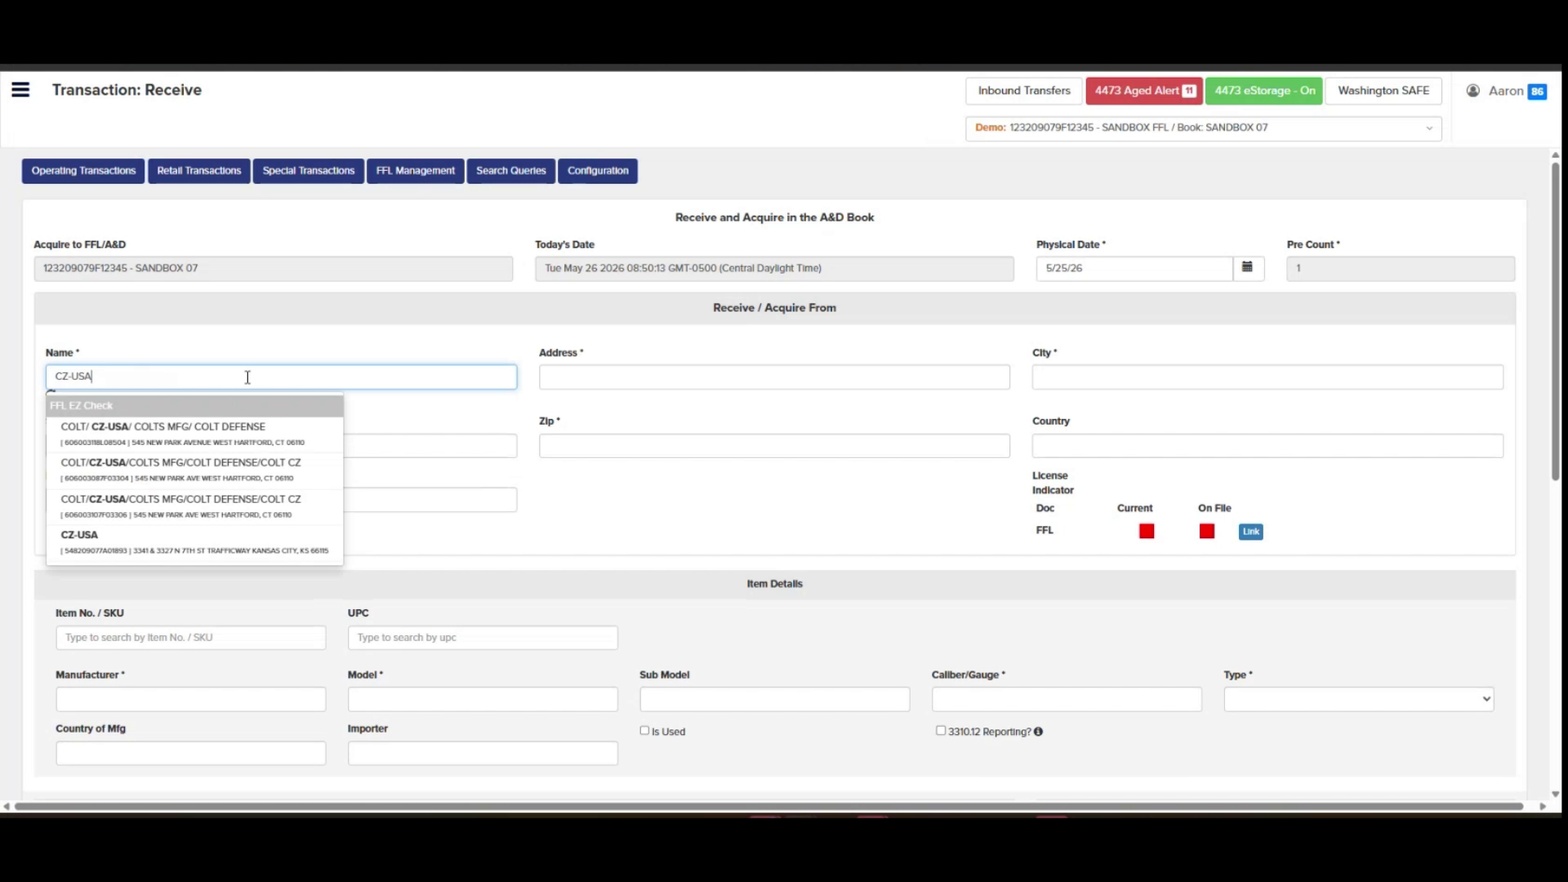
- Select the matching FFL from the dropdown. Click the correct FFL record from the suggestion list. The Address, City, State, Zip, Country, and FFL # fields auto-populate from FFL EZ Check.
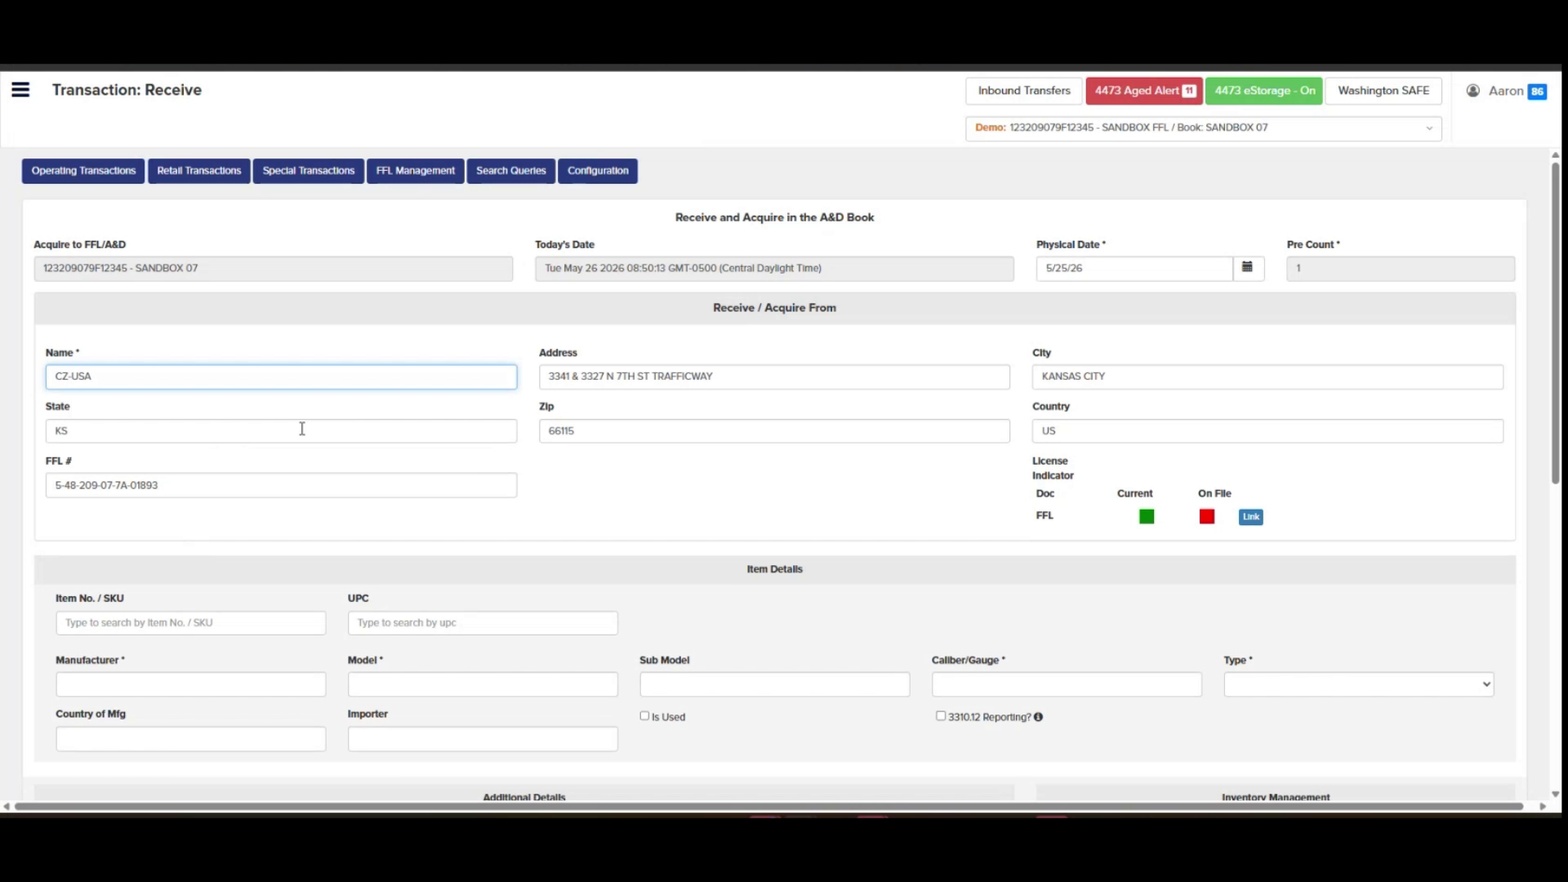
- Verify the License Indicator. Confirm the Current indicator under License Indicator turns green, indicating the FFL is valid in EZ Check.
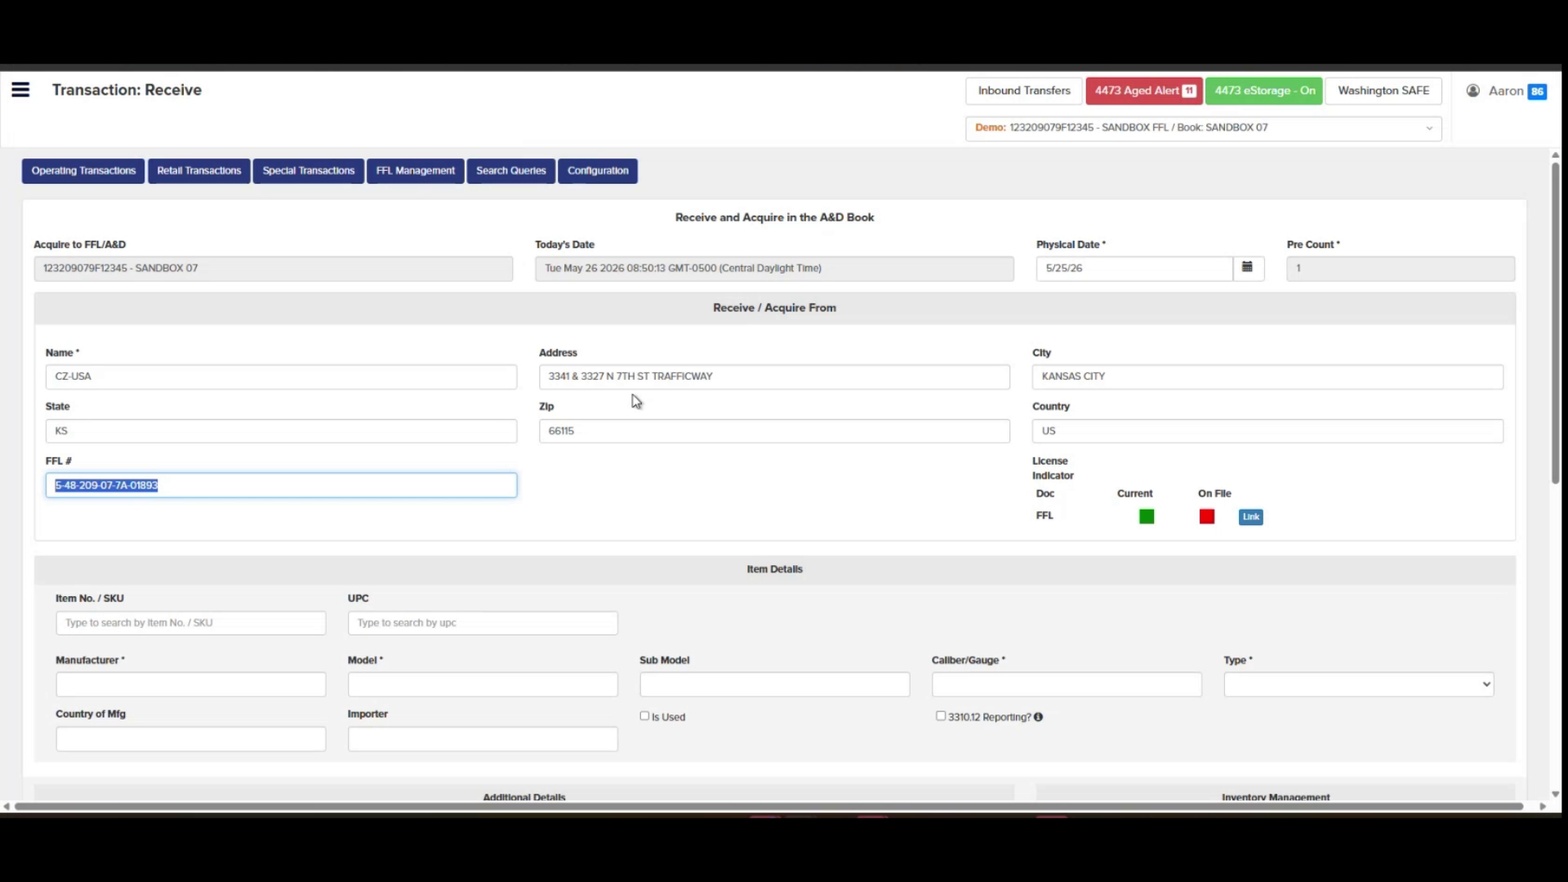
- Alternative — search by FFL number. If you prefer, you can search by FFL number directly. Click the FFL # field and type the FFL number (e.g., "5482097a"). Select the matching record from the dropdown.
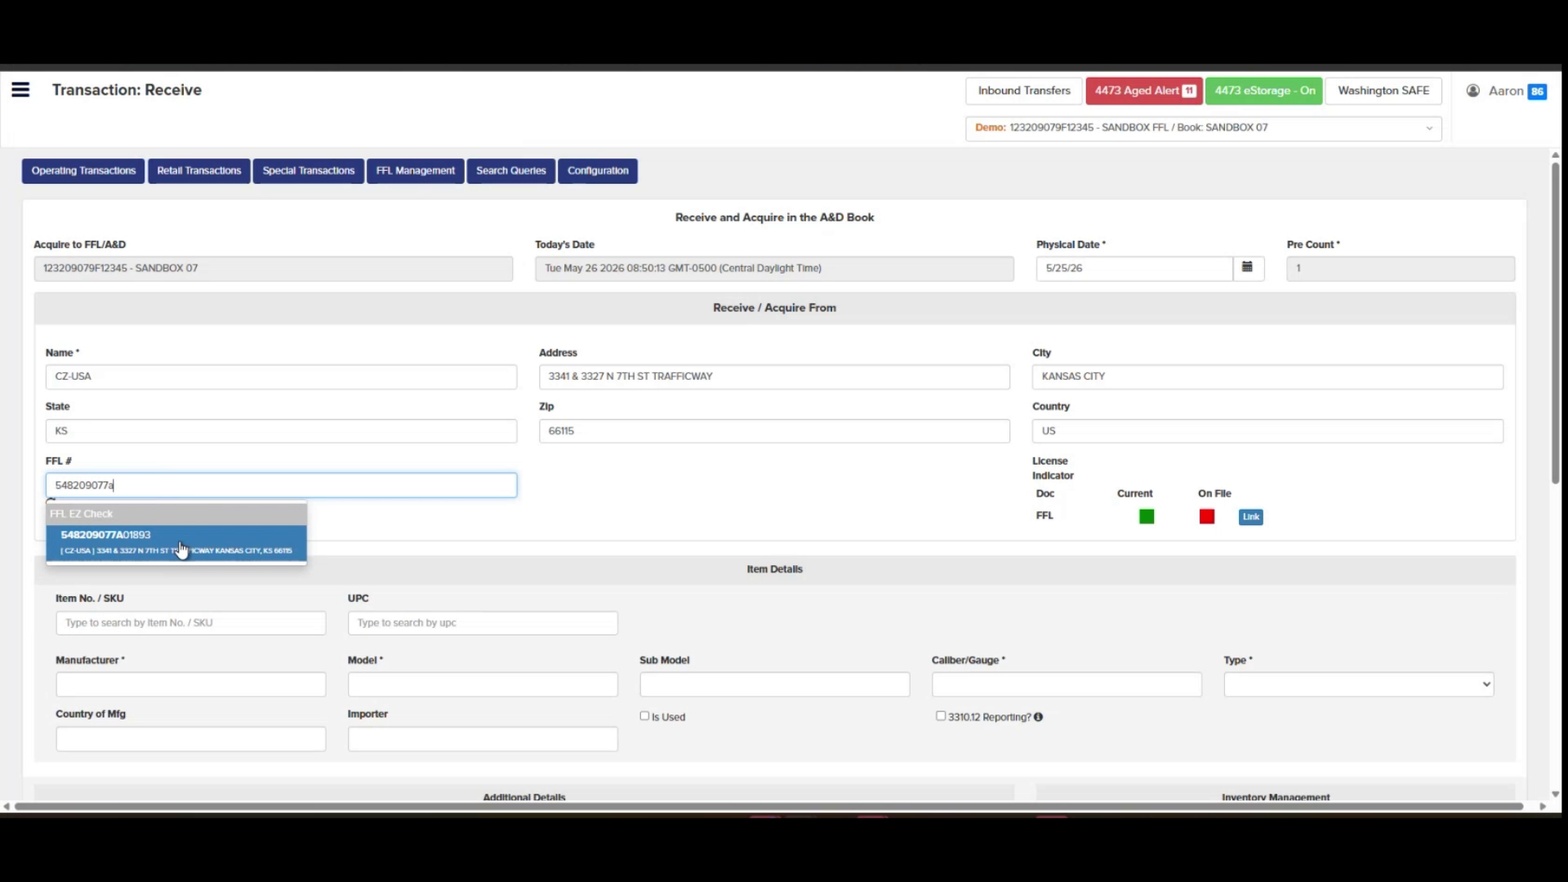
- Confirm the FFL # field is populated. The FFL number appears formatted (e.g., 5-48-209-07-7A-01893) in the FFL # field once the FFL is selected.
- Note: FFL number will be left blank if receiving from a foreign vendor.
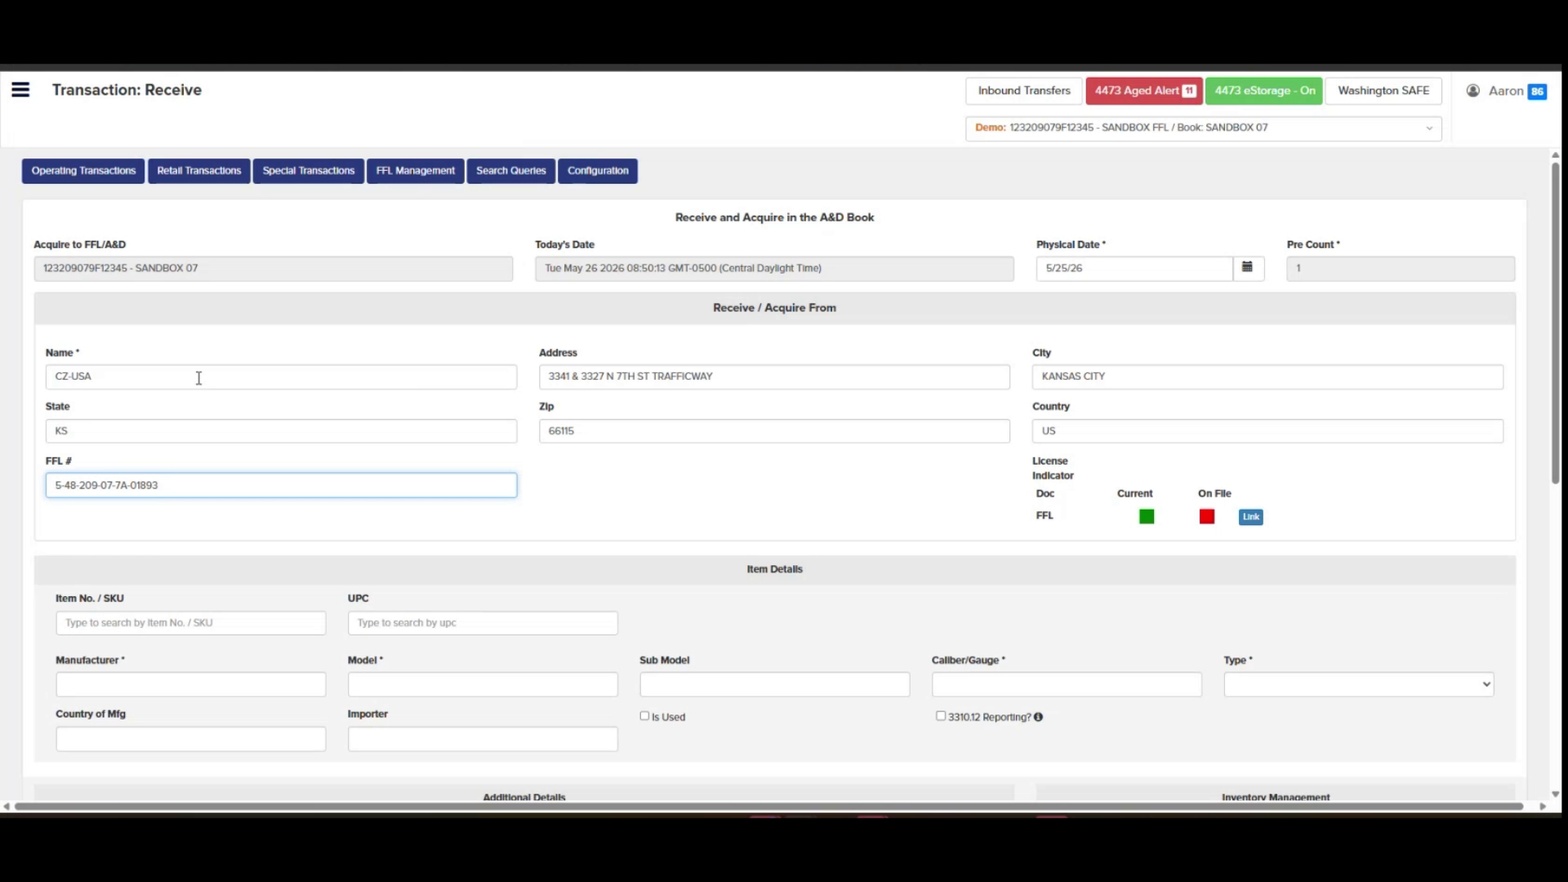
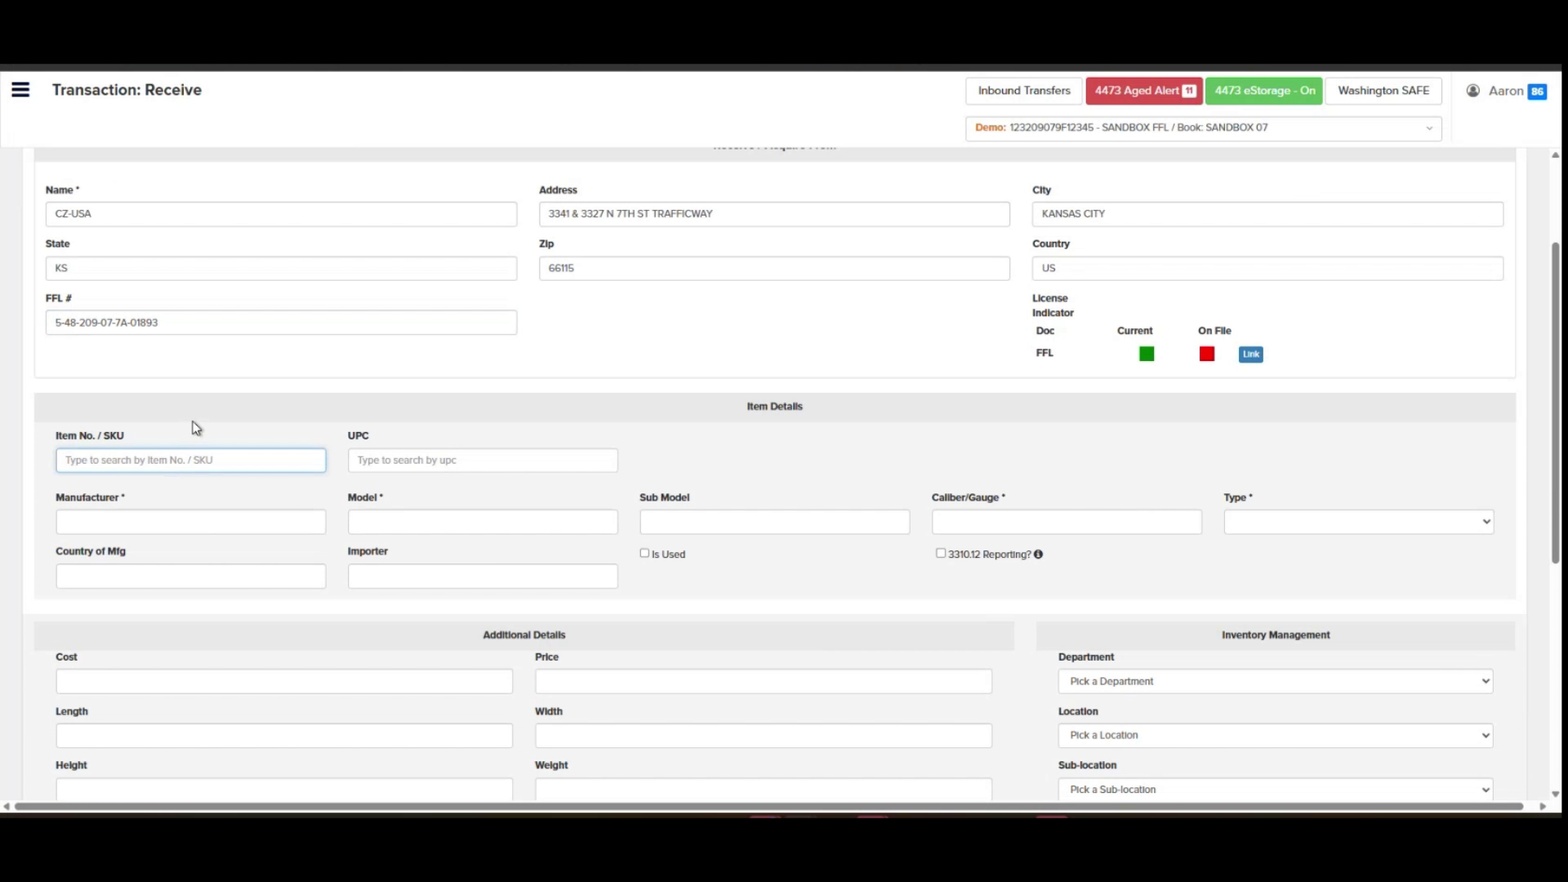
- Scroll down to Item Details. Locate the Item Details section to begin entering the firearm record.
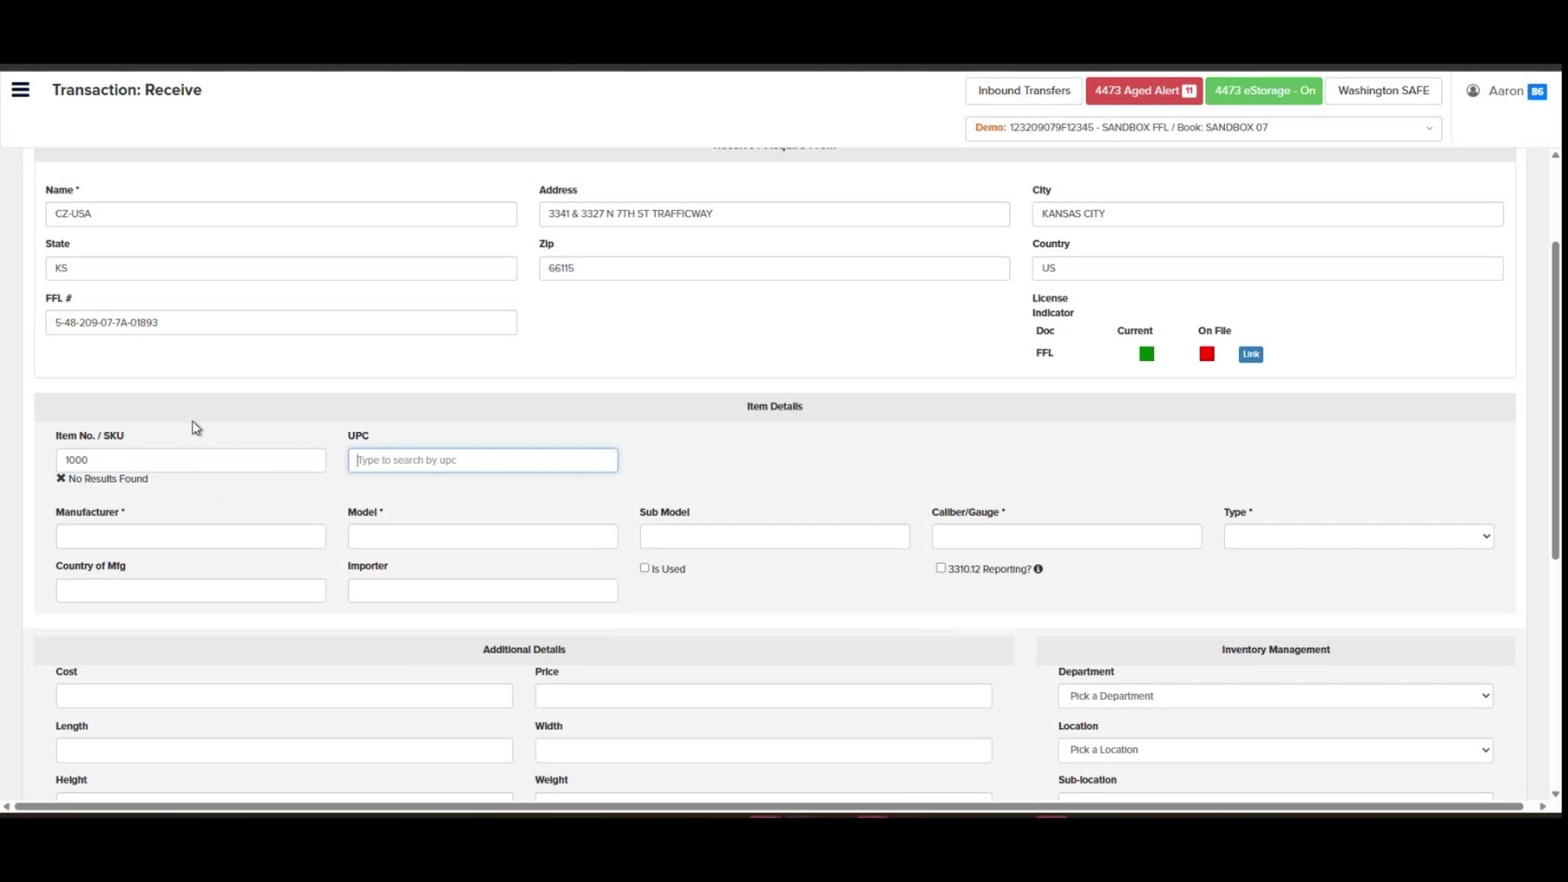
- Enter the Item No. / SKU. Click the Item No. / SKU field and type your internal SKU (e.g., "1000"). If no match is found, "No Results Found" will display — you can still proceed by entering firearm details manually.
- Enter the Manufacturer. Type the manufacturer name in the Manufacturer field (e.g., "SIG SAUER").
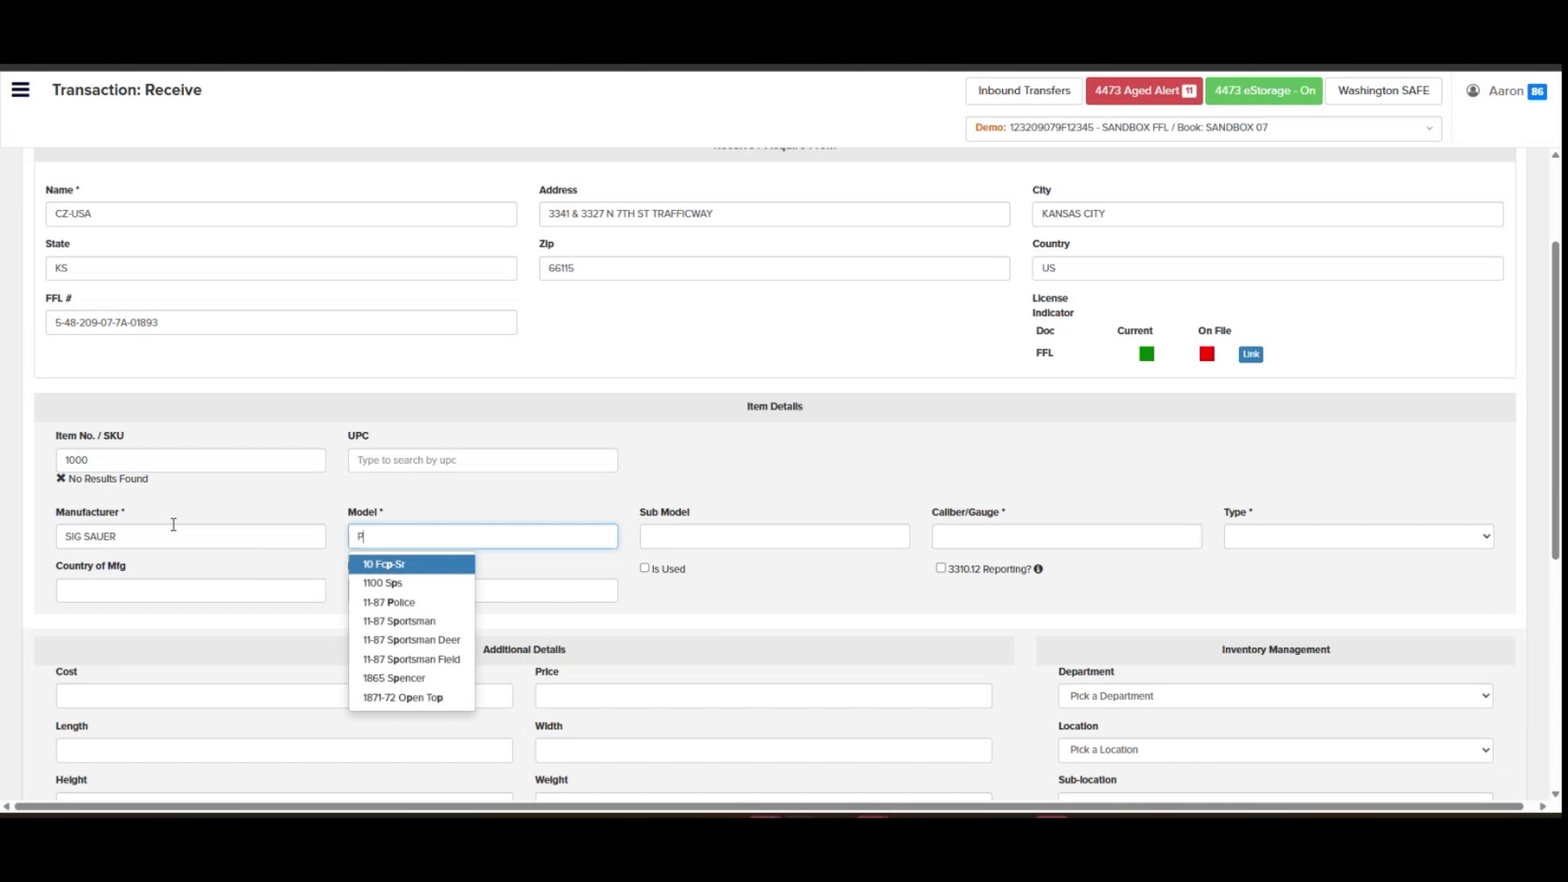
- Select the Model. Click the Model field and start typing the model (e.g., "P"). Select the correct model from the dropdown list, or type the full model name (e.g., "P22").
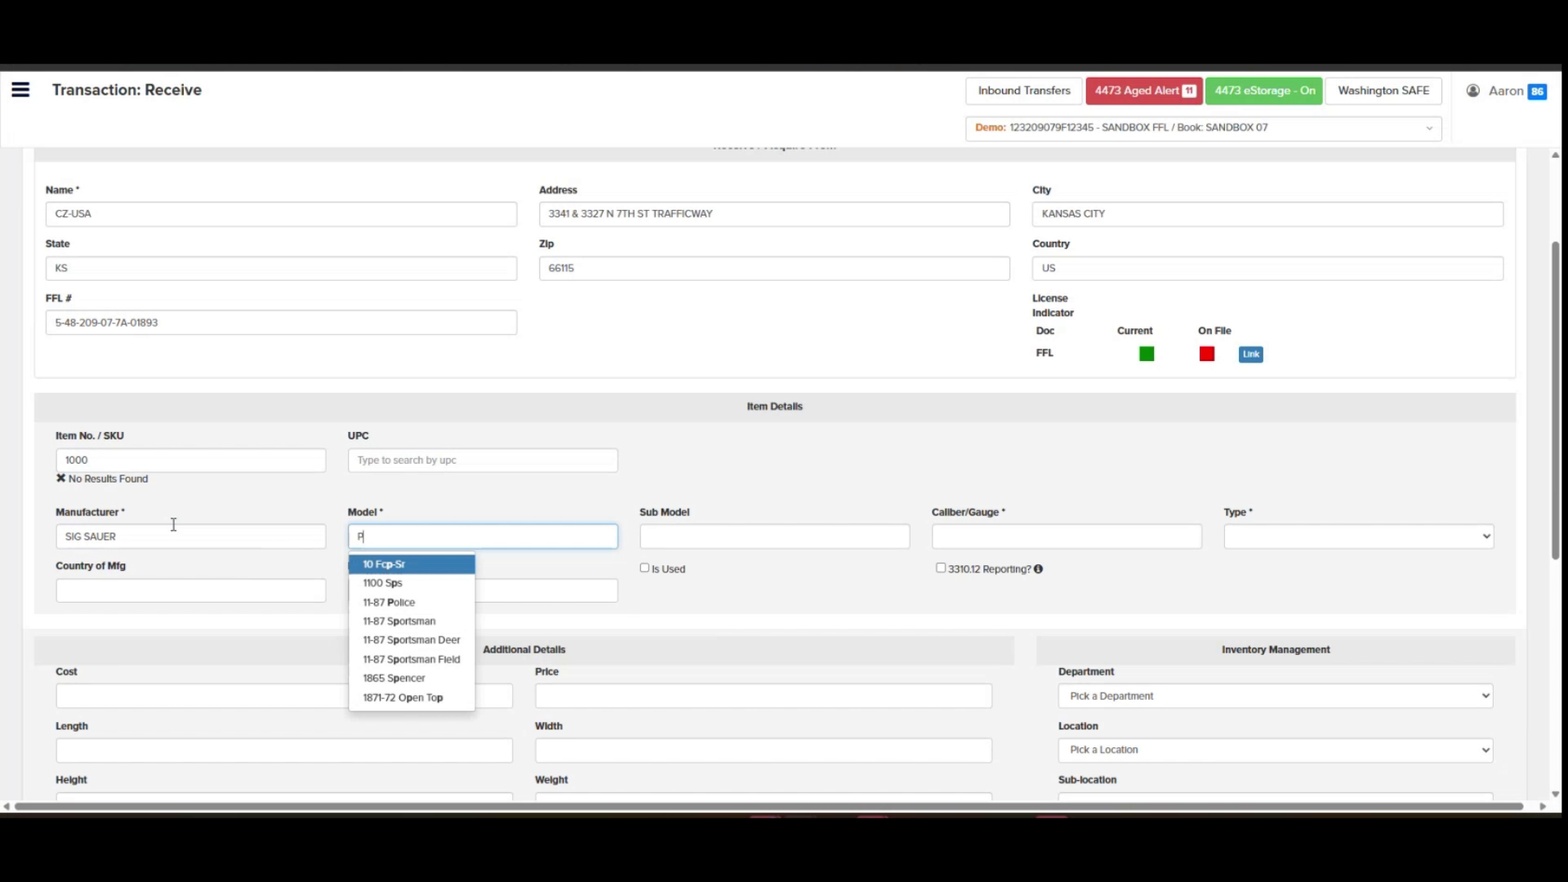
- Enter the Caliber/Gauge. Type the caliber in the Caliber/Gauge field (e.g., "9MM").
- Select the Type. Choose the firearm type from the Type dropdown (e.g., "Pistol").
- Enter Country of Mfg. Type the country of manufacture in the Country of Mfg field (e.g., "USA").
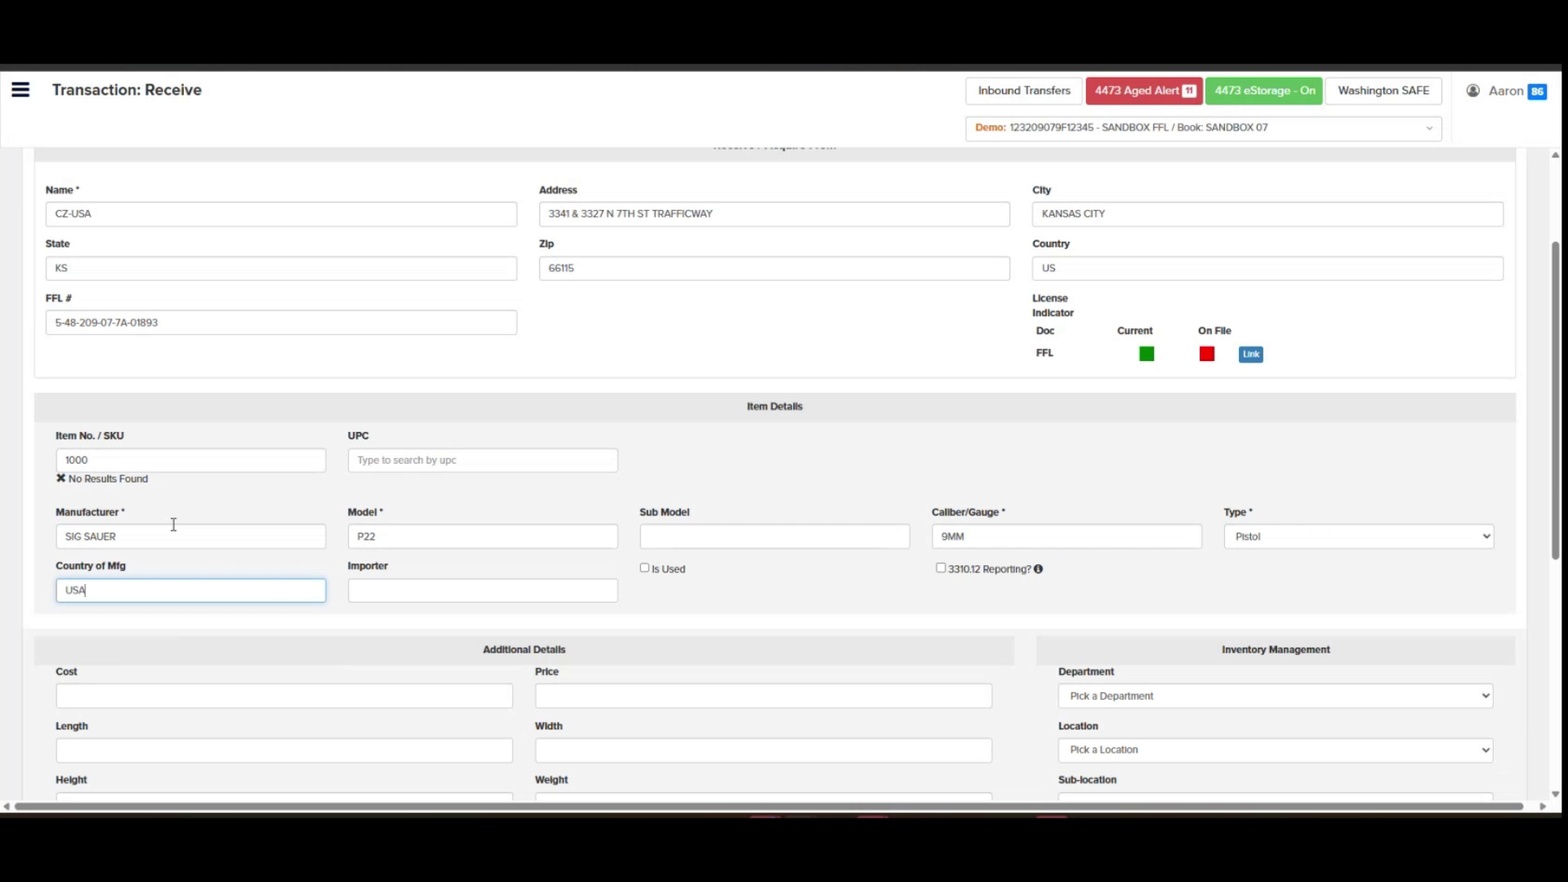
- Set Is Used and 3310.12 Reporting if applicable. Check Is Used if the firearm is used, and check 3310.12 Reporting? if this acquisition is part of a multiple handgun sale report. Leave unchecked if not applicable.
- Review Additional Details and Inventory Management. Optionally fill in Cost, Price, Length, Width, Height, Weight in Additional Details, and select Department, Location, and Sub-location in Inventory Management.
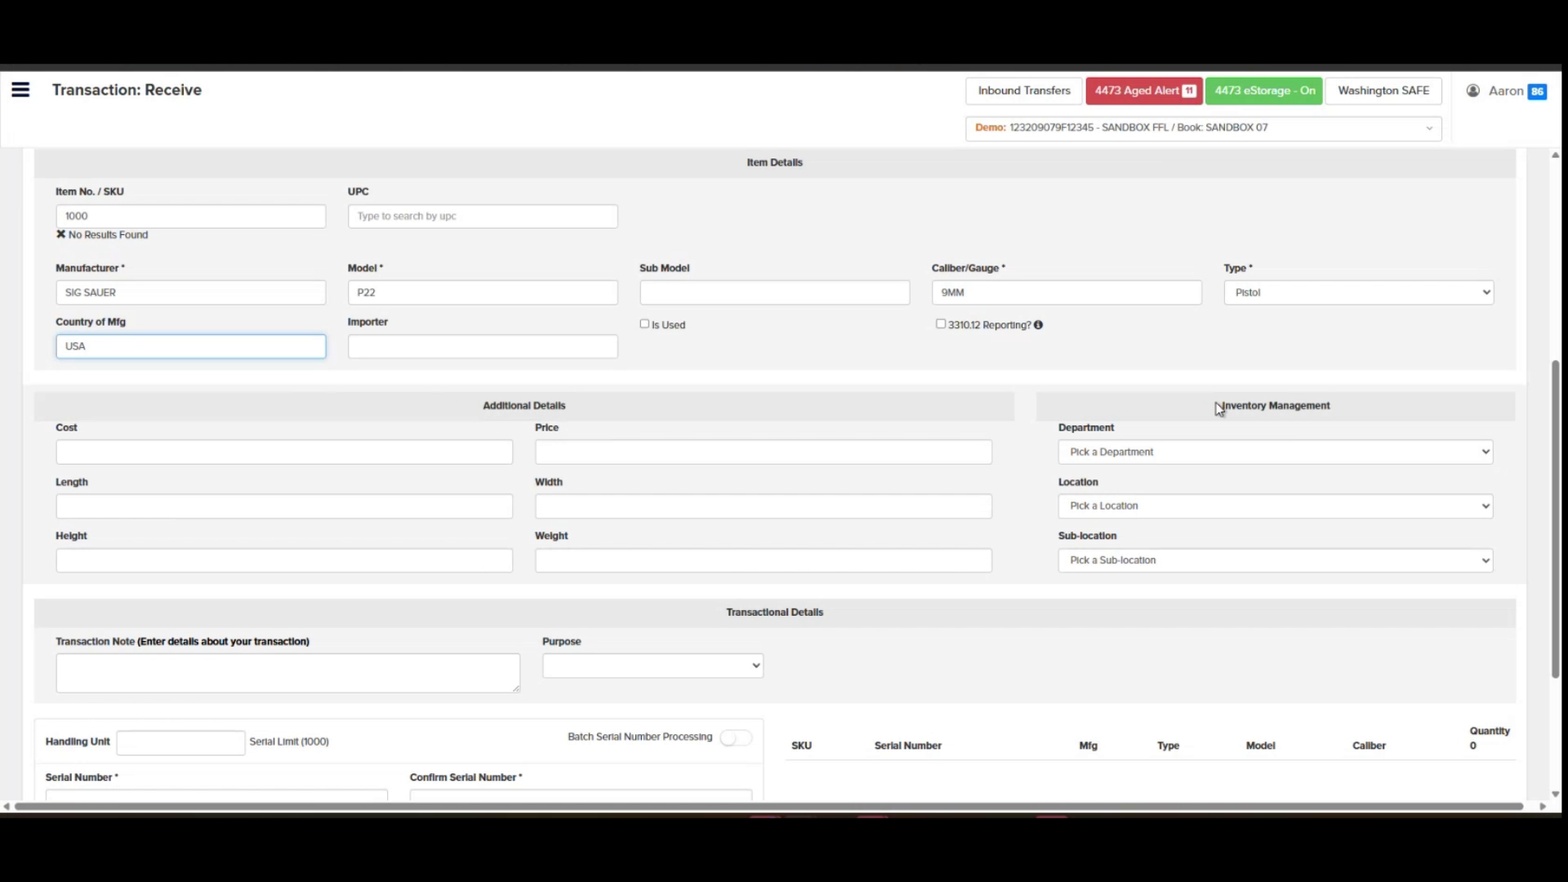
- Add a Transaction Note (optional). In the Transactional Details section, click the Transaction Note field and enter any relevant details about the transaction.
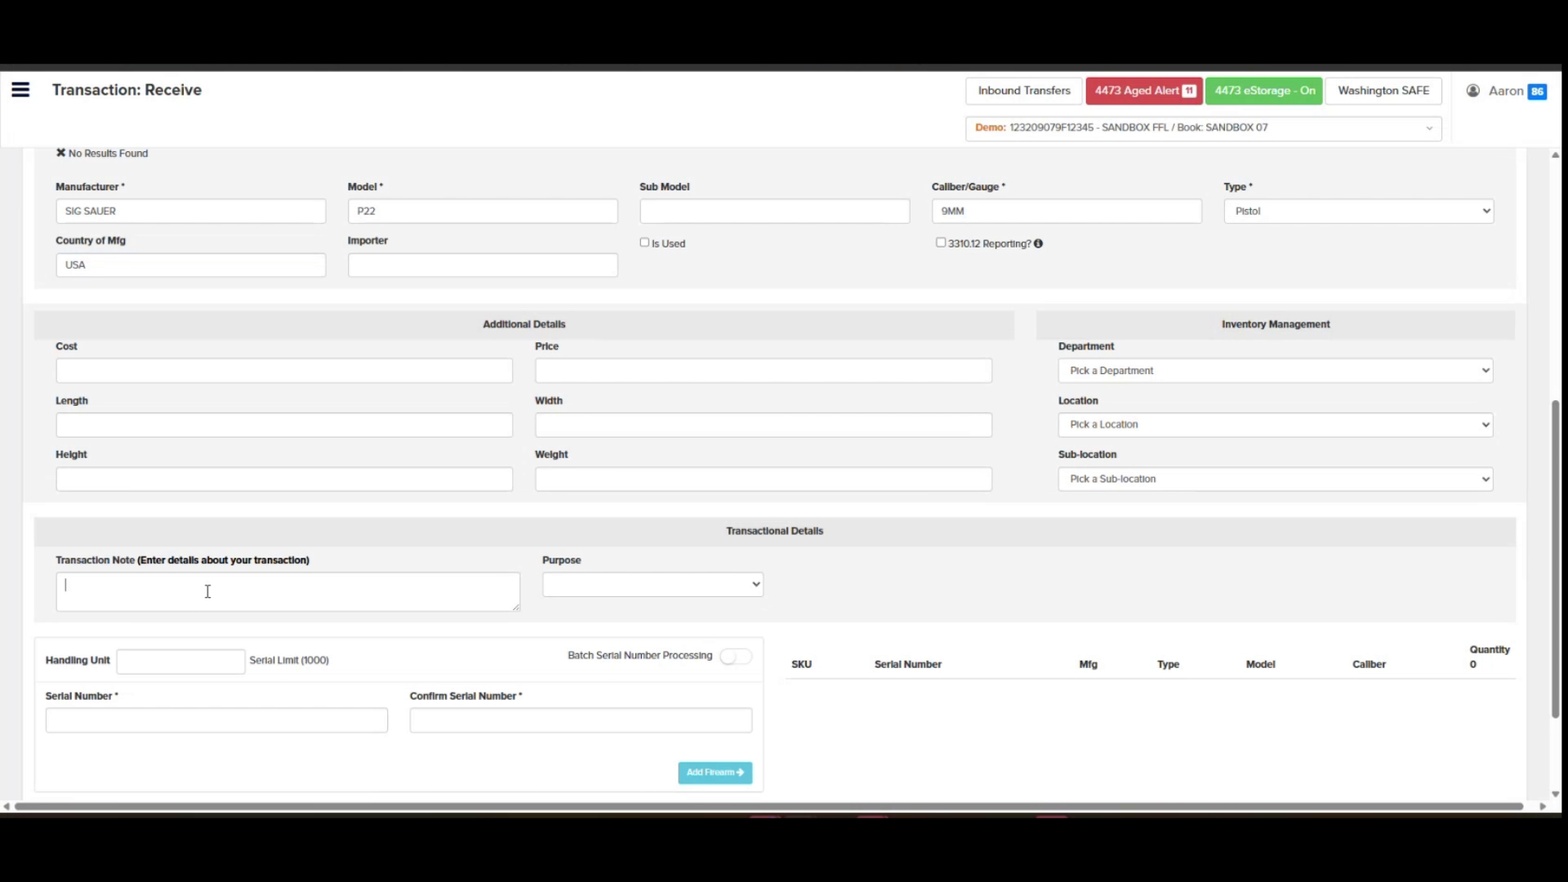
- Select the Purpose if desired. Click the Purpose dropdown and select the appropriate transaction purpose.
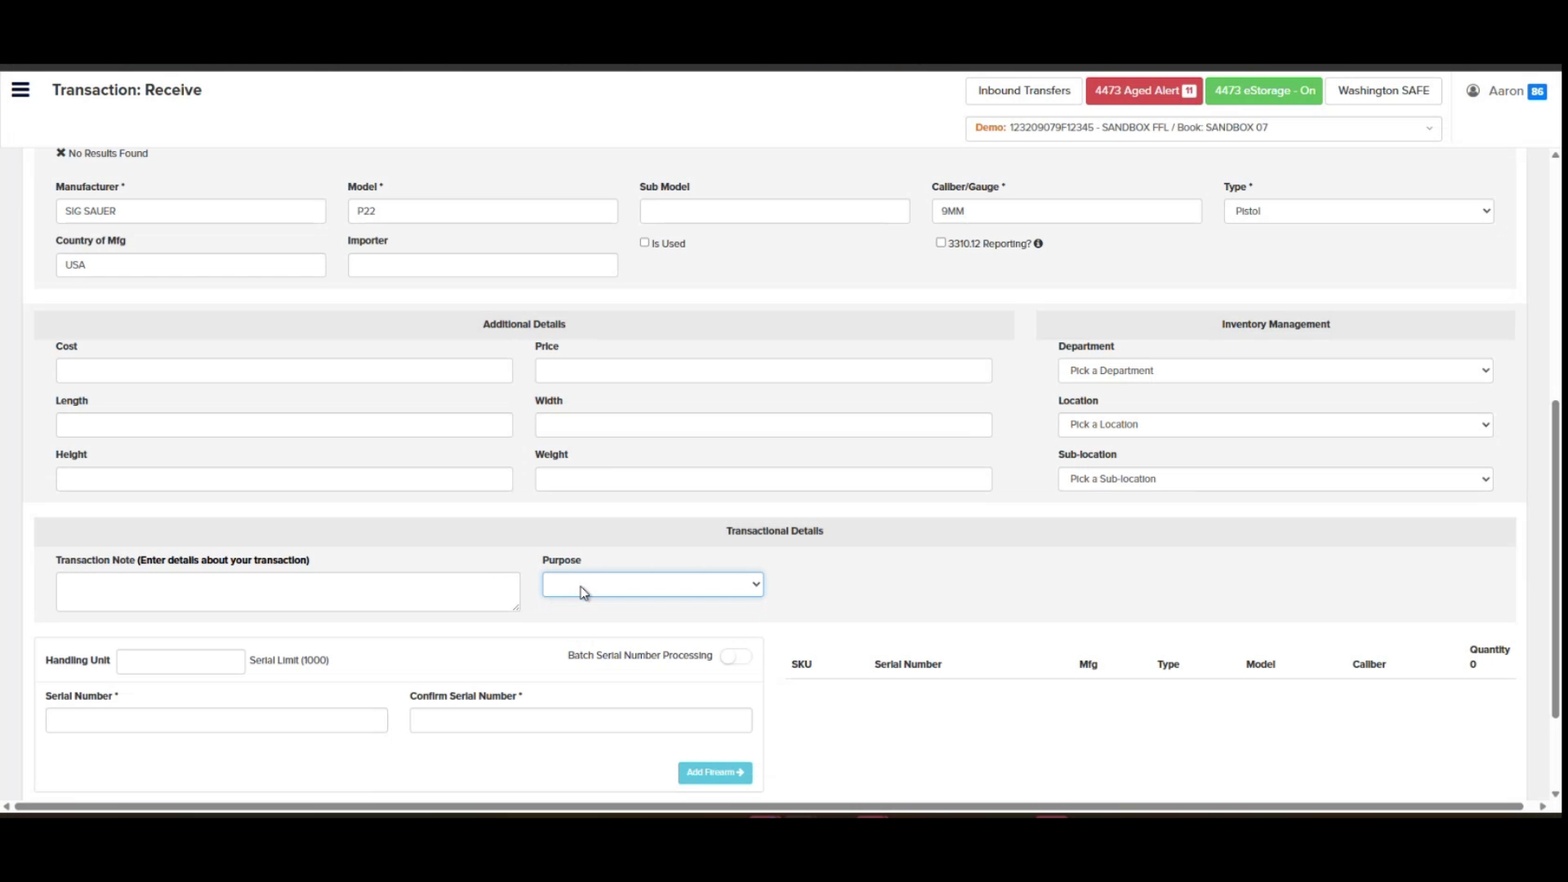
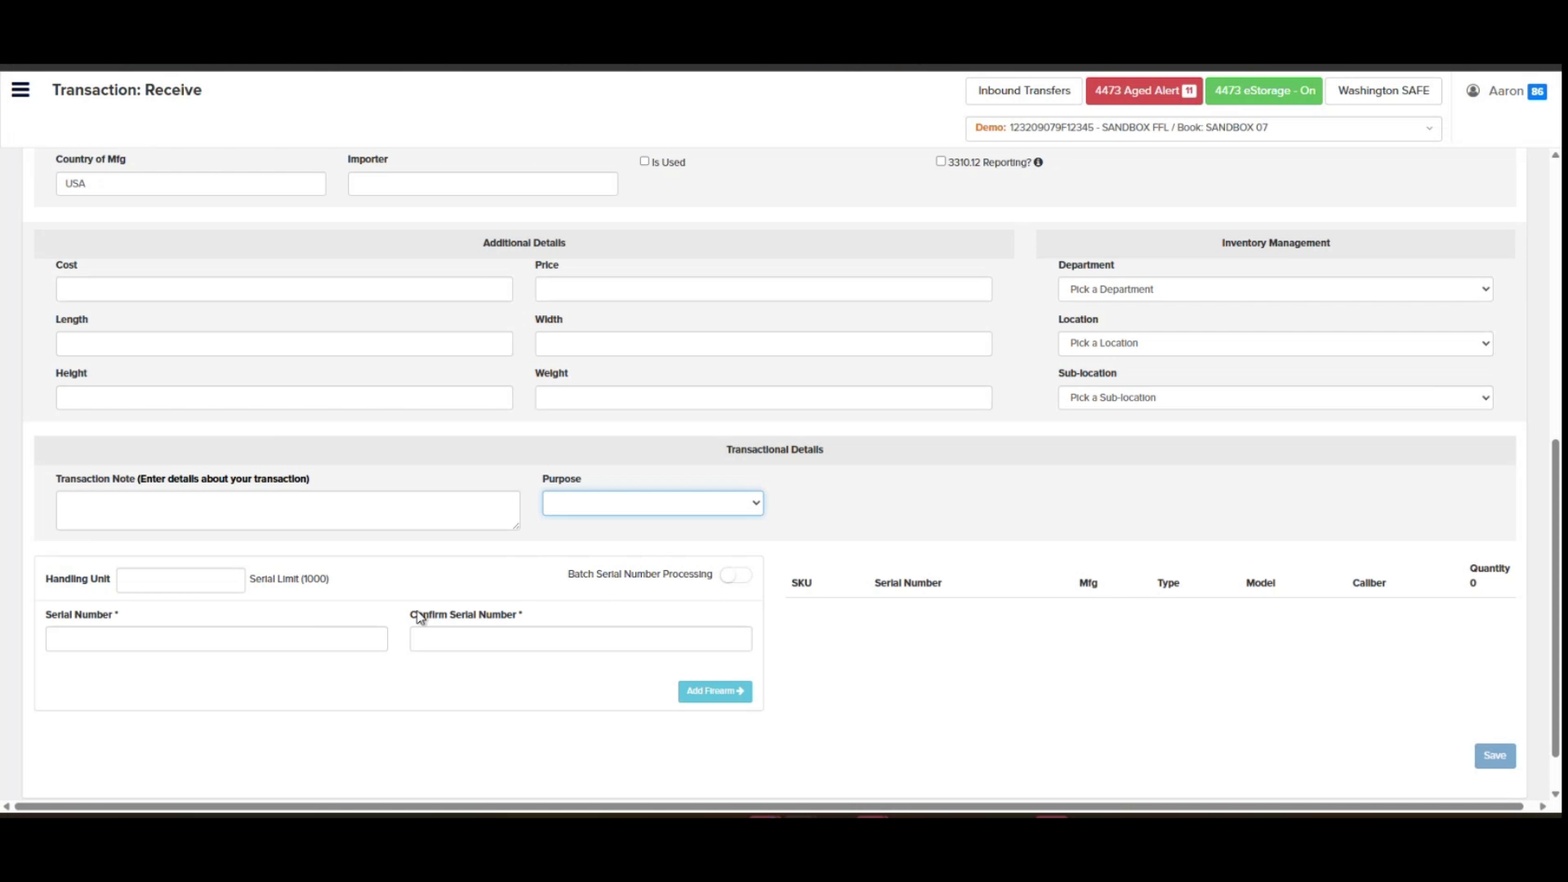
- Enter a single serial number (standard method). For a single firearm, type the serial number in the Serial Number field and re-enter it in Confirm Serial Number, then click Add Firearm.
- Enable Batch Serial Number Processing (for multiple firearms). Toggle on Batch Serial Number Processing at the top right of the serial entry section. The form expands to show Prefix, Start Number, Suffix, and Quantity fields.
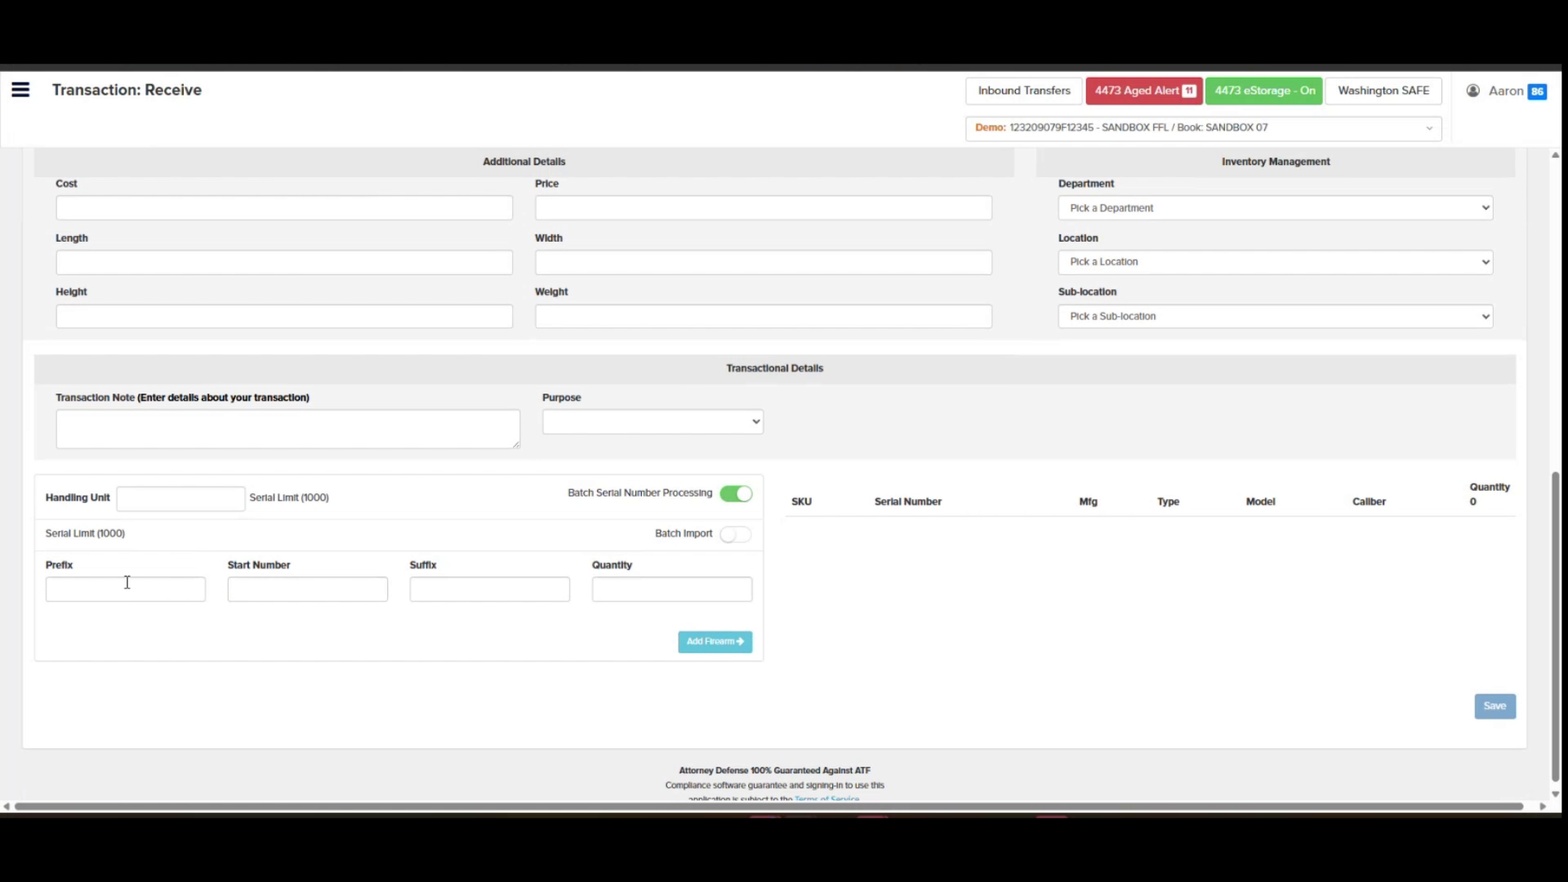
- Toggle Batch Import if pasting a list. Optionally enable the Batch Import toggle to paste a list of serial numbers into a single Serial Number(s) text area instead of generating them sequentially.
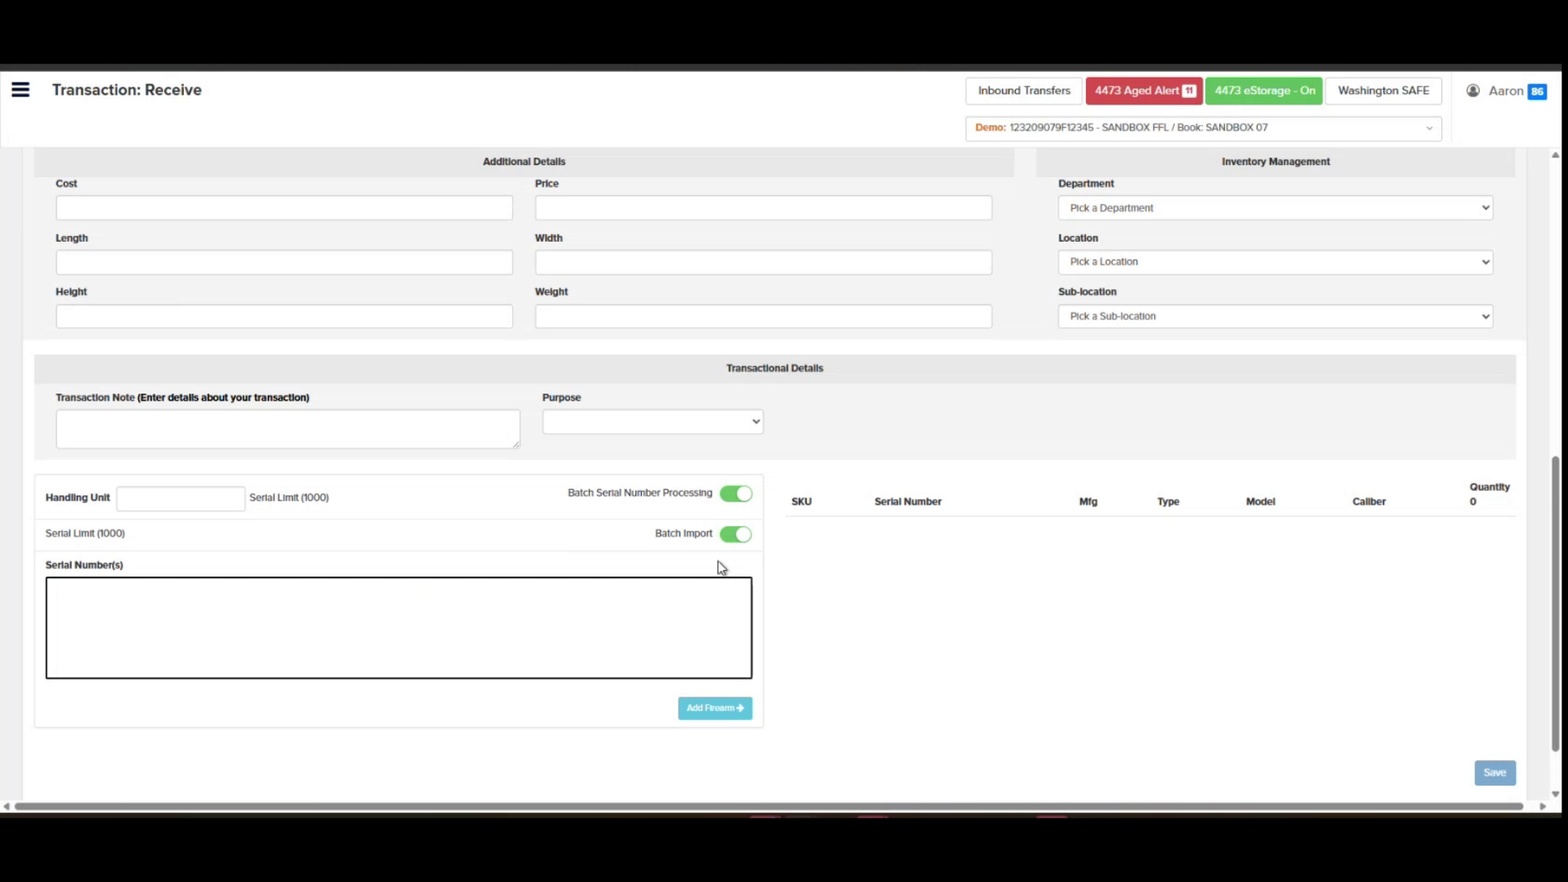
- Enter the Prefix. With Batch Serial Number Processing on (and Batch Import off), click the Prefix field and type the alpha prefix shared by all serials (e.g., "TESTRECSIG").
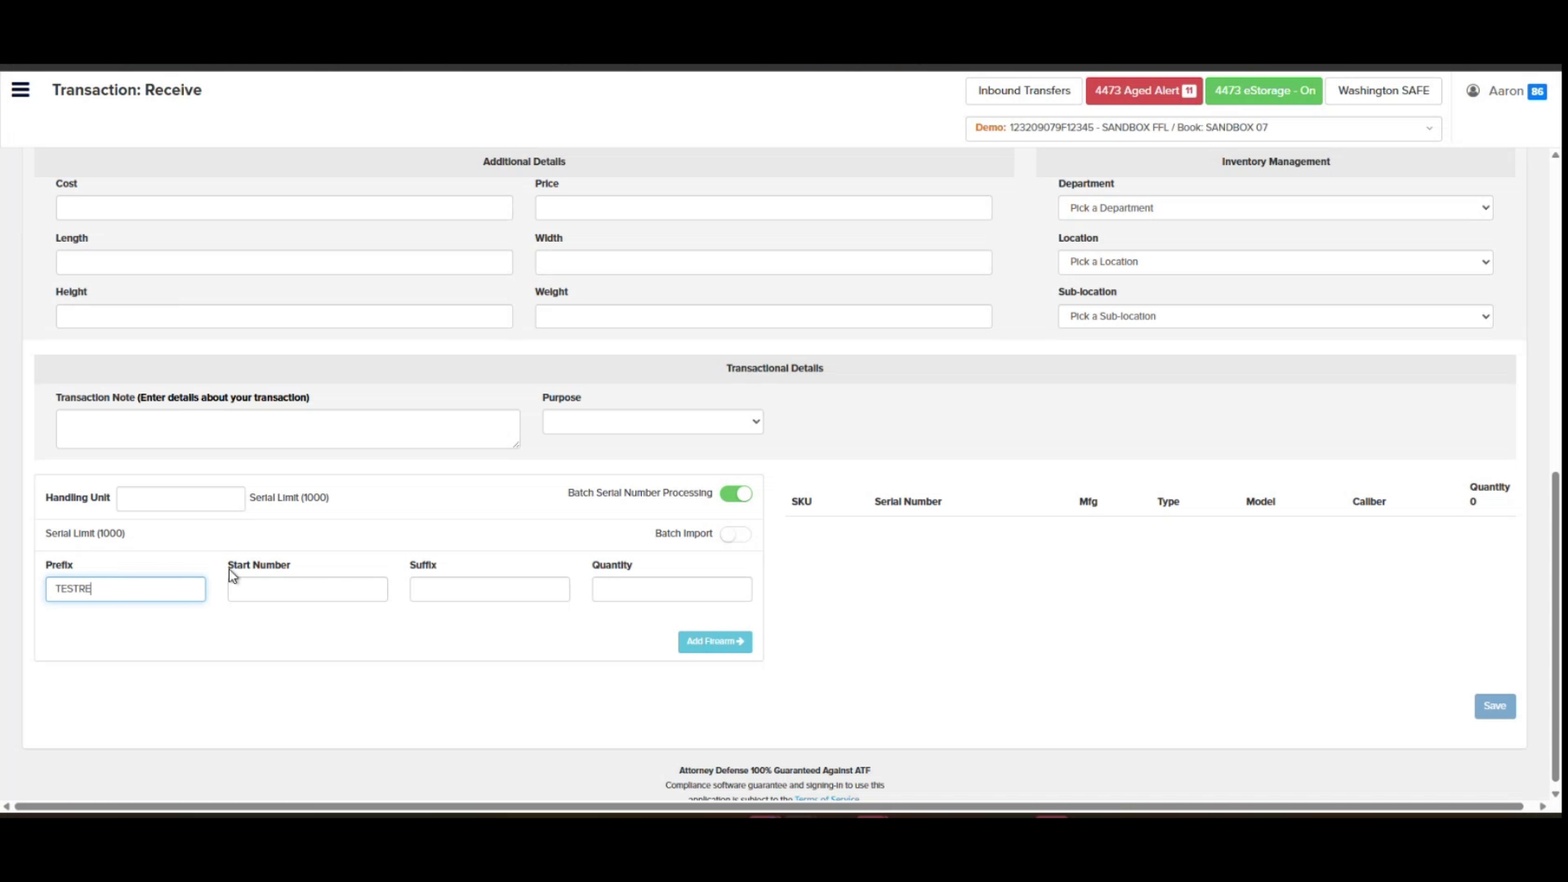
- Enter the Start Number. Click the Start Number field and type the numeric starting value (e.g., "99"). The system will increment from this number for the specified quantity.
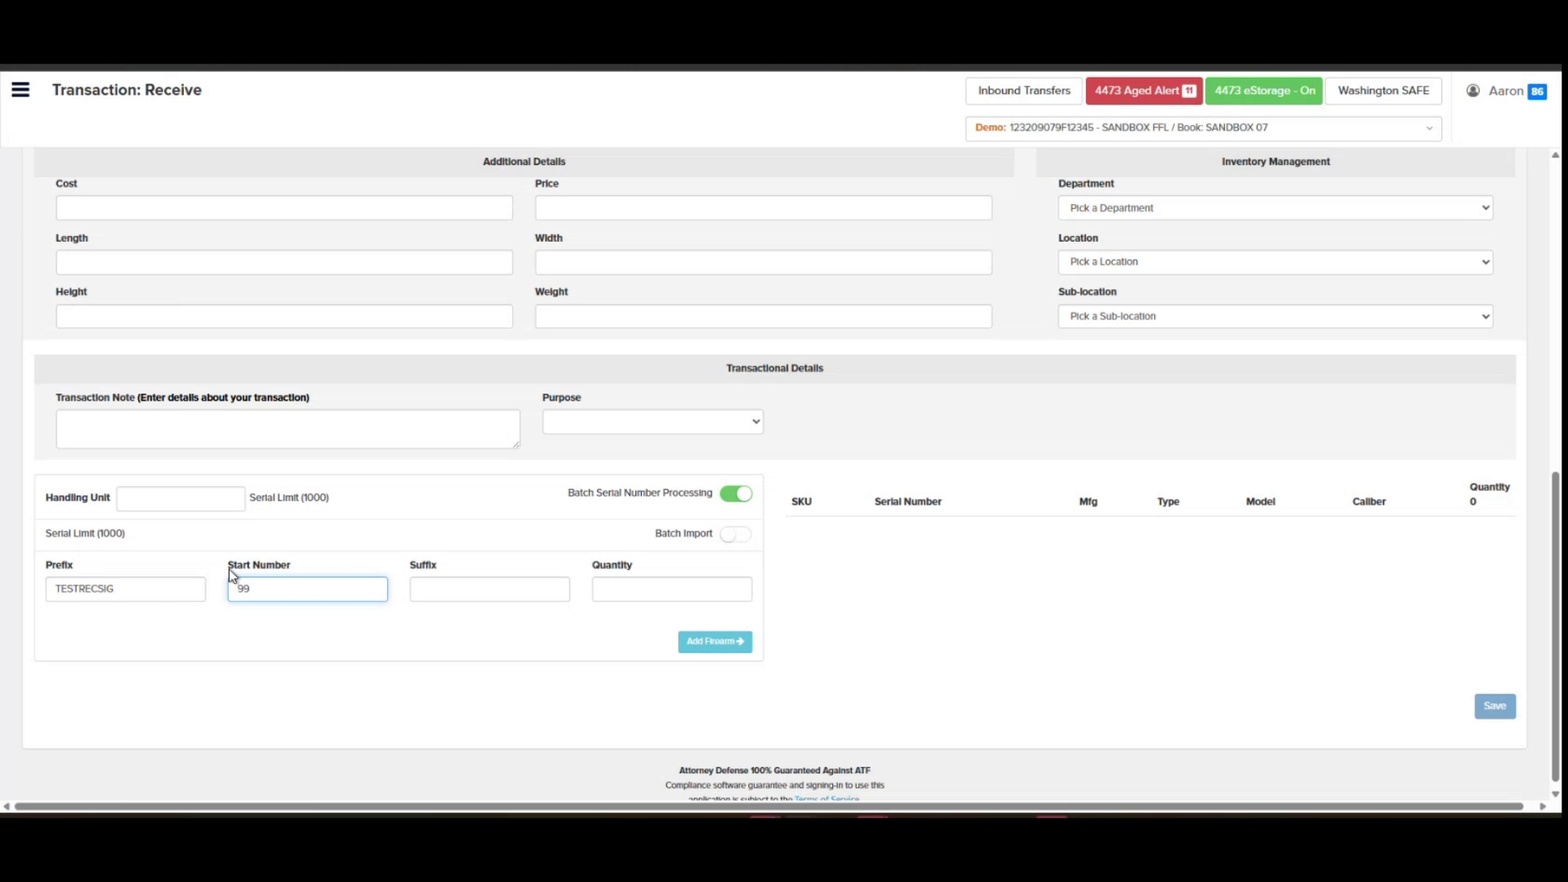
- Enter the Suffix (optional). If your serials include a trailing string, type it in the Suffix field.
- Enter the Quantity. Click the Quantity field and enter how many serial numbers to generate (subject to the Serial Limit shown, e.g., 1000).
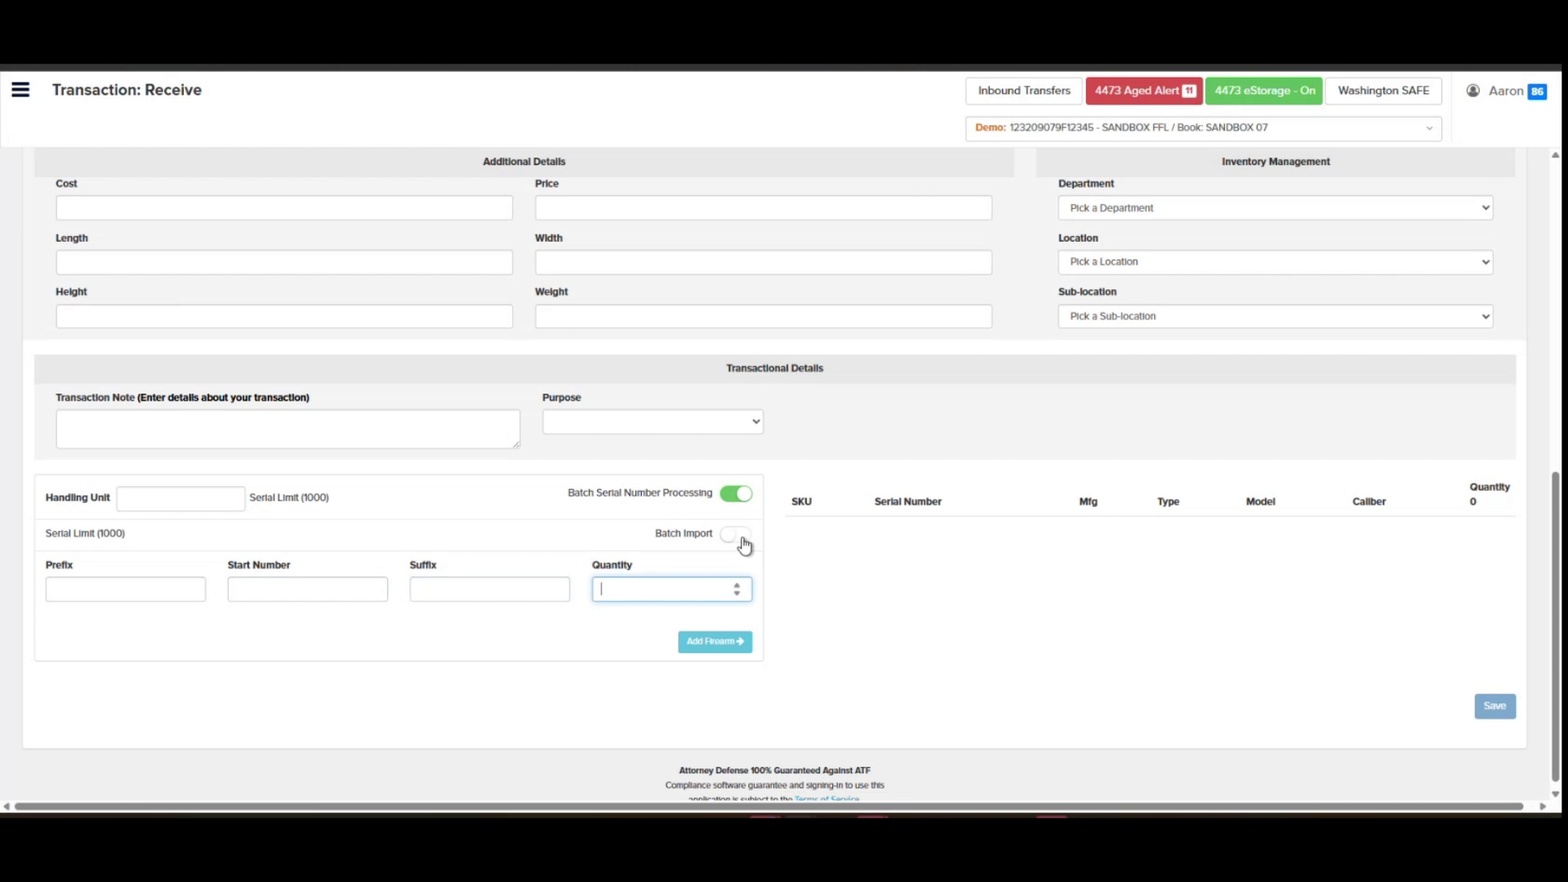
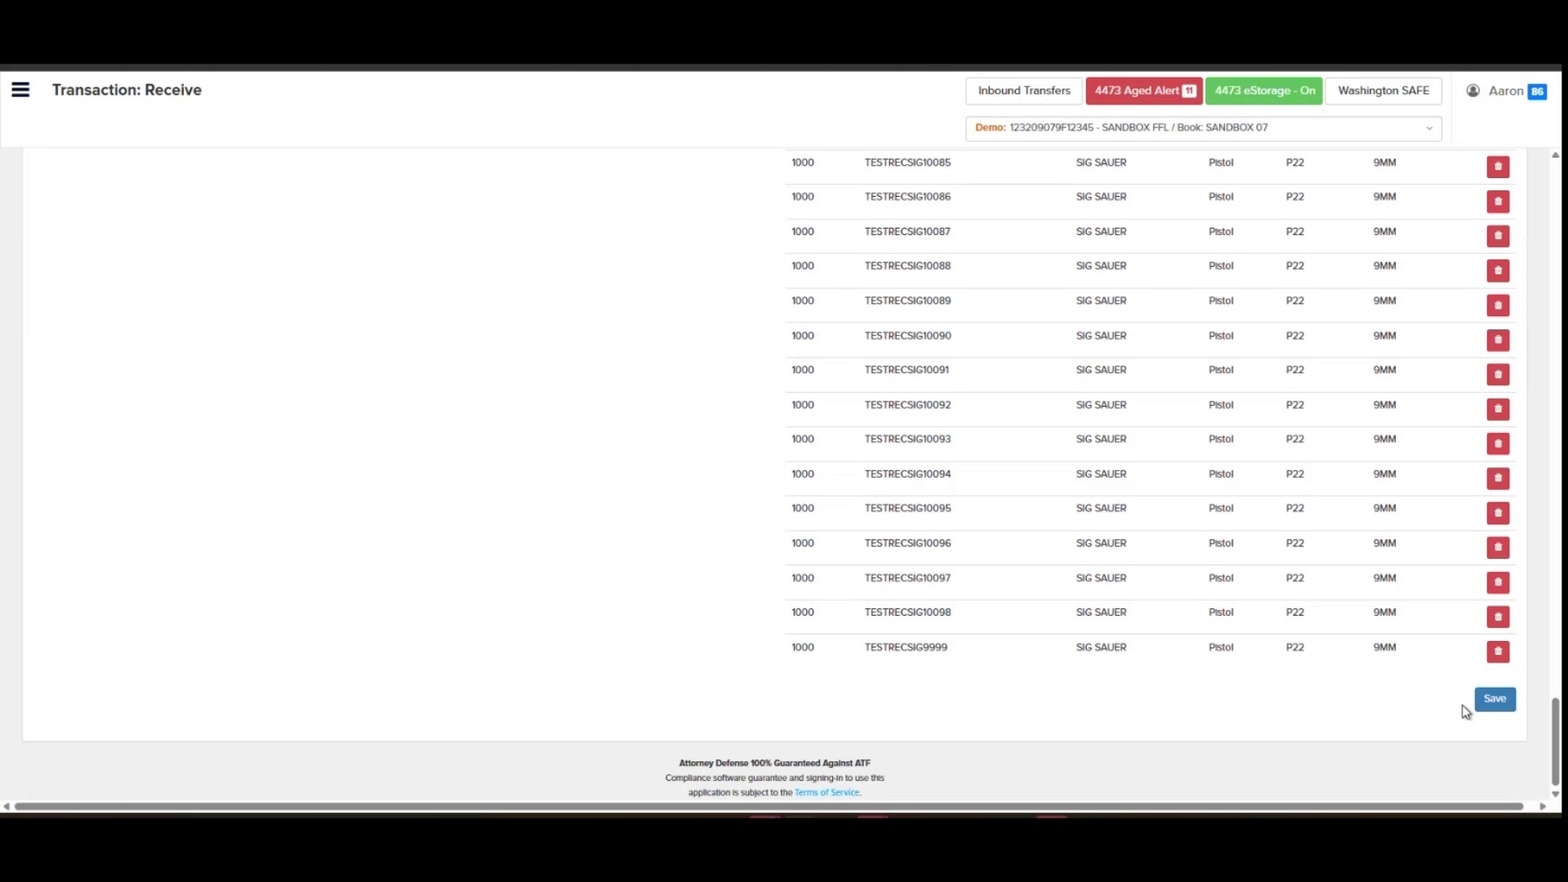
- Click Add Firearm. Click the teal Add Firearm button to generate the batch. Each generated firearm appears as a row on the right with SKU, Serial Number, Mfg, Type, Model, and Caliber.
- Review the firearm list. Confirm all serial numbers, SKUs, manufacturers, types, models, and calibers are correct. Use the red trash icon next to any row to remove an incorrect entry.
- Save the transaction. Click the blue Save button at the bottom-right of the screen to commit the acquisition to the A&D book.
- Confirm the form resets. After saving, the Receive form returns to a blank state, ready for the next acquisition.
Expected Result
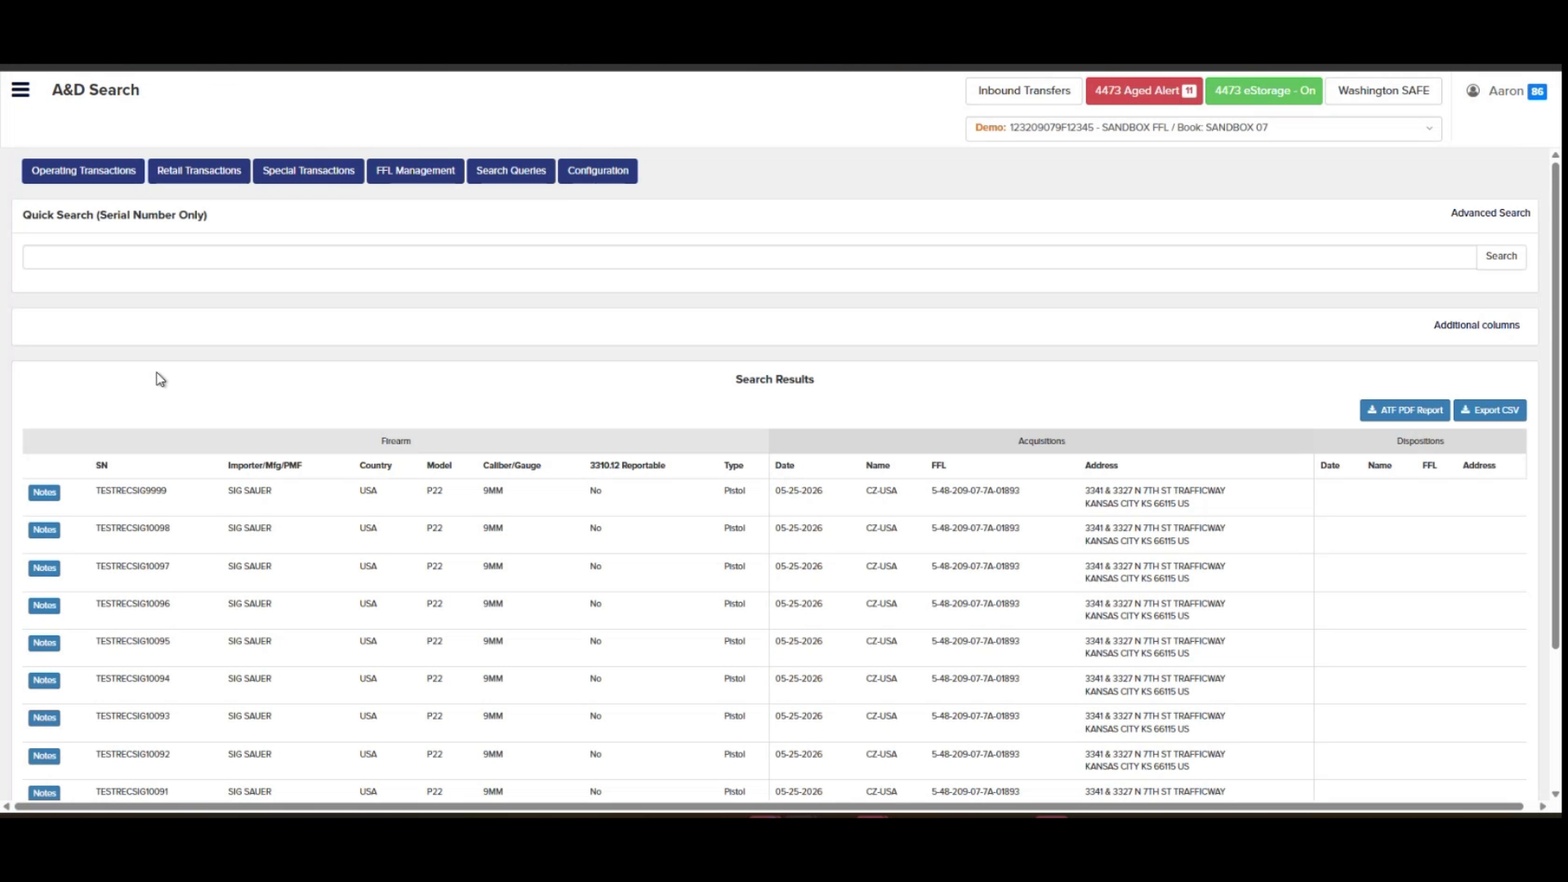
The firearms are acquired into the bound book with the selected Physical Date, source FFL, and item details. You can verify the acquisitions by running an A&D Search — each serial appears with its Acquisition date, source Name, FFL, and Address, and the Disposition columns remain blank until the firearm is sold or transferred.
The Receive transaction creates the acquisition entry required by 27 CFR § 478.125 within 24 hours of physical receipt. Always use the Physical Date the firearm was received, not the date you enter it. Orchid's eBound handles this automatically, but if you have questions, Orchid's in-house compliance team is available to help. Contact Orchid Compliance →