How to Get Started with Orchid POS — First Sale Guide
Your Orchid Point of Sale is purpose-built for the firearm industry and acts as the central hub of your retail operation. Complete your first standard and firearm sale end-to-end in about 20 minutes from login.
Steps
- Complete your first login. Check your welcome email for your login credentials — it will include your email address, username, and temporary password. Open Google Chrome, navigate to your store's unique POS URL (also found in your welcome email), and click Sign In. On your first login, you will be able to change your password before continuing.
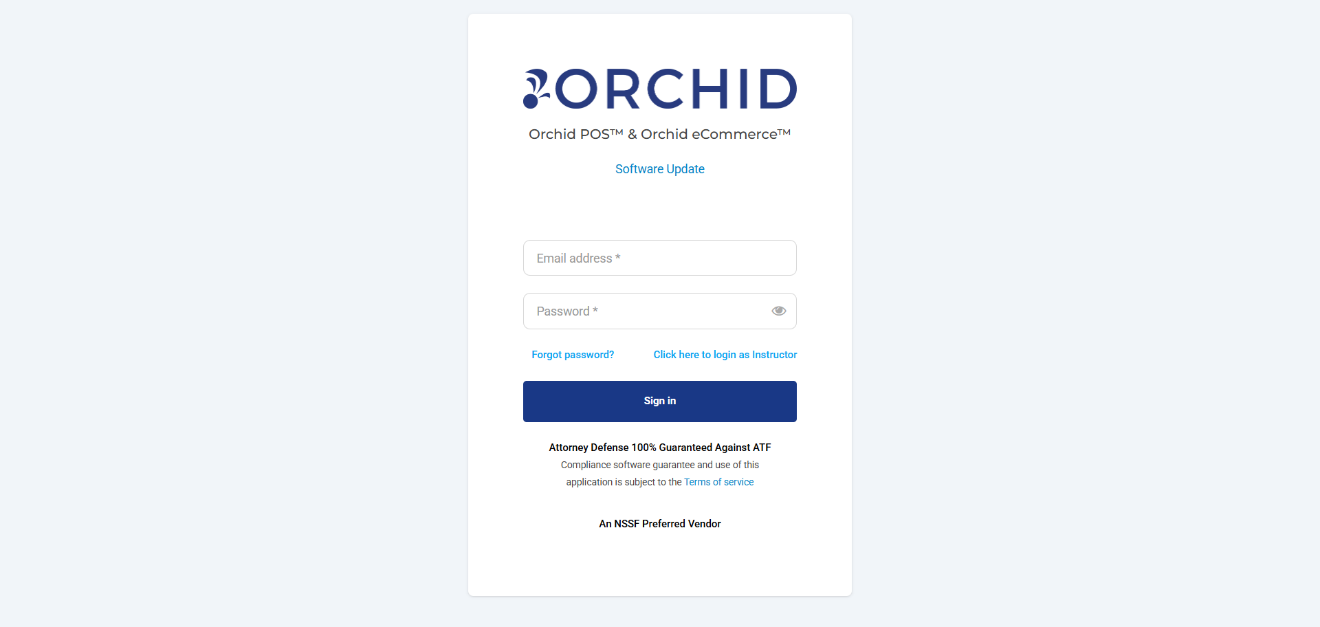
Login screen
- Update your store information. Go to Manage > Store Configuration > My Store & FFL. Click the Edit icon corresponding to the Store you want to update and confirm your Store Name, Address, and Phone Number, then click Update. This information will appear on every customer receipt.
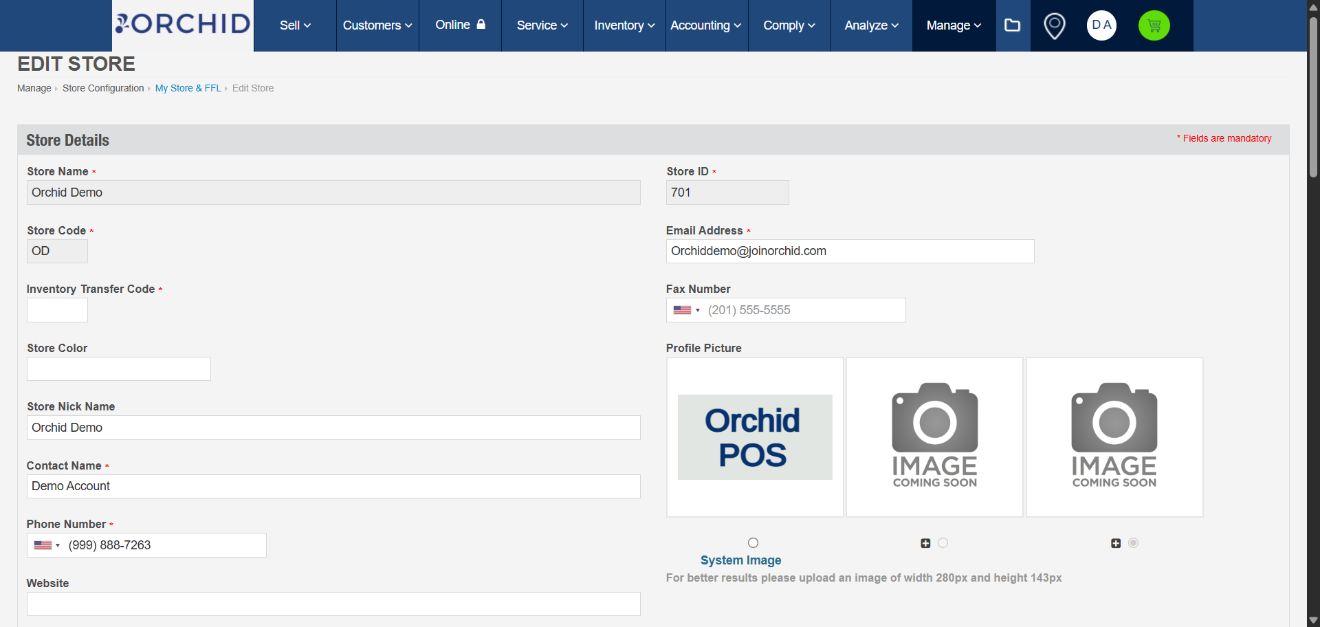
Store Profile settings
- Connect your hardware. The POS supports receipt printers, cash drawers, barcode scanners, and card readers. Hardware setup steps vary by operating system. Follow the Mac Hardware Setup Guide or Windows Hardware Setup Guide for your workstation, then return here once your devices are ready.
- Set your tax rate. Go to Manage > Store Configuration > My Store & FFL, then scroll to Sales Tax Settings. Enter your standard sales tax percentage, give it a clear Title (e.g., "State Sales Tax"), and click Update. The POS will automatically apply this rate at checkout on every transaction.
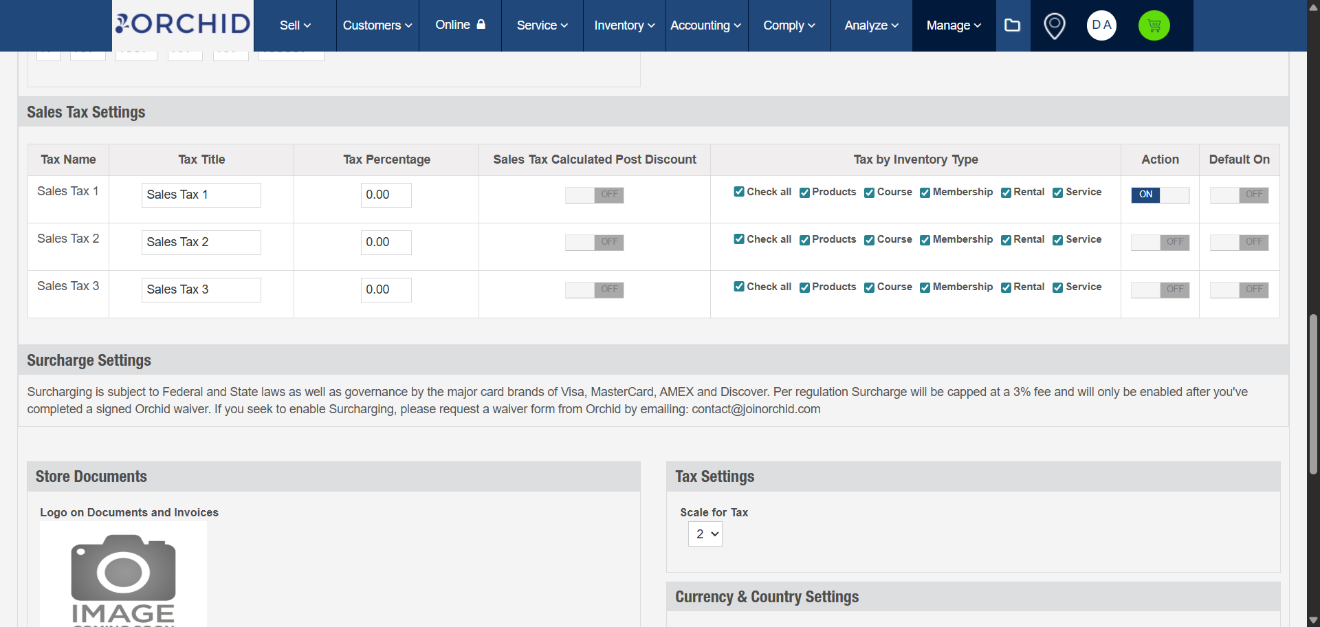
Tax Rate setup
- Add inventory. You don't need a full catalog to make your first sale. From Sell > Register, search for the item you want to sell. If the item already exists in your inventory, you'll see it in the search results. If not, you'll get an option to add it as a new item — enter the Barcode (UPC), Manufacturer Part Number (SKU), Description, Price, and quantity.
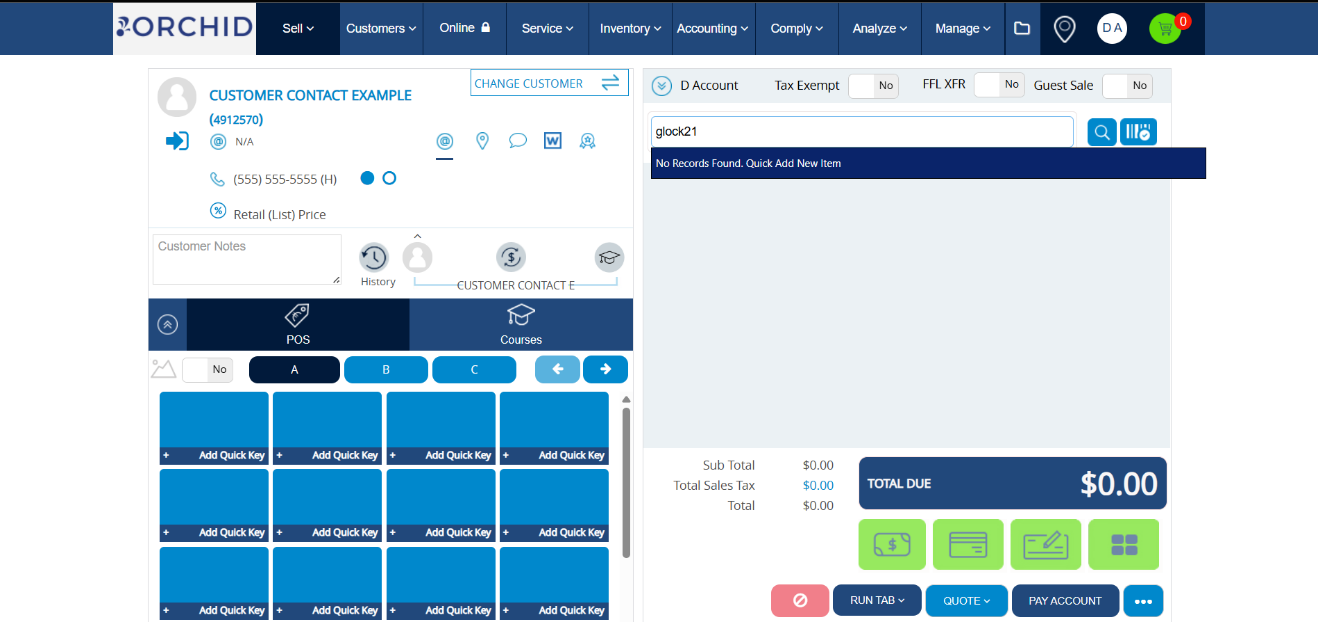
Quick-Add item at register
- Complete your first standard sale. Navigate to your register page from Sell > Register. Search for an existing customer or add a new customer. Scan the item's barcode or search by name to add it to the cart. Add all the items you want to sell. Click the customer's preferred payment button — Cash, Credit Card, or Cheque. Complete the payment. The receipt will print and the cash drawer will open automatically.
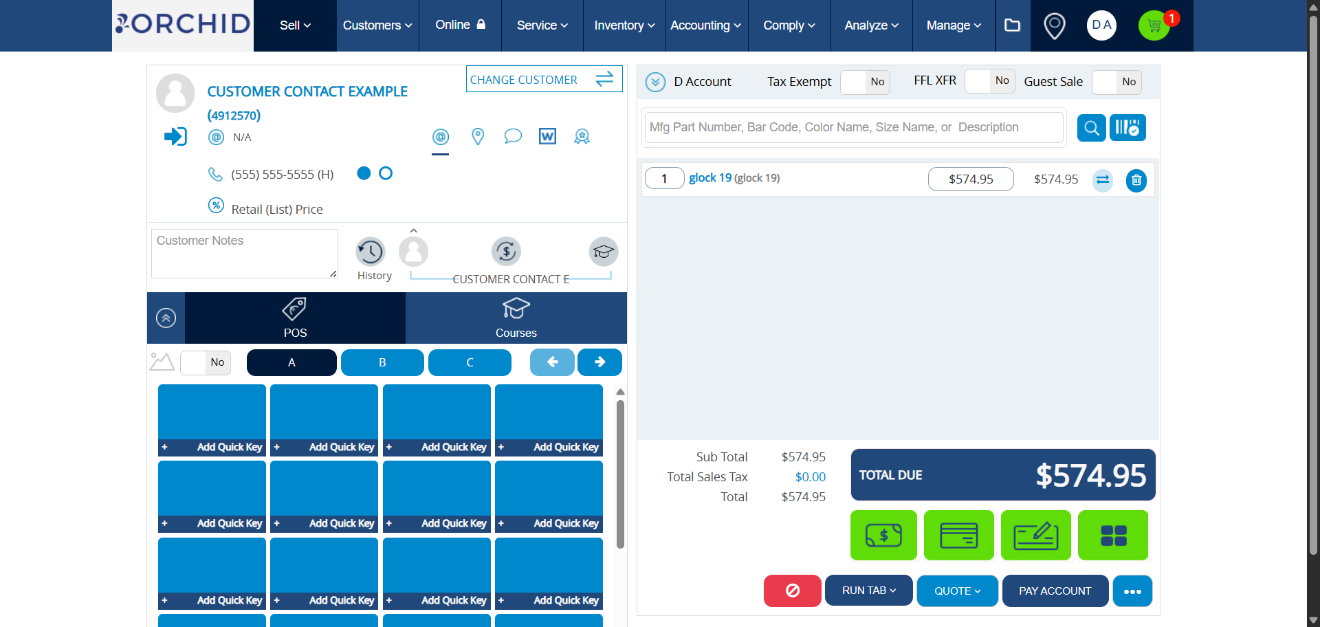
Register / checkout screen
- Complete your first firearm sale. Add the firearm to the cart as normal. The system will automatically recognize it as a firearm and prompt you to enter its serial number. When you click any payment button, you'll be prompted to complete the ATF Form 4473. Selecting an option opens your Bound Book application in a new browser tab, where the customer can complete the required ATF Form 4473 and wait for the NICS background check. Until then, the transaction is placed in Pending status — no payment is collected yet.
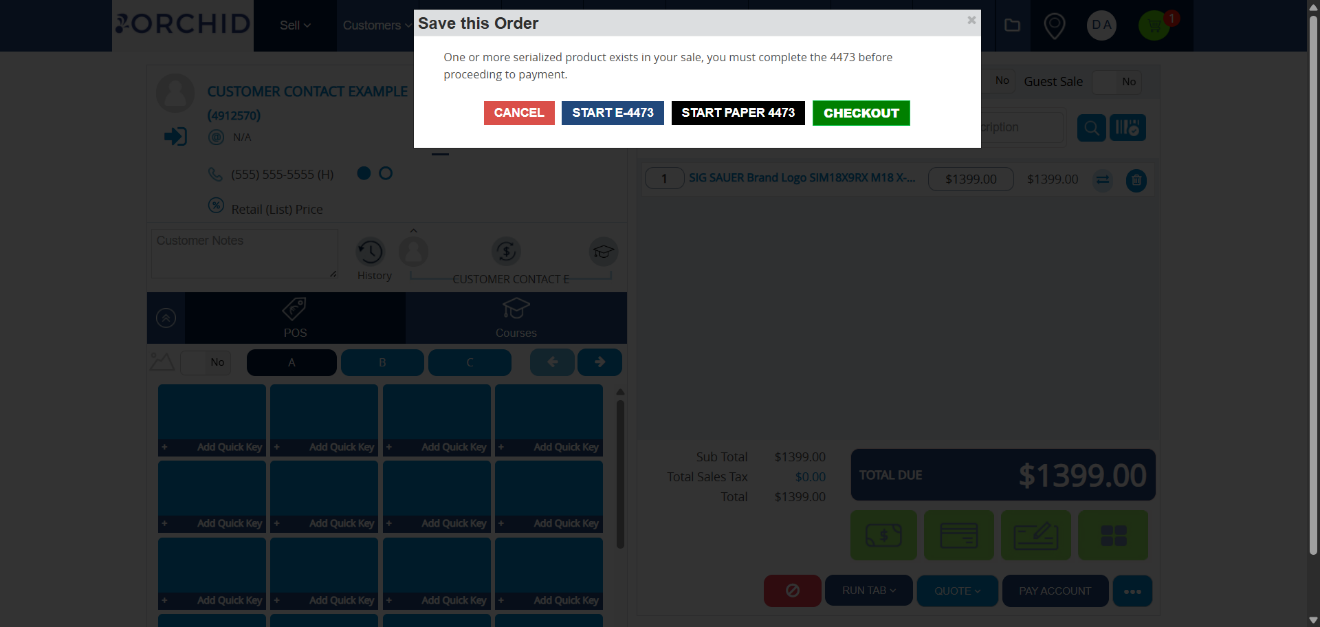
Firearm added, options for filling Form 4473
- Convert pending firearm sale to invoice. Once the NICS background check is processed and a determination is received, return to the main browser tab and navigate to Sell > Pending Gun Sales. Click the Review link for the pending gun sale, then scroll to the bottom and click Convert to Invoice. This takes you back to the Register screen with all order details pre-populated. Finalize payment as usual. The receipt will print and the transaction will be recorded automatically in your Bound Book — no manual entry required.
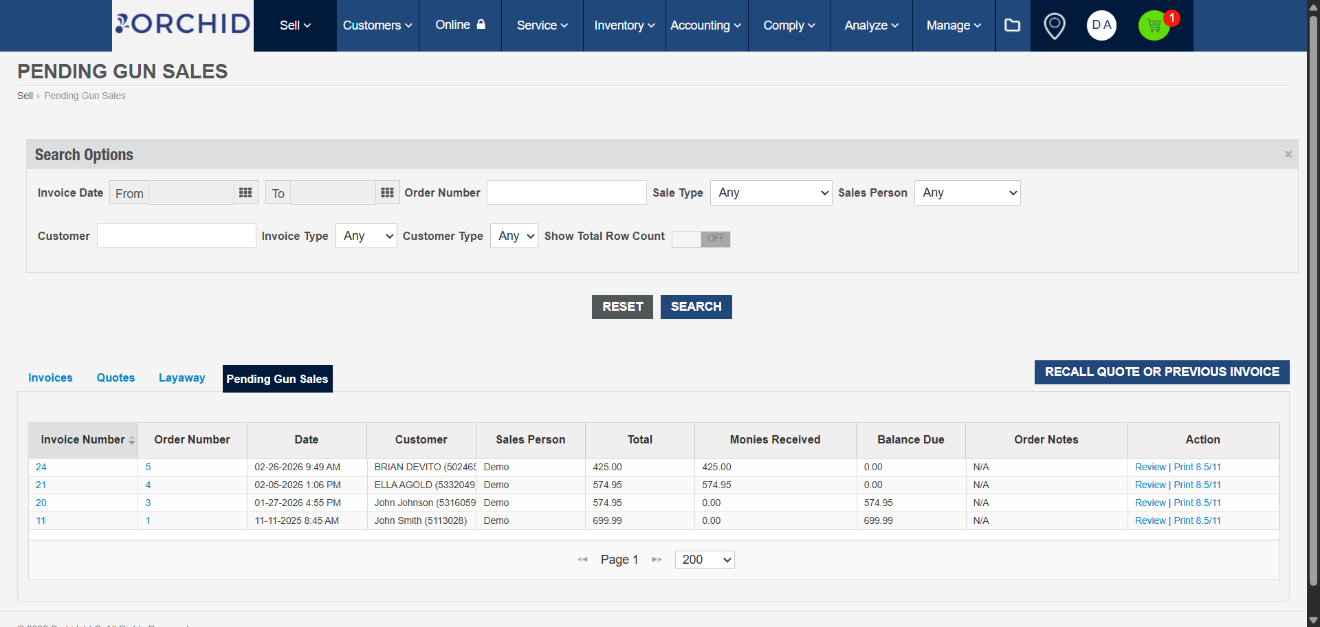
Pending Gun Sales
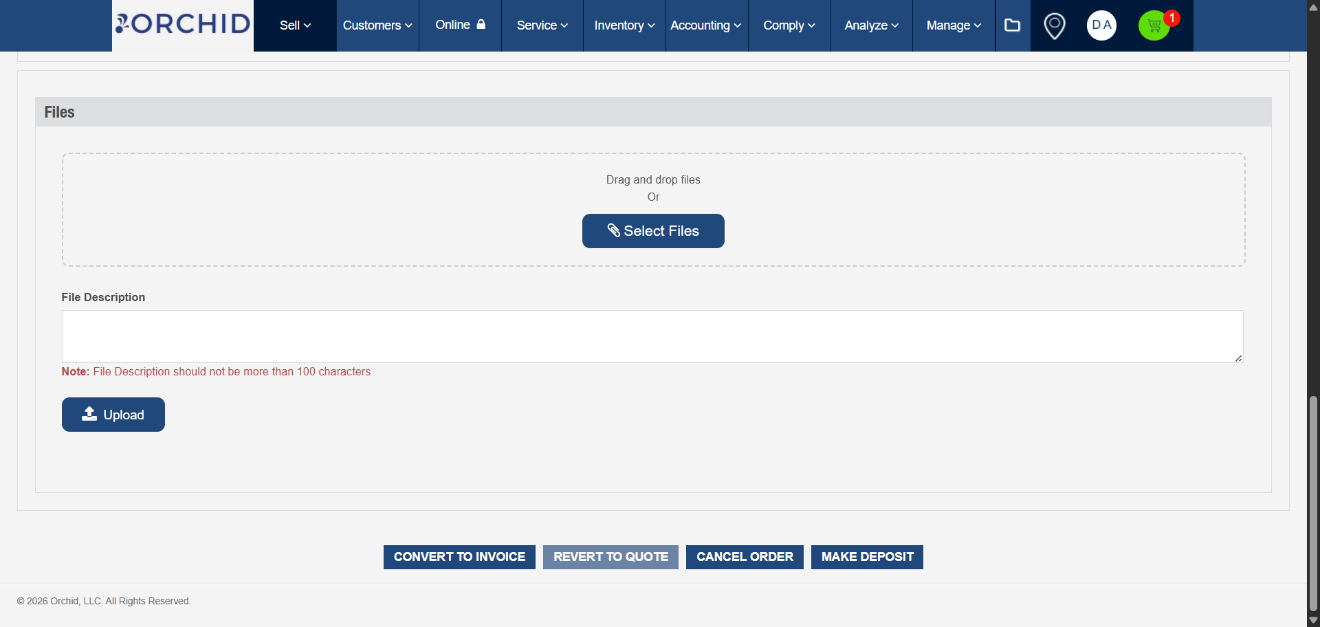
Convert to Invoice
Expected Result
- You have completed your first standard sale and your first firearm sale
- Your team can ring standard and firearm sales at the register, with the ATF Form 4473 flow built in
- You can maintain a single inventory across in-store and online channels, with no manual reconciliation
- Every firearm transfer is captured to your Bound Book automatically, with no double entry
Related Articles
- → Adding Employees & Permissions
- → Full Inventory Setup
- → Daily Operations Guide
- → Reports & QuickBooks Integration
- → Connecting eBound & eCommerce
💡 Tip
Your Orchid implementation team configures payment processing, your initial store profile, and any hardware mapping prior to your go-live date. You handle daily operations, inventory, and ongoing user setup. Think of onboarding as co-setup, not self-serve.
⚠️ Compliance
A firearm sale follows the same checkout flow as a standard sale, with one additional step for ATF Form 4473 compliance. The system connects directly with your eBound application to record every firearm transfer to your Bound Book automatically.