Ecommerce Functionality within POS BackOffice
Product Management
- Login to your POS and navigate to the Inventory
- On the Top menu, select ‘Inventory’
- Select Manage Inventory > Manage Products > Inventory
Pro Tips:
Orchid eComm Visibility - Filter to see what products are currently listed on/off your website
Product with Images - Filter to see which products have/don’t have images
Show Products with Variants - Filter to see all products included/not included within a variant group
Adding Products To The Website Individually
- Search for a products and click that part number to display the product attributes.
Navigate to the sales channel tab
Set Orchid eComm visibility to “On”
Click save
Personalize title, description, SEO and product images
Adding Multiple Products To The Website
Filter products from the main manage products page and ensure your table view is set from “standard” to “storefront”
Click the checkbox to the left of the product details for the product(s) that you want to add to the website
Click “Bulk Actions” and select “Turn On Orchid eComm Visibility”
Online Module
Editing content on a page
Go to the online Drop down > Build & Manage Site > Pages and Content Blocks > select the page you wish to edit
To change an image, double-click on the image to see the option to upload a new image.
To edit a button or link URL, double-click on the button to see the url option.
Custom HTML code can be used by clicking source and making changes as needed. There are many free HTML code generetors online that can be used for this task.
Editing Automatic Pop-up
To edit your Pop-up that shows as soon as someone enters your online page you will navigate to the online drop down > engage customers > popups.
You can also schedule an automatic start date and an end date, perfect to run special sales announcements.
Pro Tip:
Important Note:
Creating a Gallery
Galleries are a way for you to upload organize images into a slider that can be added to different pages on your website or serve as a standalone image gallery. You can create as many galleries as you want for your website.
in the online module, click on Build & Manage Site > Gallery > select Upload Pictures > begin uploading.
Click options to name the Album and be sure to publish the gallery when complete
After the images are uploaded, copy the “Page Slider Shortcode”. Paste the Shortcode on the page and on the page’s location you want the gallery to show.
Optional:
Shipping
As a Default, there are 5 available shipping options: Free, Flat Rate, Price Based, Pickup In Store and Local Delivery.
To navigatte to your shipping options you will go to the Online Drop Down > Configure Checkout > Order Notices & Shipping
Free Shipping - Set a minimum order amount and when the users cart total is equal or greater than that amount they will be offered free shipping. Select which states this offer is applicable in.
Flat Rate - Regardless of the cart total or how many items are in the cart set a flat rate that will alway charge users the same amount for shipping
Price Based - Use the cart total to determine the shipping price. Setup your own priced based shipping formula by using “Cart Total” + “:” + “Shipping Amount.” Use a comma to add additional values. Important note: The system will set shipping costs to $0.00 whenever the cart total is greater than the largest value specified.
Ex. 50:10.99, 100:19.99, 1000:29.99
This example can interpreted as: when the cart total is less than $50 than shipping will cost $10.99. When the cart total is less than $100 but greater than $50 than shipping will cost $19.99. And when the cart total is less than $1000 but greater than $100 than shipping will cost $29.99. When the cart total is greater than $1000 will charge $0.00 for shipping costs.
Pickup In Store - Allows the customer to choose to pickup the product in your store and to display custom pickup instructions that the user will see at checkout.
Local Delivery - Local delivery option that utilizes priced based formulas and a custom note for users to see at checkout.
There’s a 6th option that can be accessed by setting up a ShipStation account and integrating with your POS. This option offers shipping by weight, product size and select carriers. For more information see the ShipStation guide here: https://orchidllc.zohodesk.com/portal/en/kb/articles/integrating-with-shipstation-for-orchid-ecommerce-orders
Product Groups
Product groups have 3 distinct features, they allow you to:
Make a custom menu structure on your shop page
Create product group landing pages.
Display products on your home page
Product Group Used To Display Live Products On Home Page
How To Add A Product Group
After the group is created, you need to set conditions so that products can get added into the group. There are two options:
Manual Conditions
Automatic Conditions
If you select manual conditions, you can individually add products to the product group from your POS product details. Once the group is created, located the product in product details “Sales Channel” tab, scroll down to "Product Group. Click on the dropdown and then select the product group you created to add the product to that group.
If you select “all conditions” then all of the conditions set must be true for a product to display within the group. If you select “any condition” only one of the conditions must be true for a product to display within the group.
To create a parent group/dropdown, just drag the subgroup so it lands within the parent group:
Editing product group image
2) Click on the image
Setup Product Variations
You can set up product variants like sizes and colors for each product. Make sure that each you have individual part numbers / barcodes for each individual variation. For example, if you want to setup a variant for a T-shirt so that website users can choose between a small and a large shirt, there should be 2 products listed in your POS with individual part numbers.- Filter products from the main manage products page and ensure your table view is set from “standard” to “storefront”
- Click the checkbox to the left of the product details for the product(s) that you want to combine into a variant group.
- Click “Bulk Actions” and select “Create Product Variant”
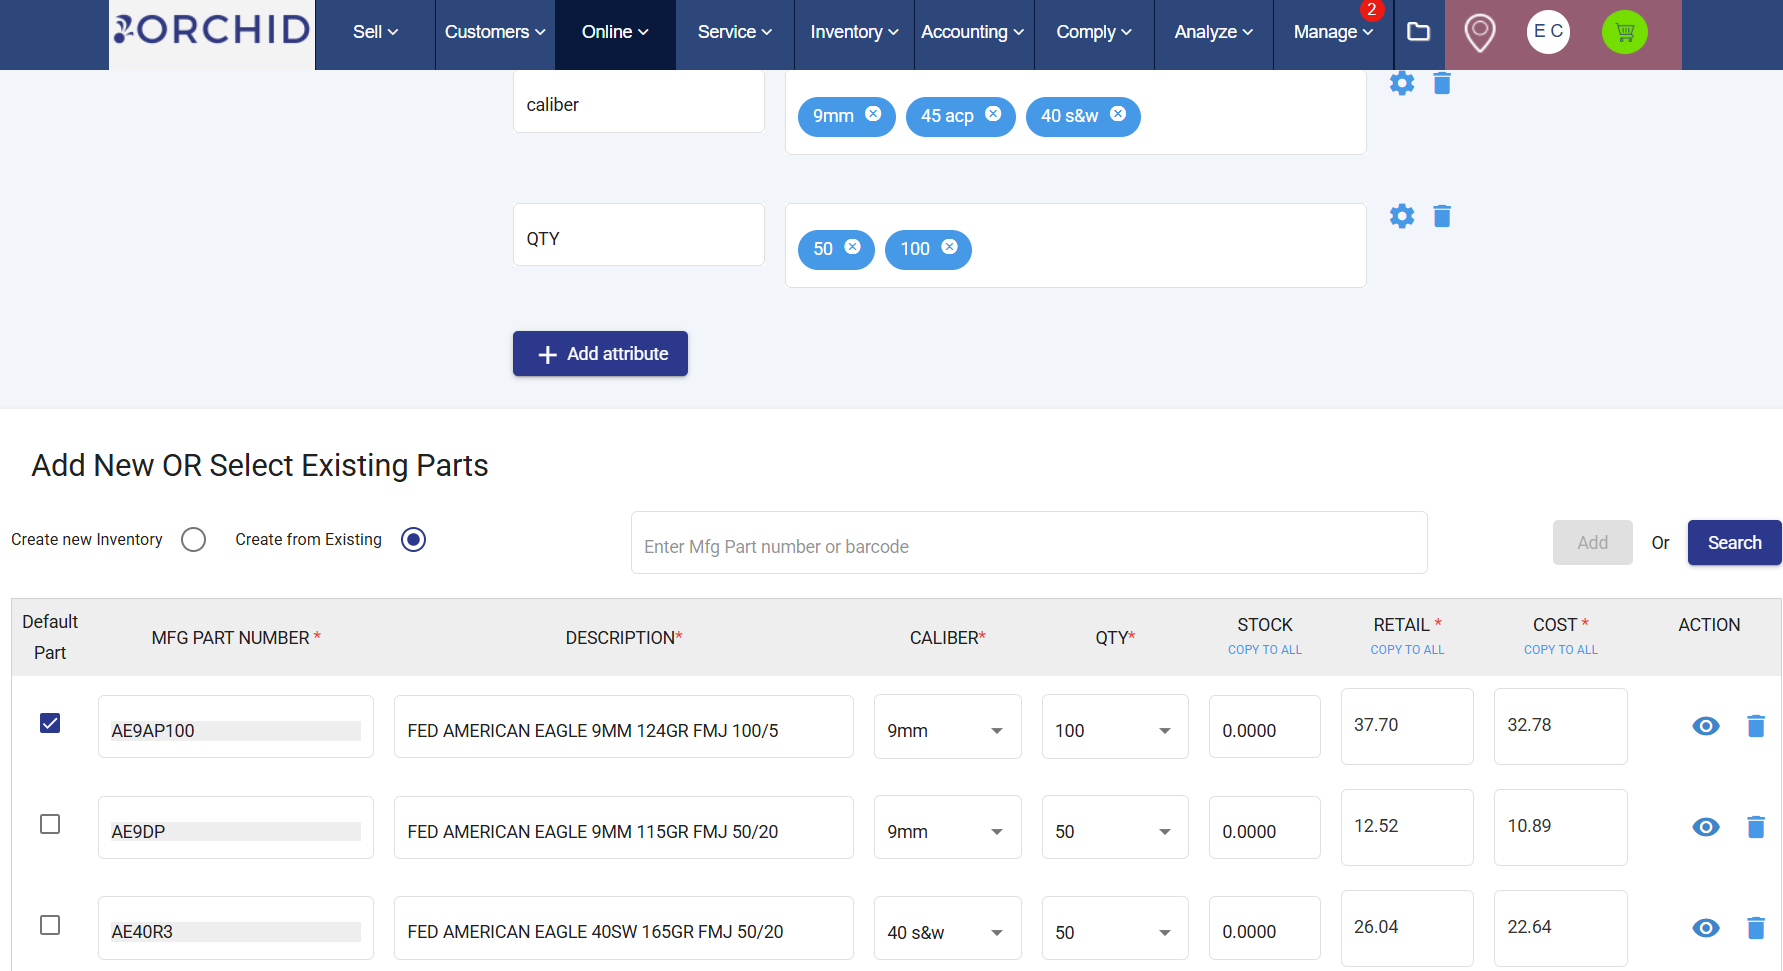
- Create the Attribute and the Options for each attribute. You can add up to 3 different attributes.
- Link the variant options to their respective part numbers, see example below.
Editing your Navigation (Menu)
- Home Page - Link to your home page.
- Page - Link to any of the custom pages that you have on your site and are found under the "Pages" module.
- Blog - Link to a specific blog landing page
- Product Group - Link to a specific product group landing page
- Course Group - Link to a specific course group landing page
- Sub Menu - Link to another menu to create a dropdown menu. Whenever the menu item is hovered over by your cursor, linked sub menu items will appear.
- Web Address - Link to an custom url. This url can be external (google.com) or internal (yourdomain.com)
Helpful links
- SAMPLE of Ecommerce Policy (Required for Setup)
https://orchidllc.zohodesk.com/portal/en/kb/articles/sample
- Use Copy Formula to set Price Levels, Discounts, and More
- Live Vendor Feed Integration Guide