Section 1: Ap Ammo Book Quick Start
How to Set Up the Orchid AP Ammo Book
Configure your Orchid AP Ammo Book for first use by setting your account preferences, creating users and roles, adding your FFL license, and preparing ammunition, transferee, and caliber data so you can begin recording armor-piercing ammunition dispositions. You must have an active Orchid AP Book license and Admin access to complete this setup.
- Open the Orchid AP Book dashboard. After logging in, the dashboard displays your AP Ammo disposition totals and a 30-day disposition chart. Use the left navigation menu to access AP Ammo Transactions, Reports, Configuration, and Admin.
- Expand the Admin menu. In the left navigation, click Admin to reveal Account Settings, Automated Backup, Manage Users, Manage Roles, and Support Center.
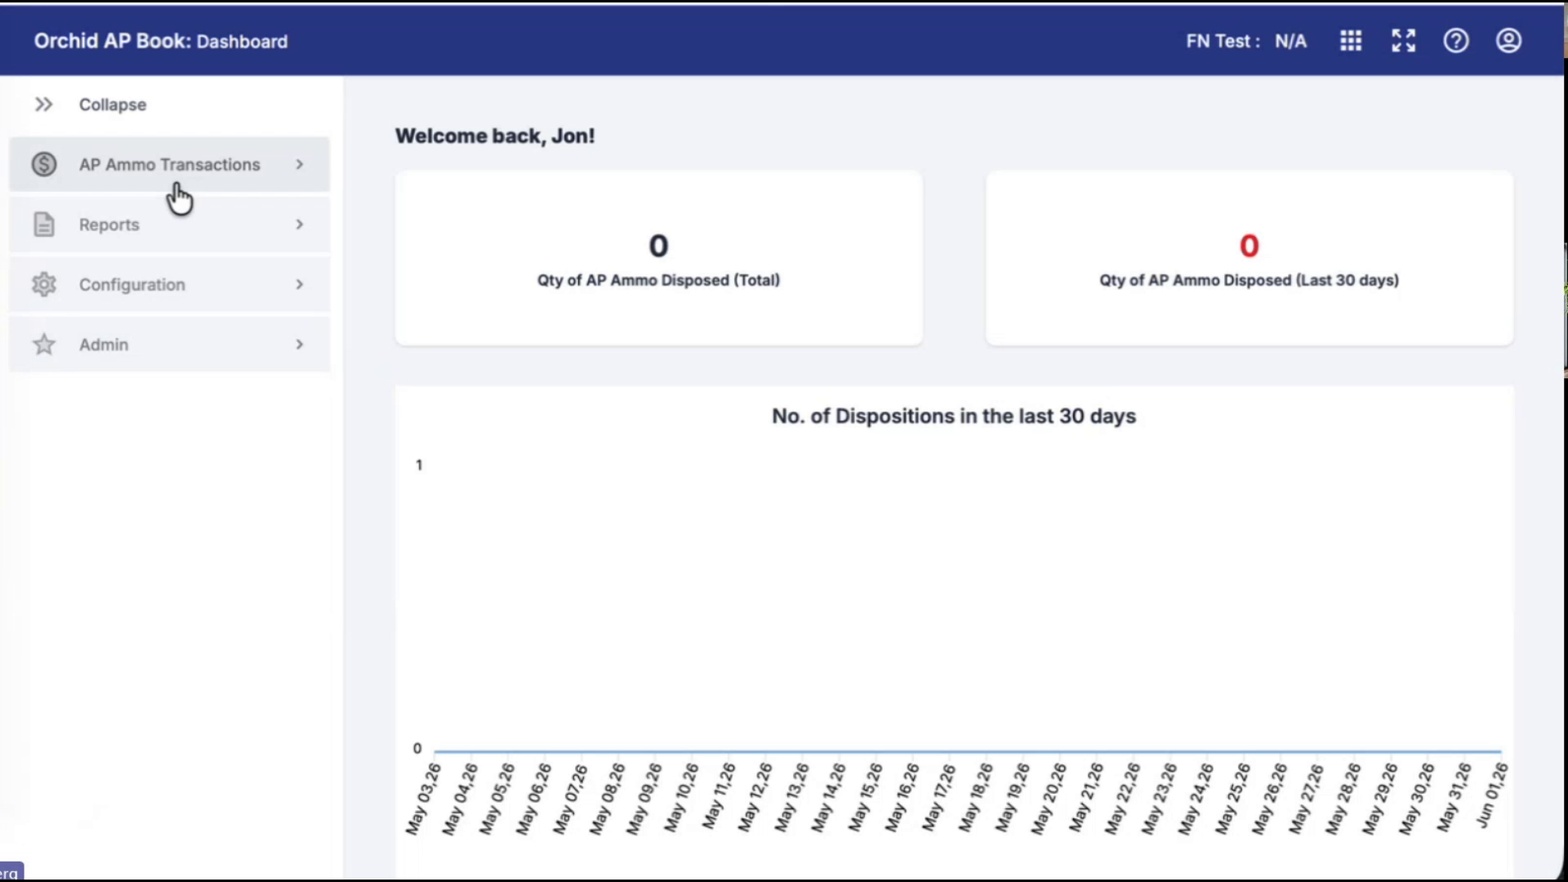
- Open Account Settings. Click Account Settings to open the Company Details and User Account TimeZone Settings page.
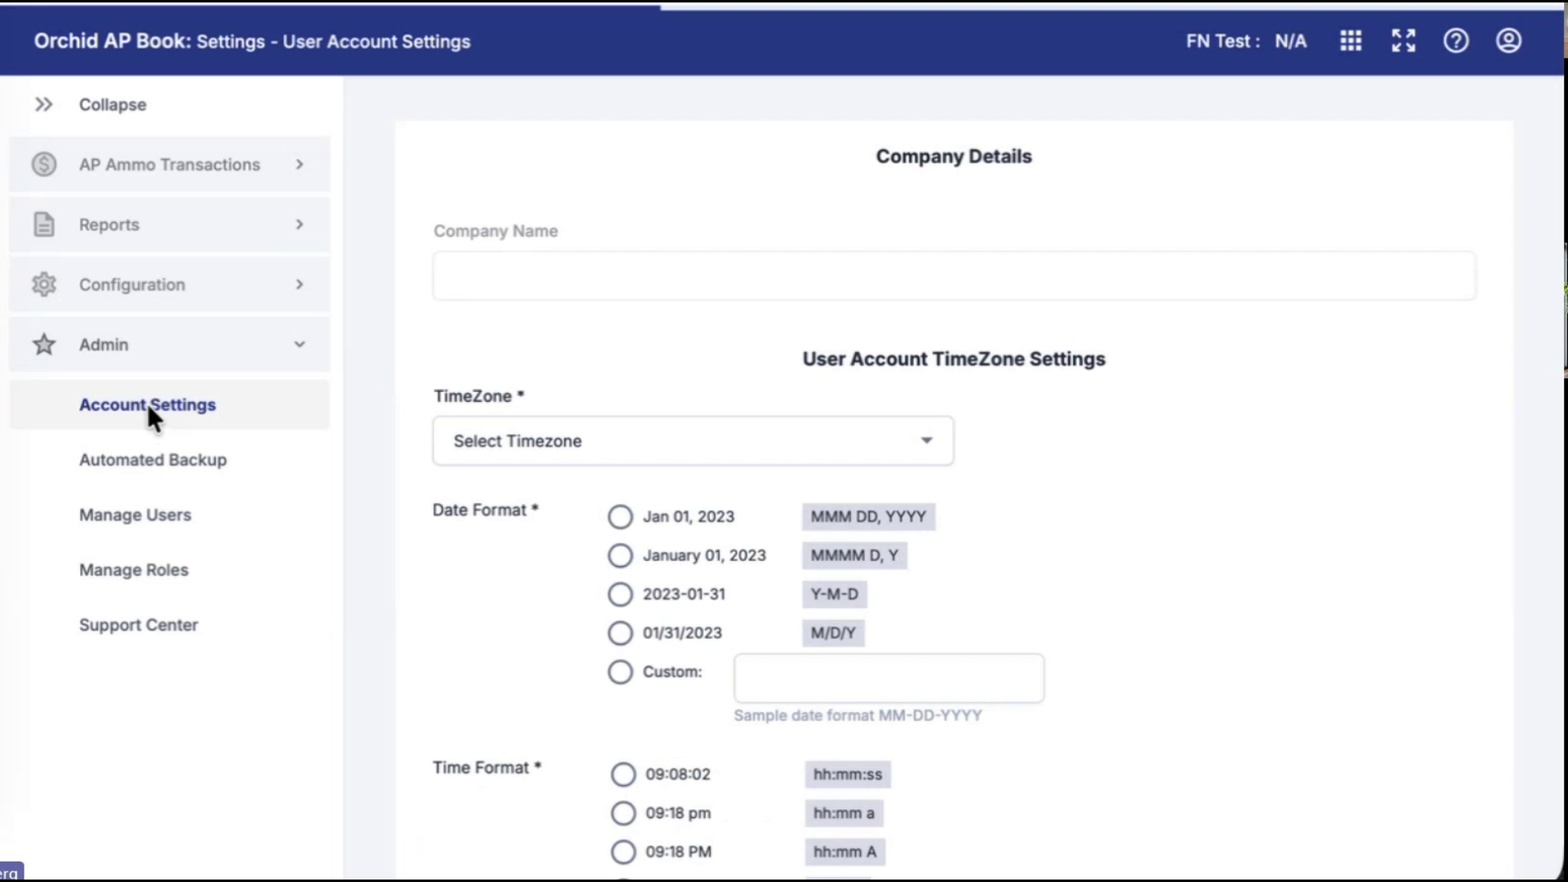
- Enter your Company Name. Type your business name into the Company Name field at the top of the page.
- Select your TimeZone. Open the TimeZone dropdown and choose your operating time zone (for example, (GMT-05:00) Eastern Time (US & Canada)).
- Choose a Date Format. Select one of the preset date format radio buttons (MMM DD, YYYY; MMMM D, Y; Y-M-D; or M/D/Y), or enter a Custom format.
- Choose a Time Format. Select one of the time format options (hh:mm:ss, hh:mm a, hh:mm A, or hh:mm).
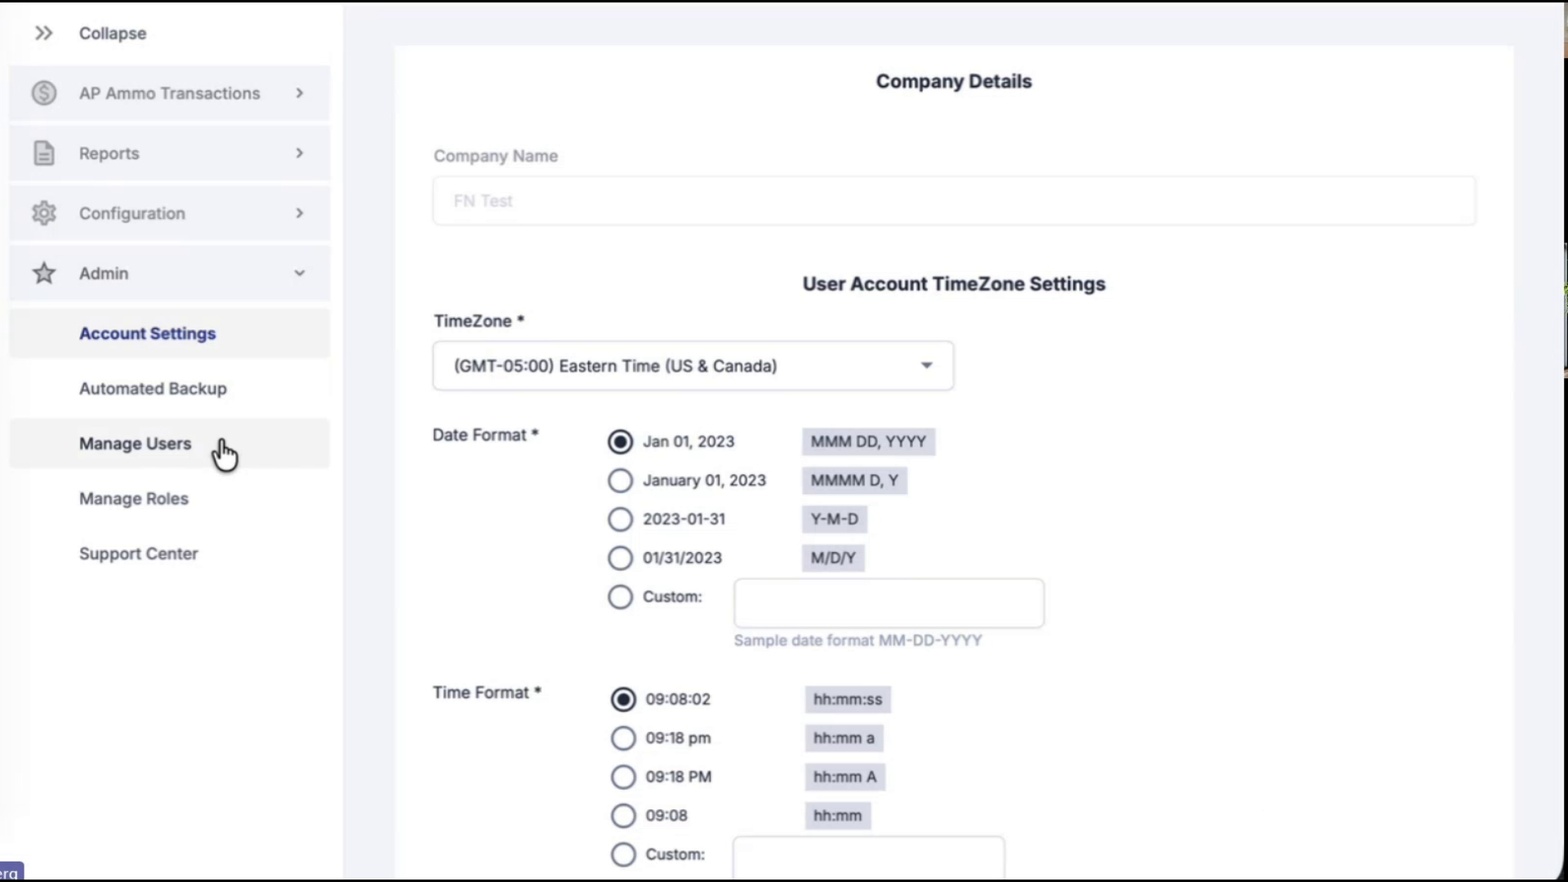
- Navigate to Manage Users. Click Manage Users under the Admin menu to view existing users and add new ones.
- Open the Create New User dialog. Click Create User in the upper-right corner to open the Create New User form.
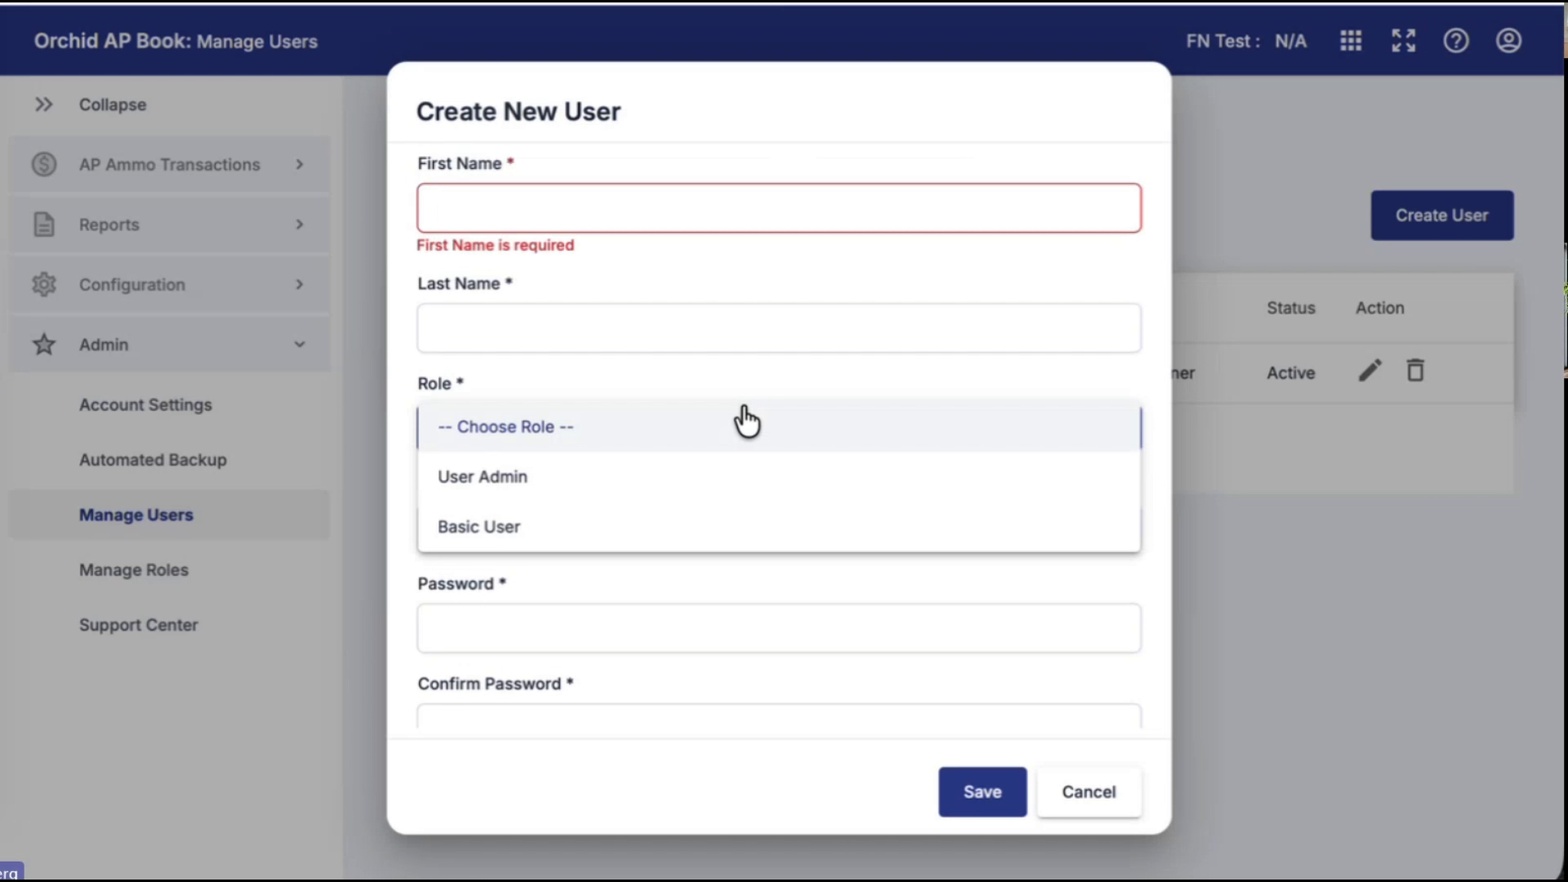
- Enter the user's First Name and Last Name. Both fields are required.
- Choose a Role from the Role dropdown. Select User Admin, Basic User, or any custom role you have created.
- Set the Password and Confirm Password. Enter a password and re-enter it in the Confirm Password field.
- Save the new user. Click Save to create the user account.
- Navigate to Manage Roles. Click Manage Roles under the Admin menu to view the list of existing roles.
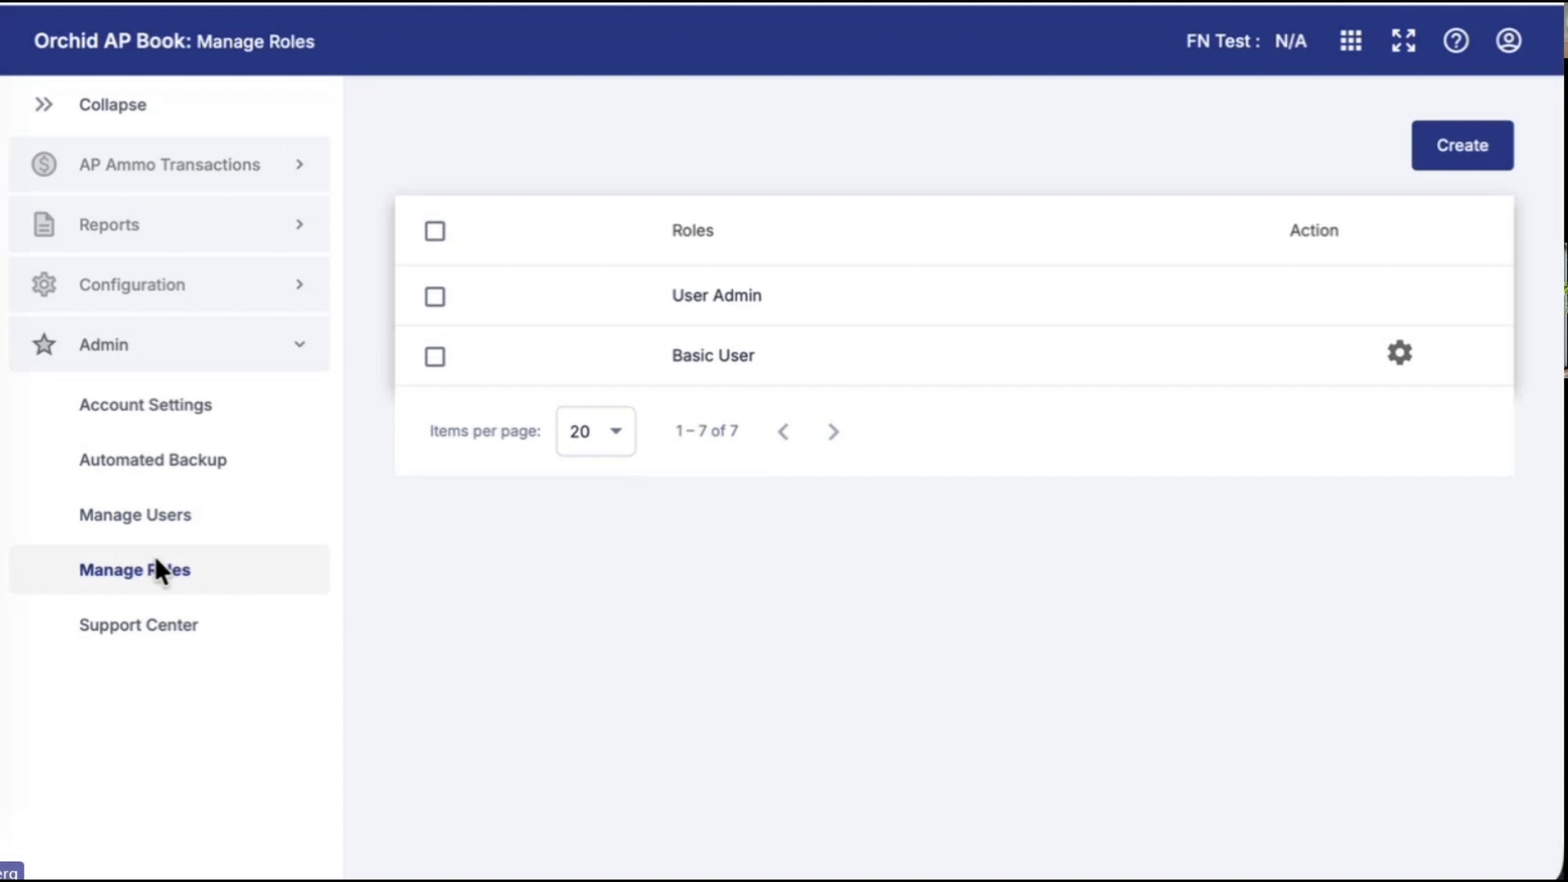
- Click Create to add a new role. Press the Create button in the upper-right to add a custom role.
- Confirm role creation. A success message reading "New Role has been created Successfully" appears at the bottom of the screen, and the new role appears in the list.
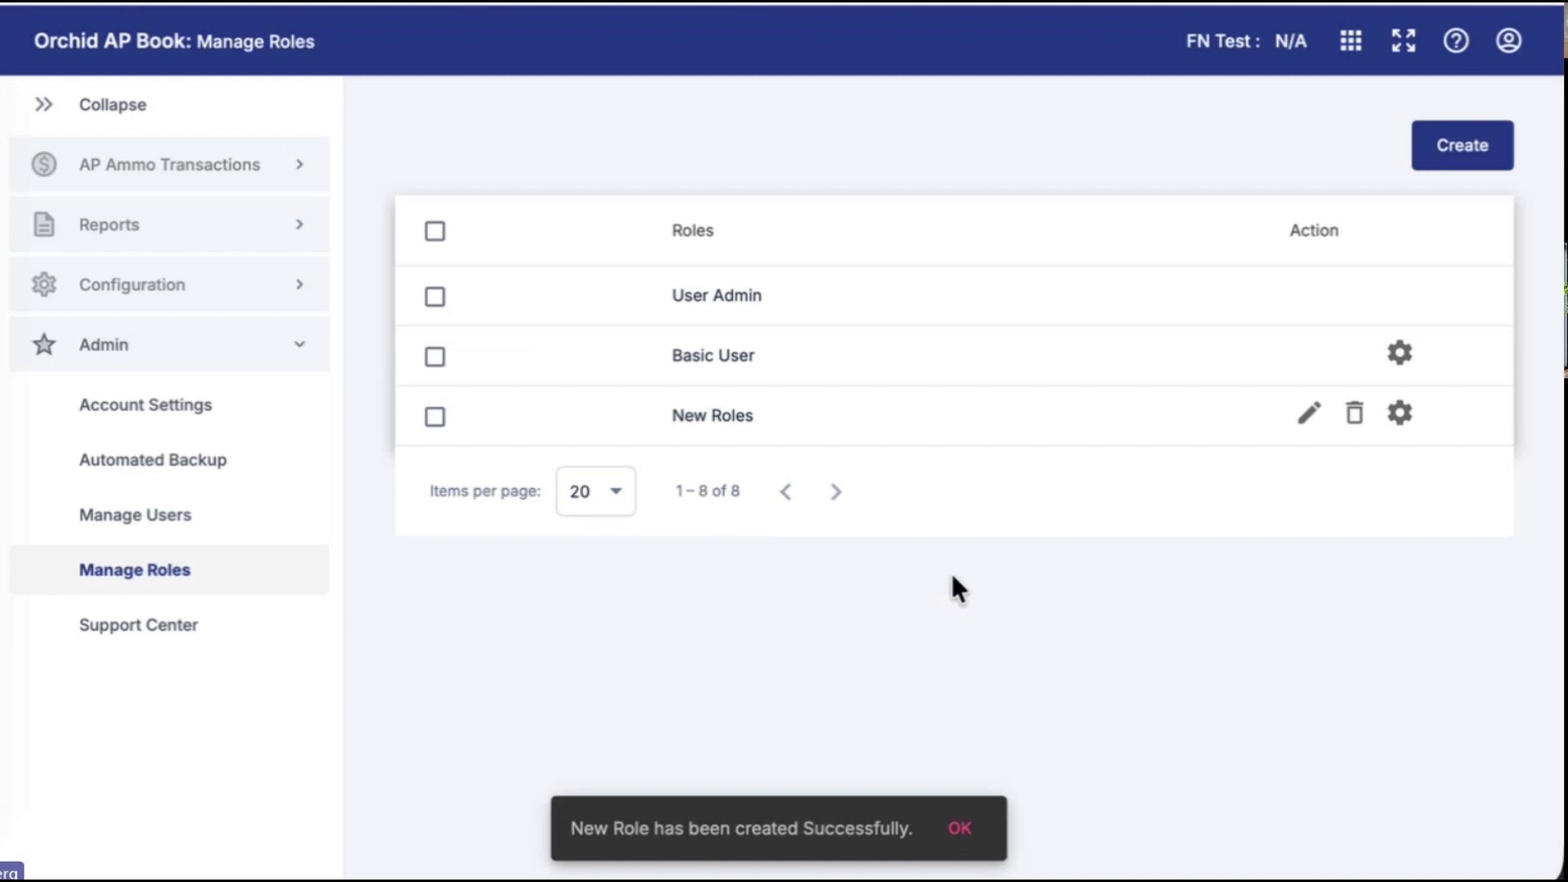
- Open Manage Permissions for the new role. Click the gear icon in the Action column next to your new role to open the Manage Permissions dialog.
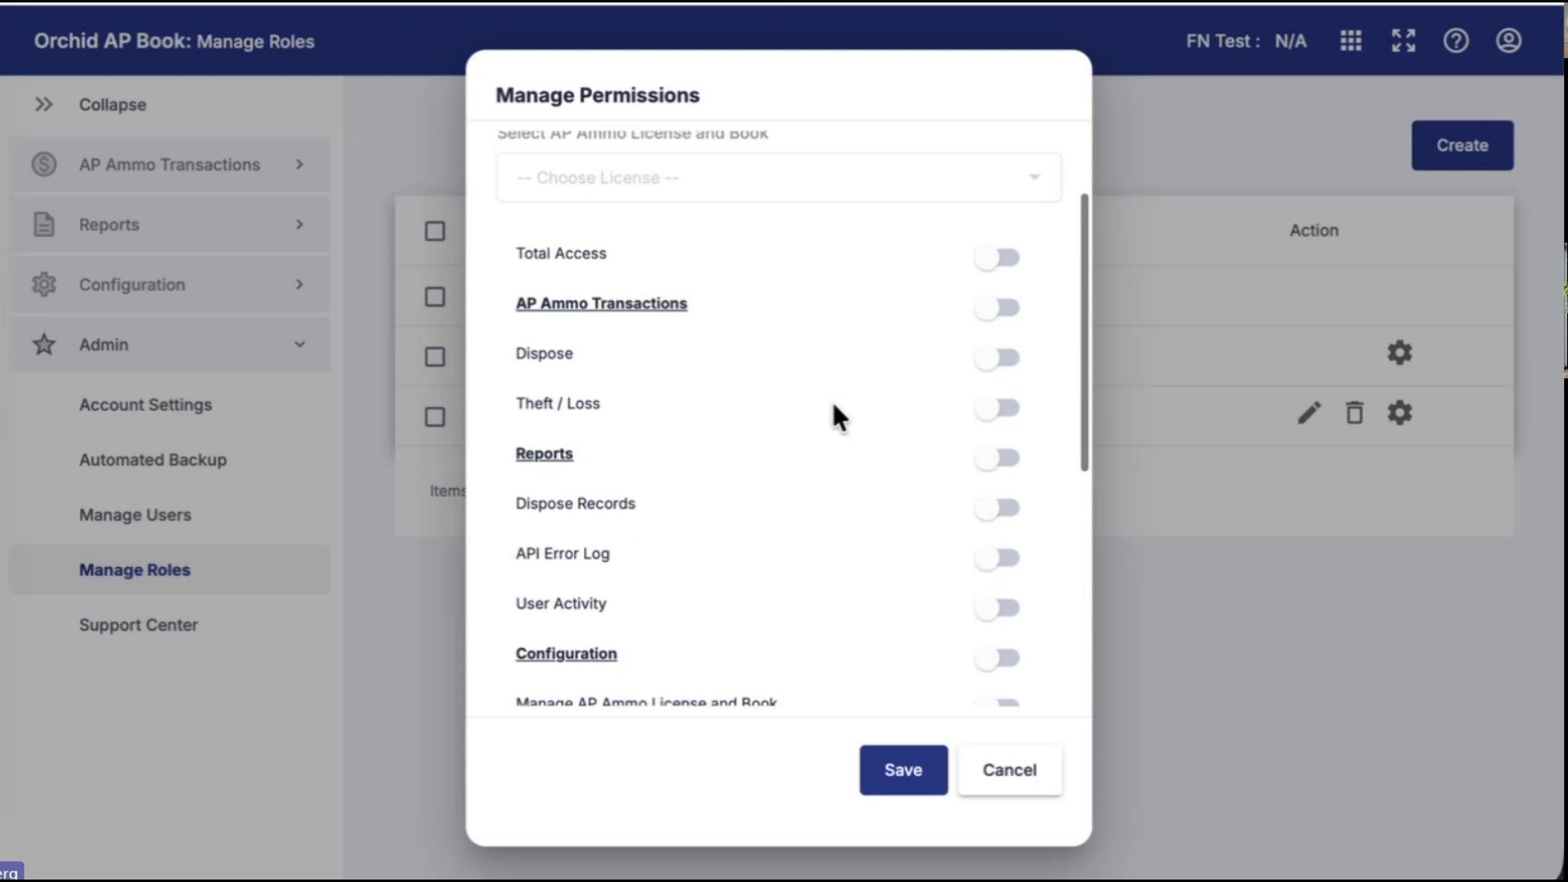
- Select the AP Ammo License and Book. Use the Choose License dropdown at the top of the dialog to pick the license this role applies to.
- Toggle permissions on or off. Enable the toggles for Total Access, AP Ammo Transactions, Dispose, Theft / Loss, Reports, Dispose Records, API Error Log, User Activity, Configuration, and Manage AP Ammo License and Book as needed.
- Save the permission set. Click Save to apply the permissions to the role.
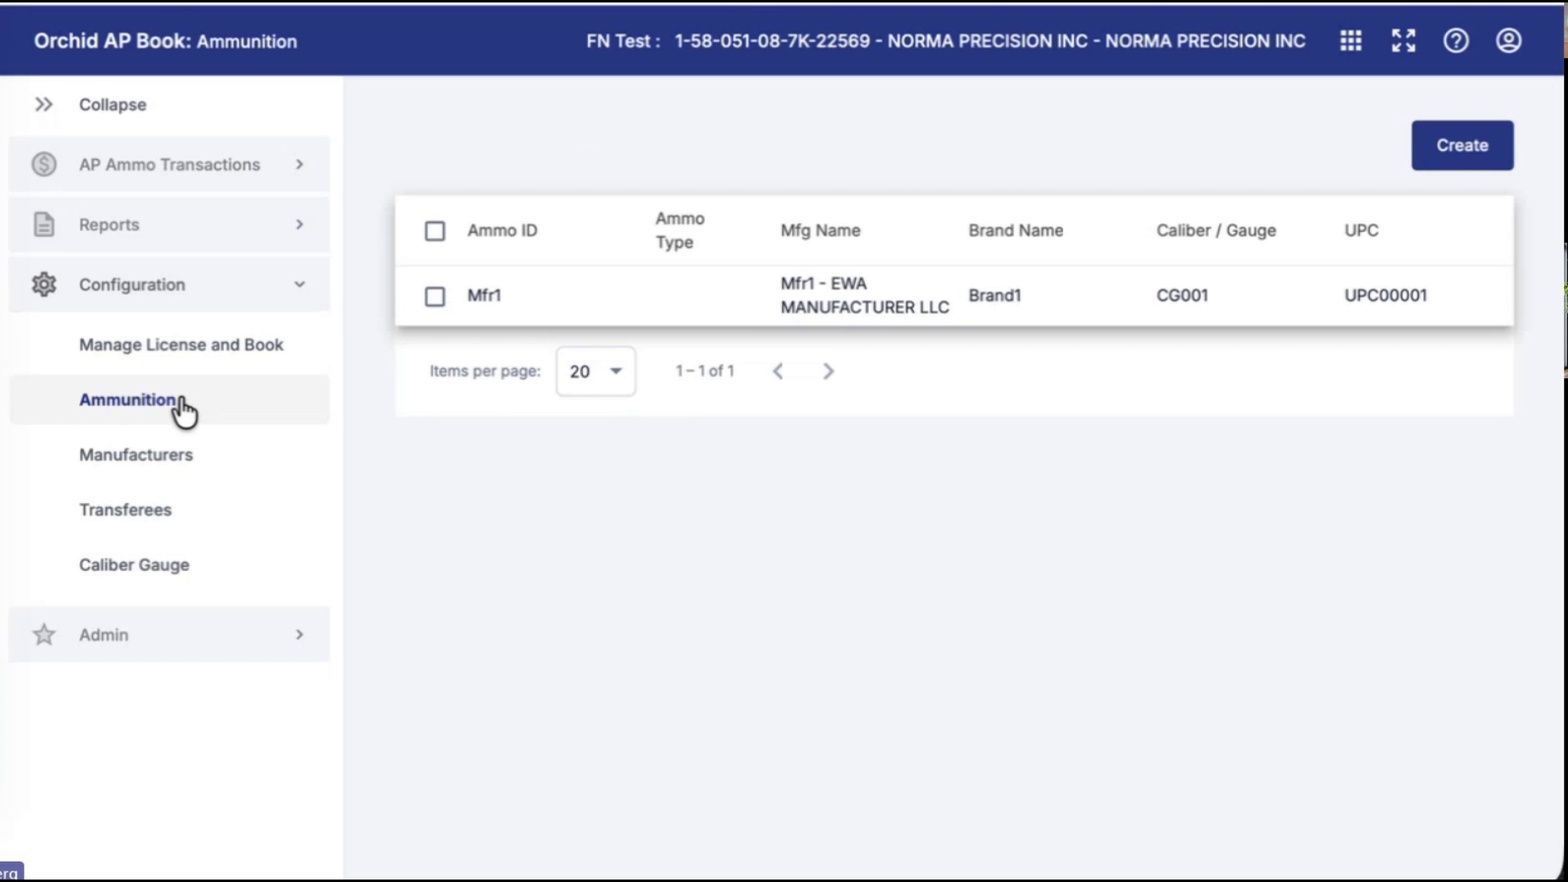
- Expand the Configuration menu. Click Configuration in the left navigation to reveal Manage License and Book, Ammunition, Manufacturers, Transferees, and Caliber Gauge.
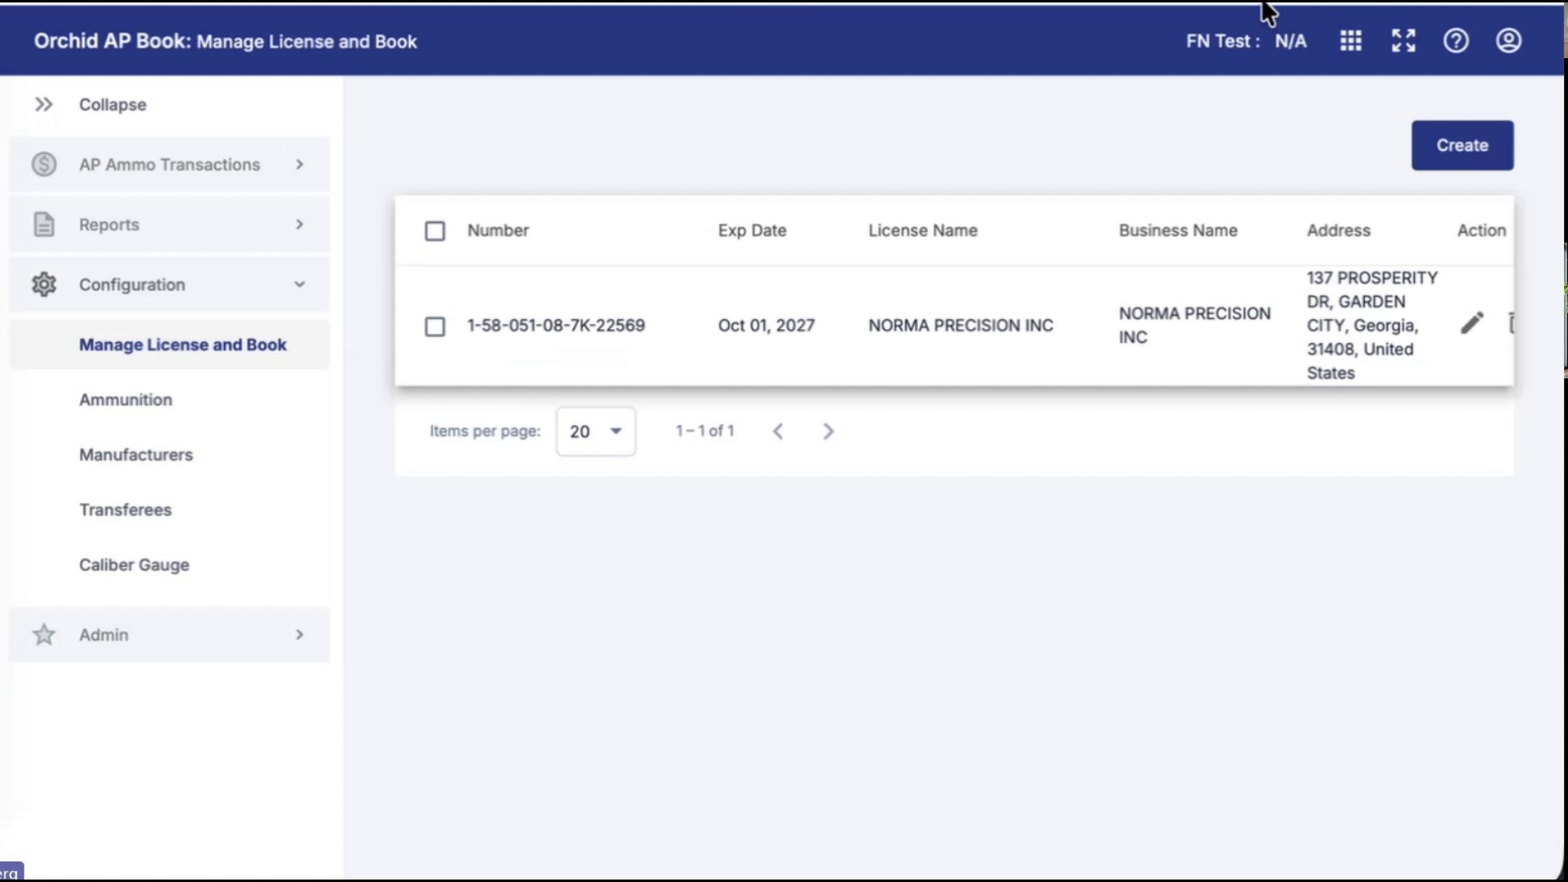
- Open Manage License and Book. Click Manage License and Book to view your registered FFL licenses.
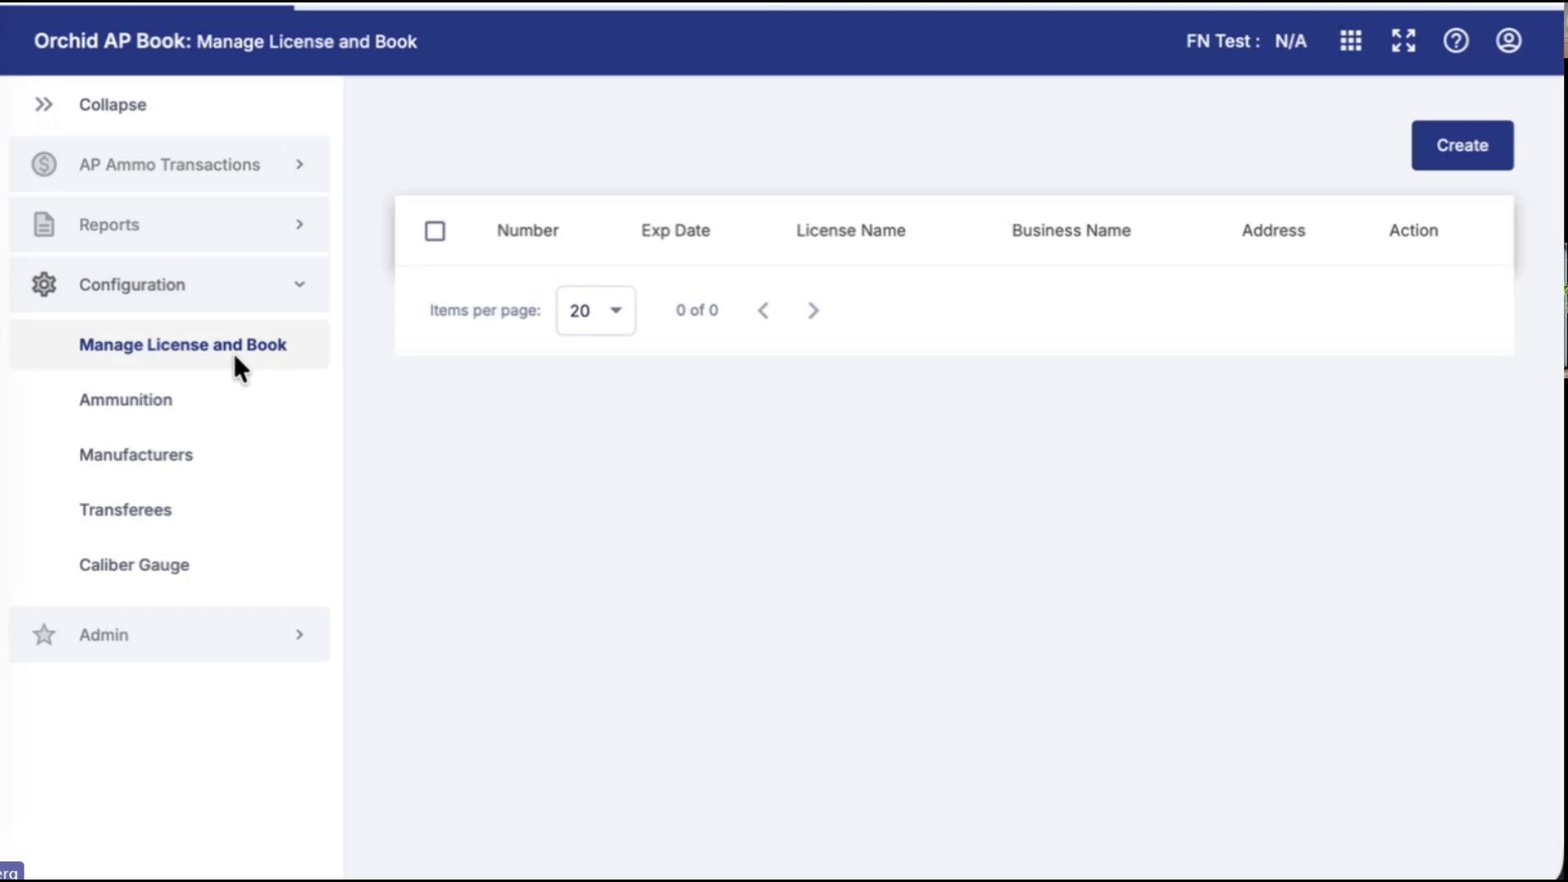
- Click Create to add a new FFL license. Press Create in the upper-right to open the Create FFL License dialog.
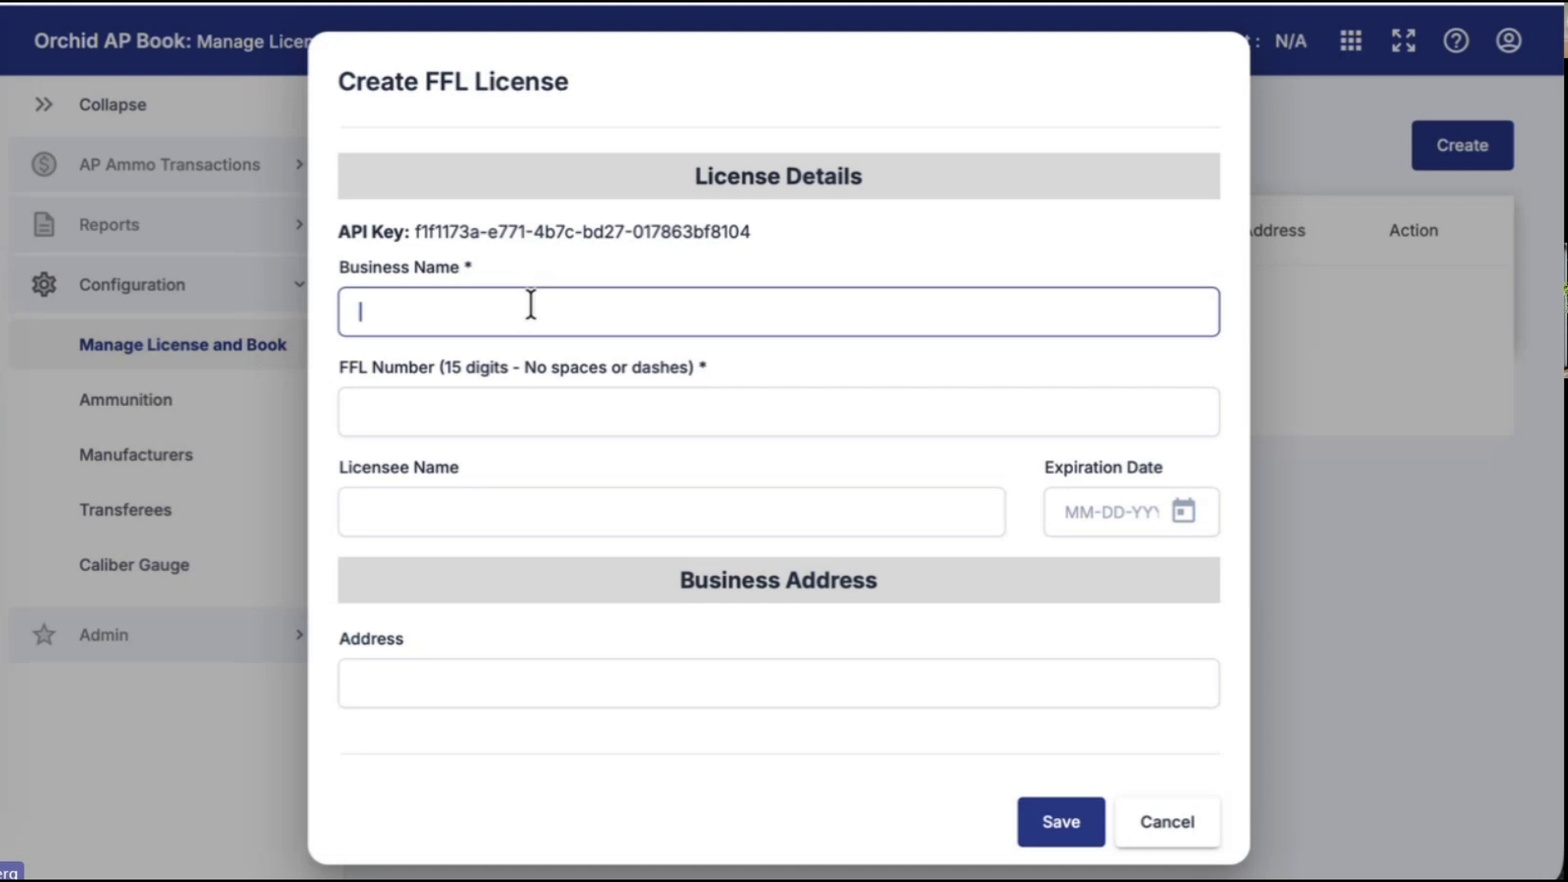
- Enter the Business Name. Type your business name into the Business Name field.
- Enter the FFL Number. Type the 15-digit FFL number with no spaces or dashes into the FFL Number field.
- Enter the Licensee Name. Type the licensee name as it appears on the FFL.
- Set the Expiration Date. Enter the FFL expiration date in MM-DD-YYYY format.
- Enter the Business Address. Complete the Address field under Business Address.
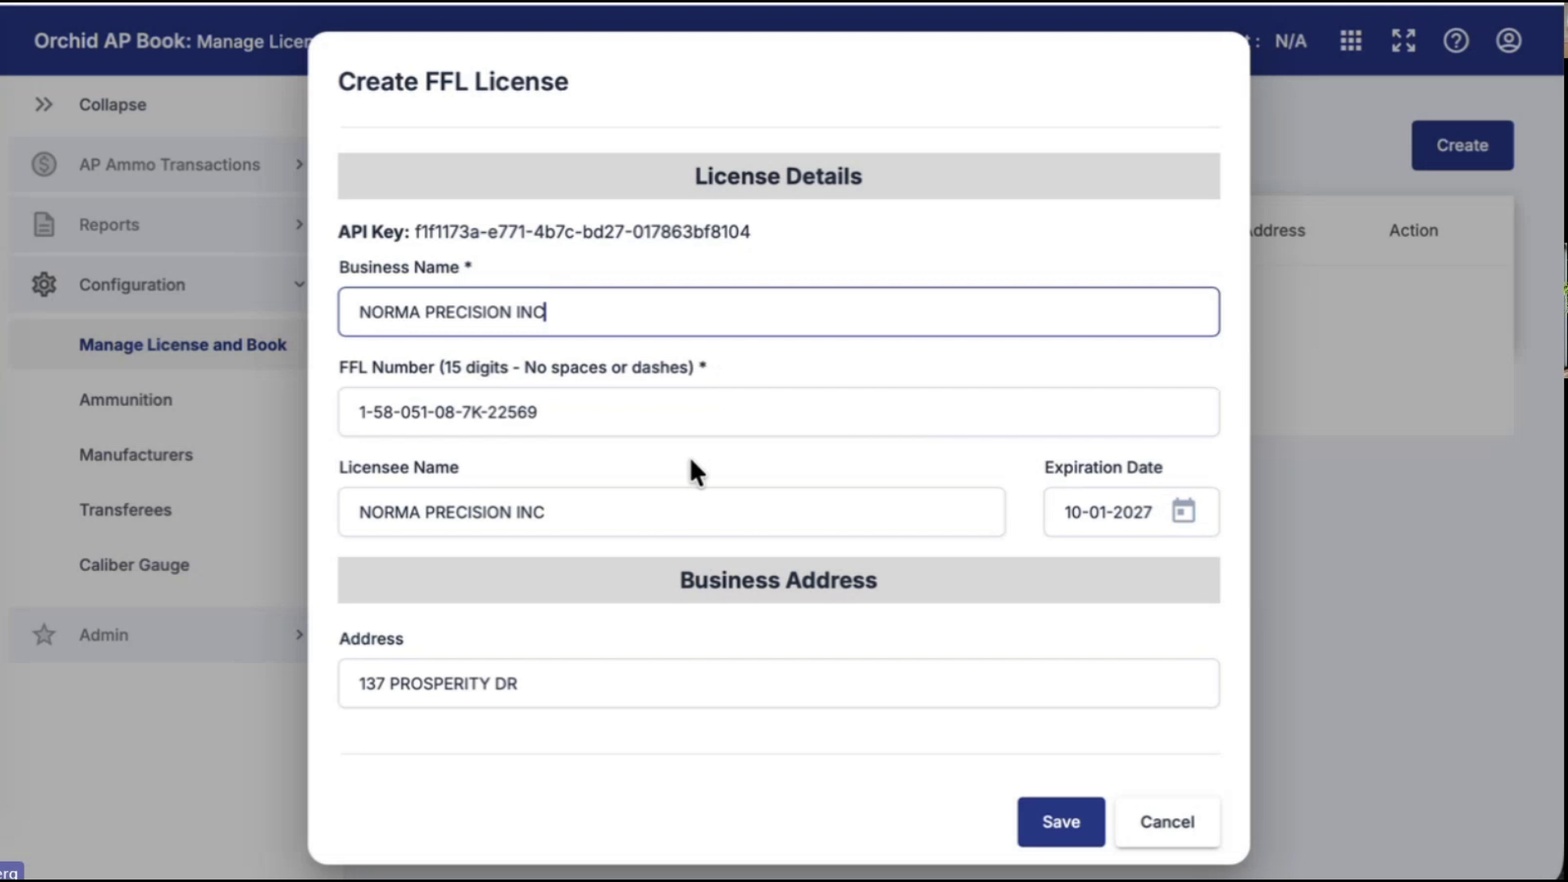
- Save the FFL license. Click Save to add the license to your account. The new license appears in the Manage License and Book list.
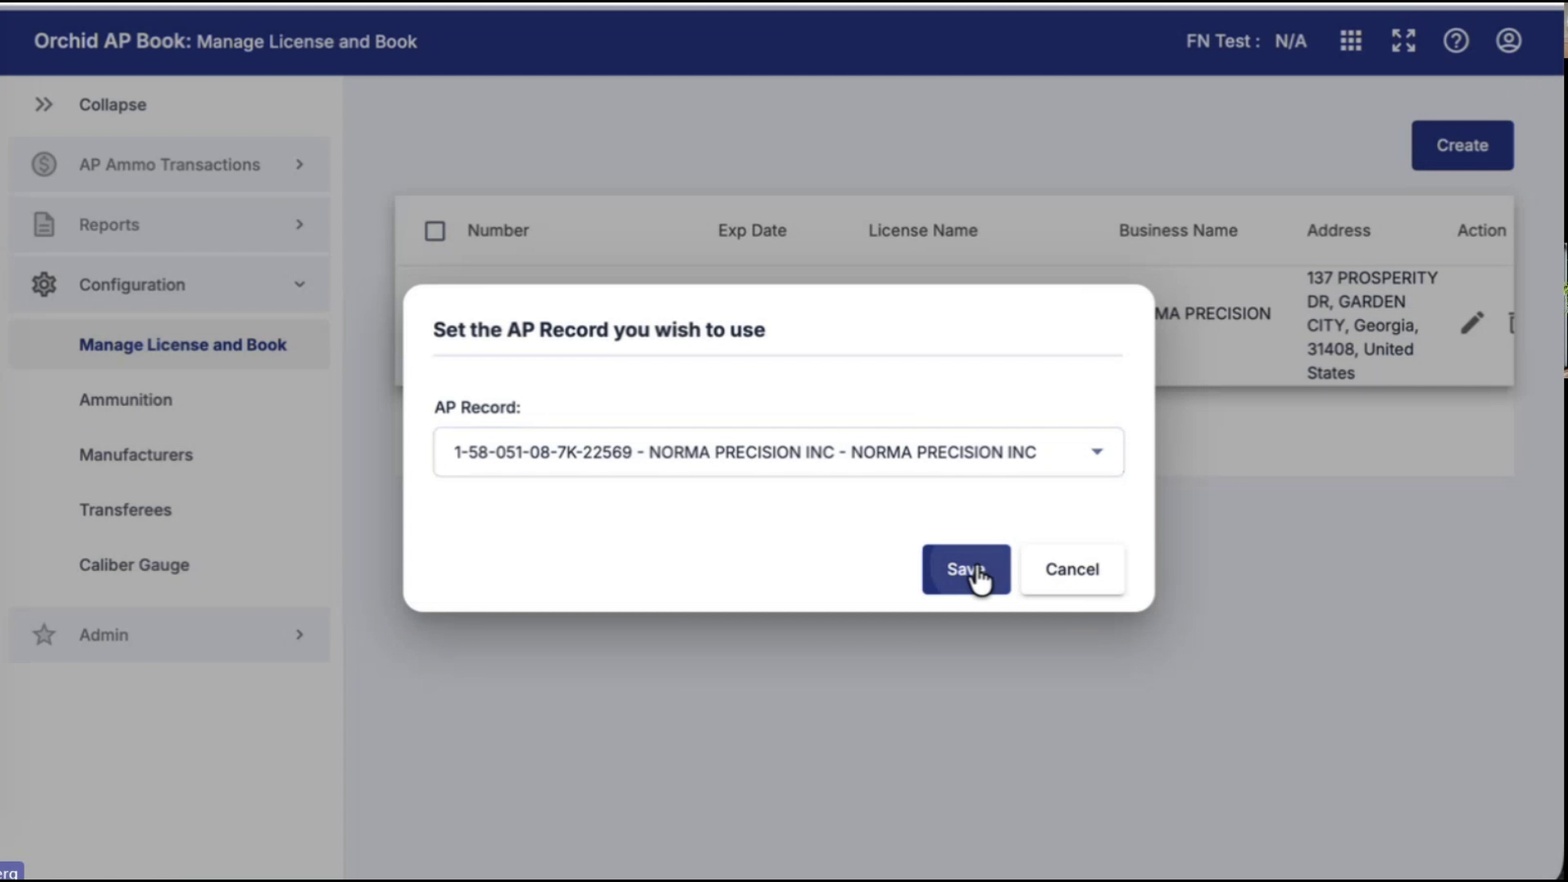
- Set the active AP Record. When prompted, use the AP Record dropdown to select the license you wish to work with, then click Save.
- Confirm the active license in the header. The selected FFL number and business name now appear in the top header bar across all screens.
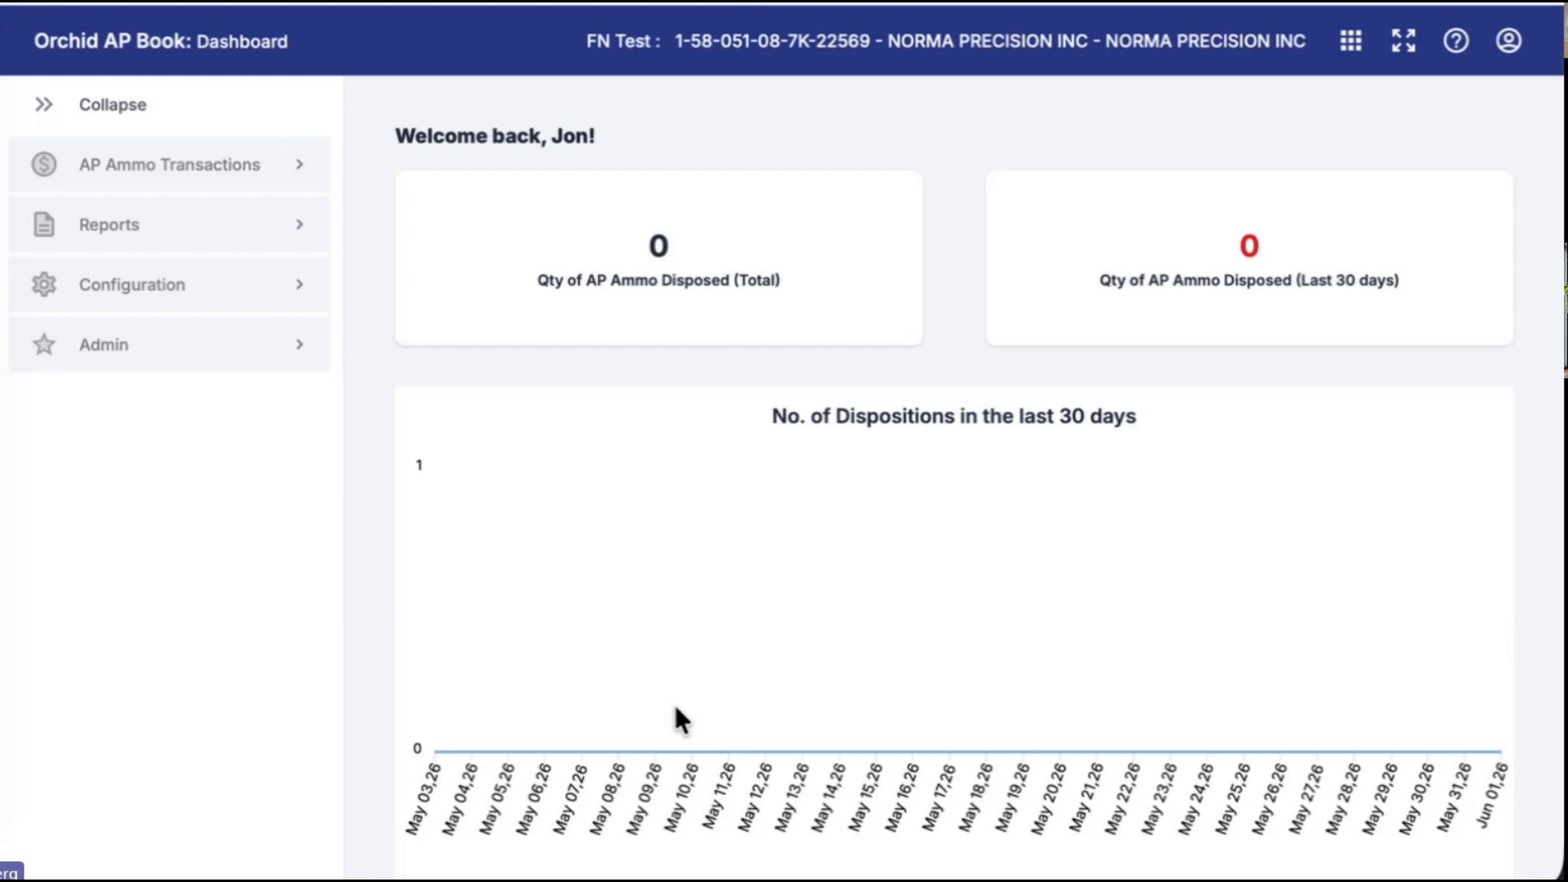
- Open the Ammunition configuration. Click Ammunition under Configuration to view all ammunition records linked to the active license.
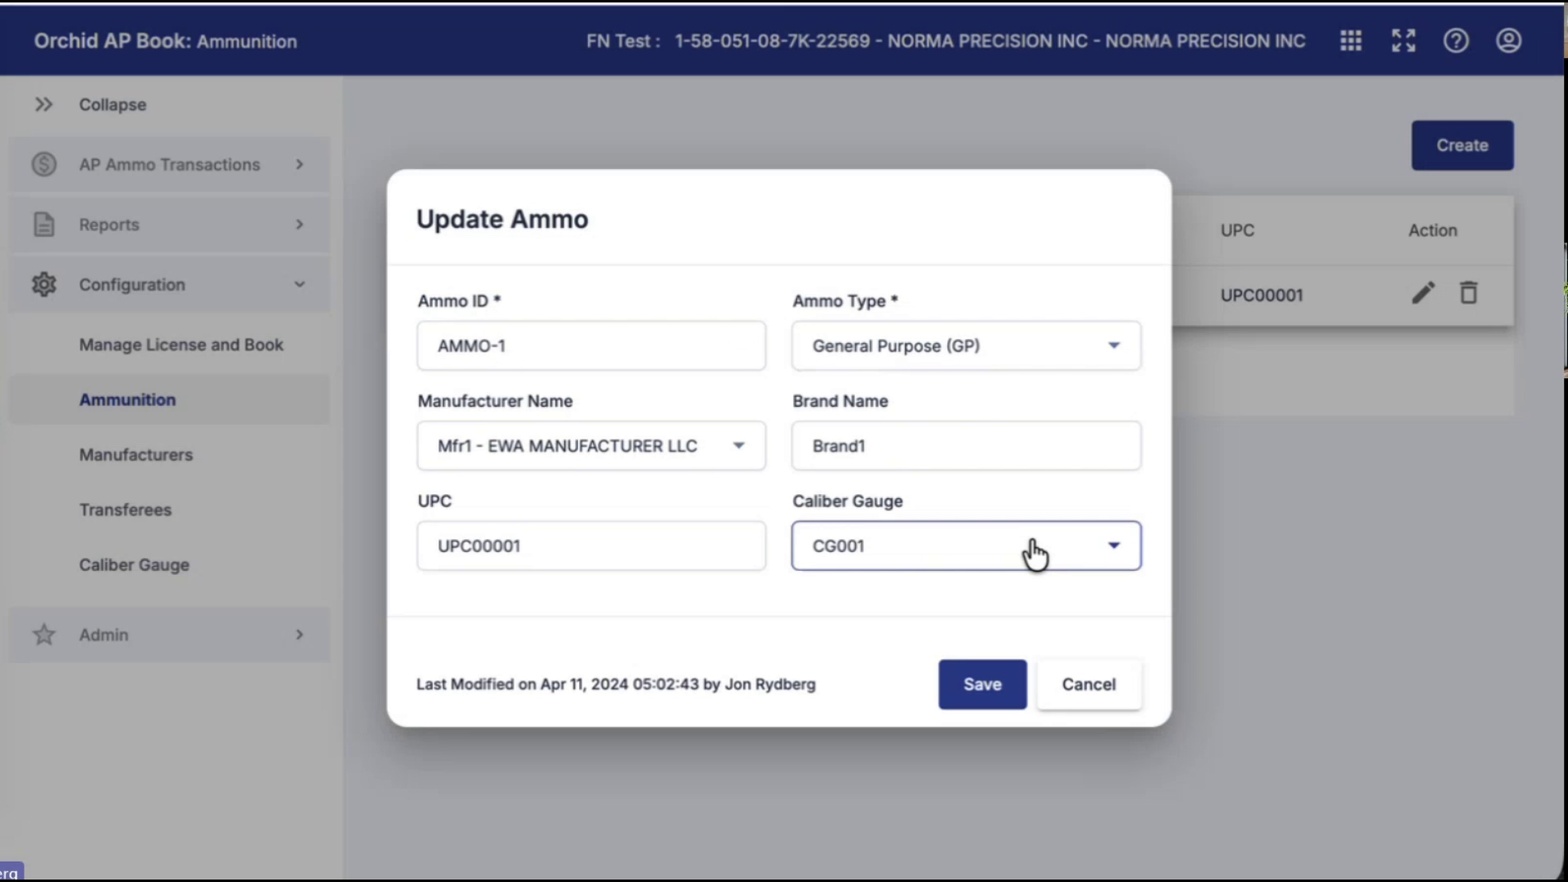
- Edit an ammunition record. Click the pencil (edit) icon next to an existing record to open the Update Ammo dialog.
- Update the Ammo ID. Change the value in the Ammo ID field (for example, from Mfr1 to AMMO-1).
- Select the Ammo Type. Choose a type from the Ammo Type dropdown (such as General Purpose (GP)).
- Verify Manufacturer Name, Brand Name, UPC, and Caliber Gauge. Confirm the remaining fields are correct or update them as needed.
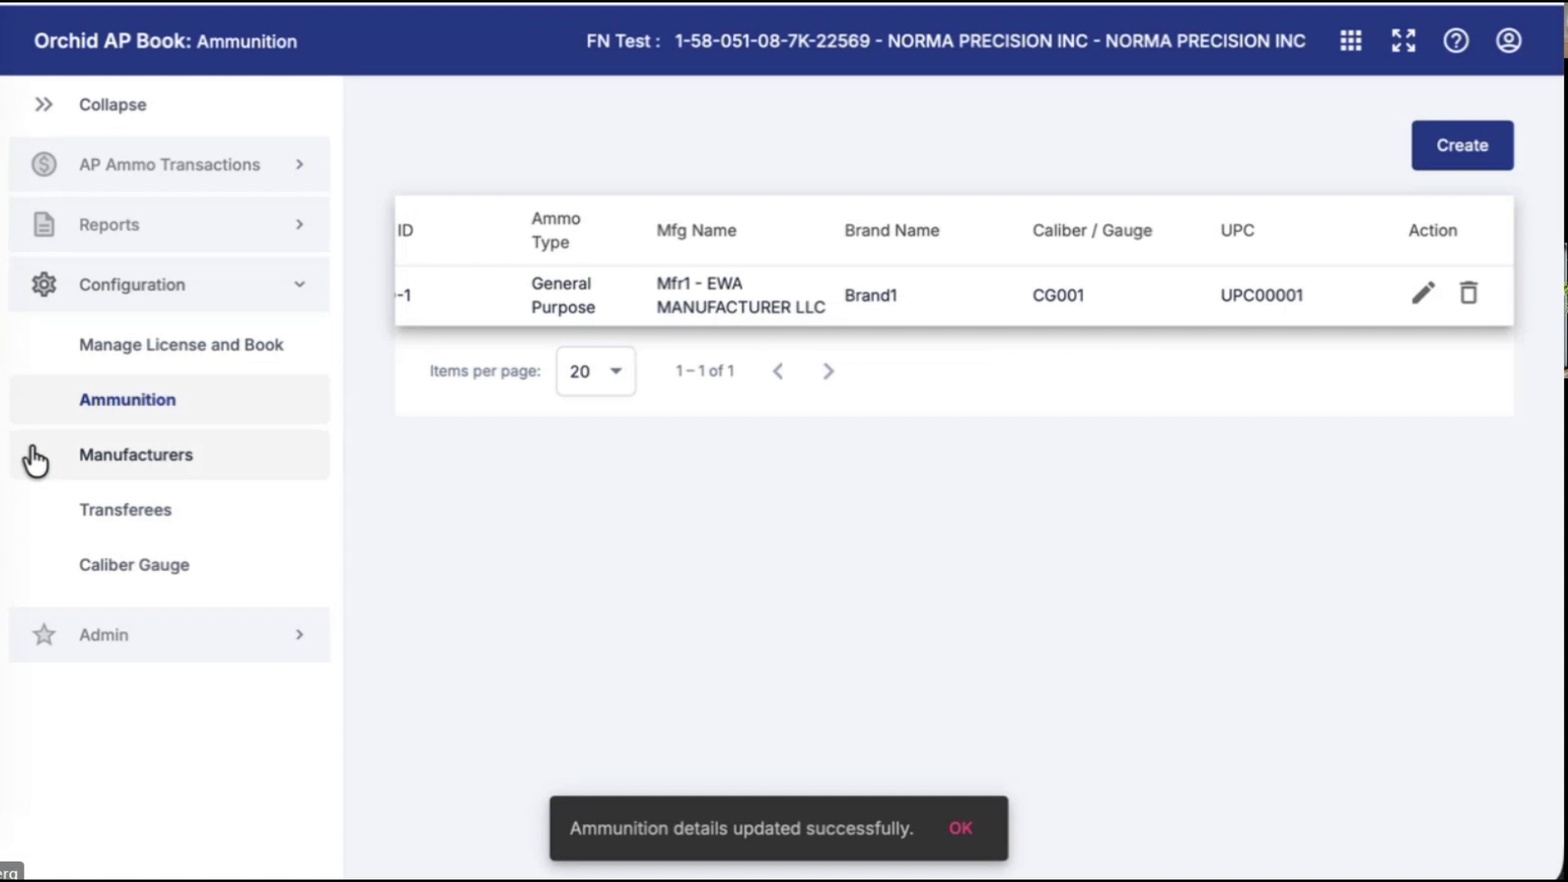
- Save the ammunition update. Click Save. A confirmation reading "Ammunition details updated successfully" appears at the bottom of the screen.
- Open Transferees. Click Transferees under Configuration to view recipient records. The list will display "No Result Found" until you add a transferee.
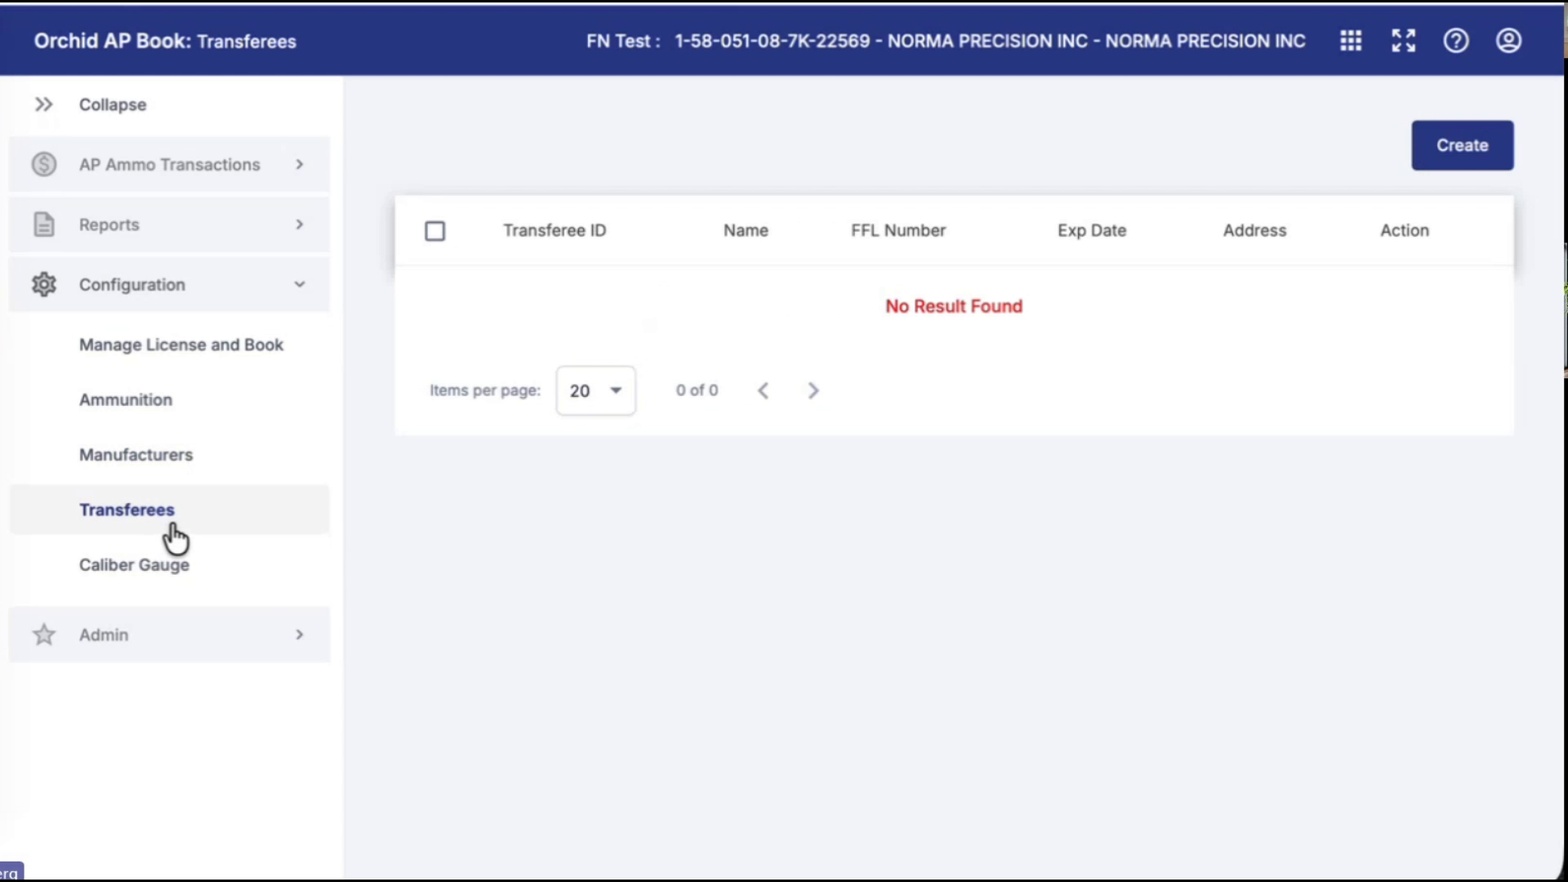
- Open Caliber Gauge. Click Caliber Gauge under Configuration to view all available caliber and gauge designations.
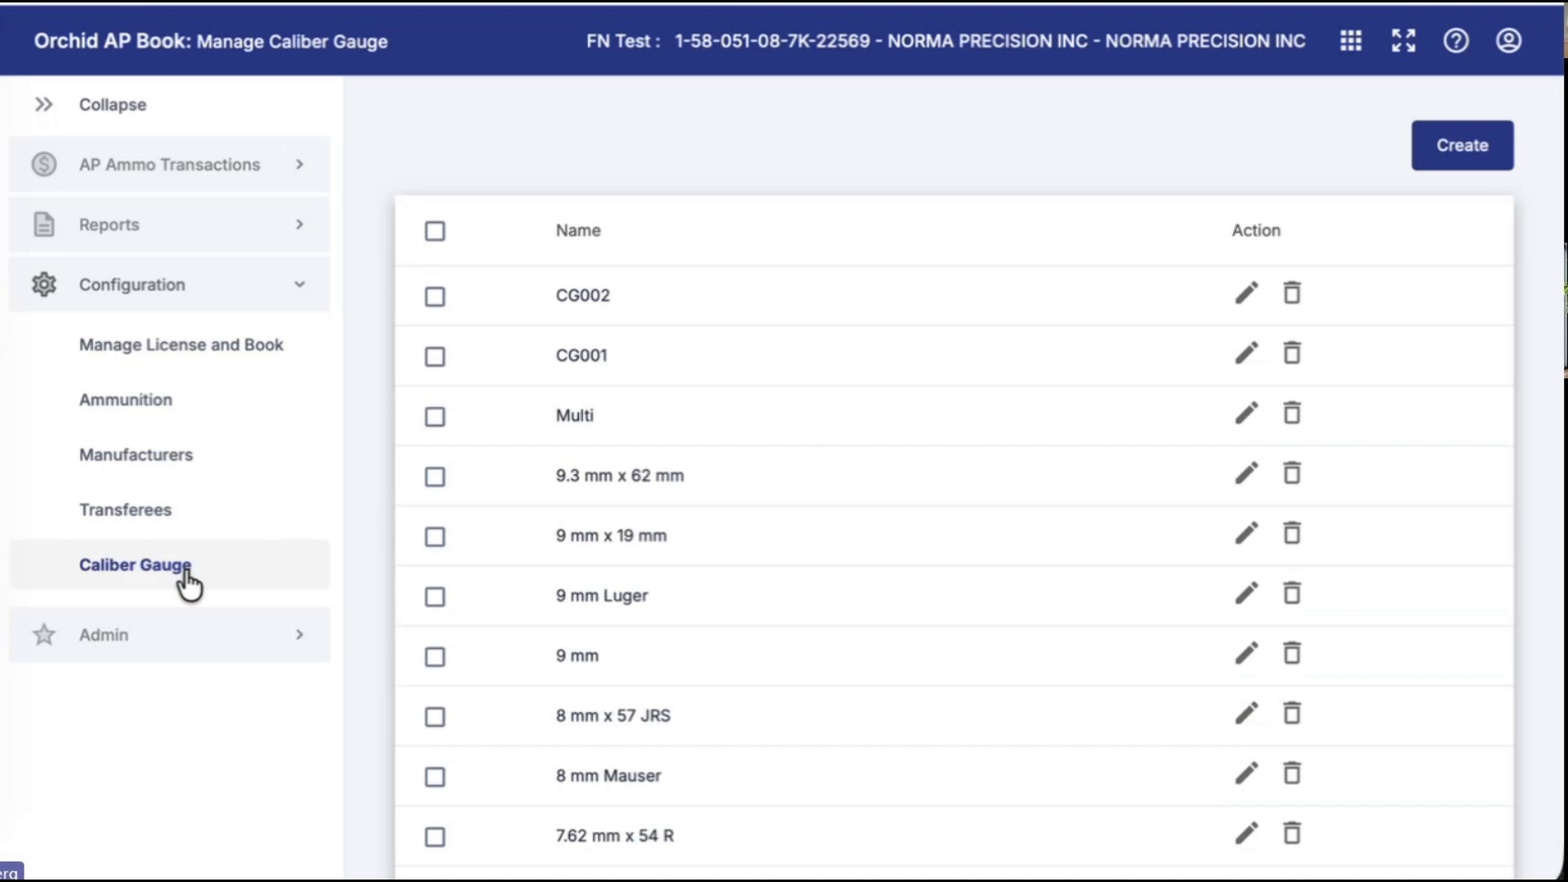
- Scroll through and edit caliber entries as needed. Use the pencil icon to edit a caliber name or the trash icon to delete one.
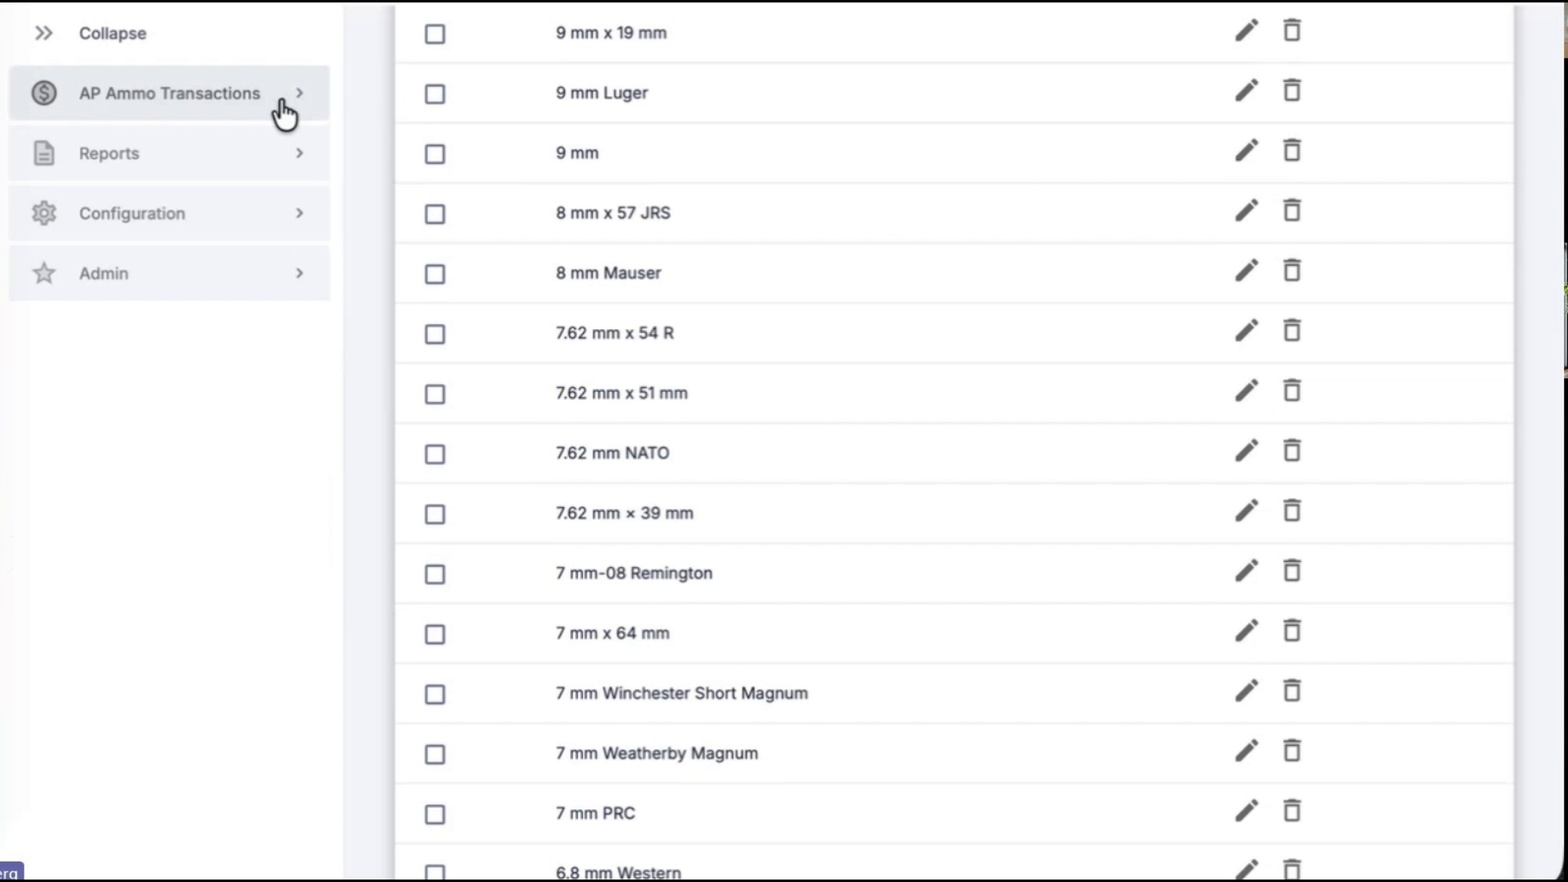
- Expand AP Ammo Transactions. Click AP Ammo Transactions in the left navigation to reveal Dispose and Theft / Loss.
- Open the Dispose screen. Click Dispose to open the disposition entry form.
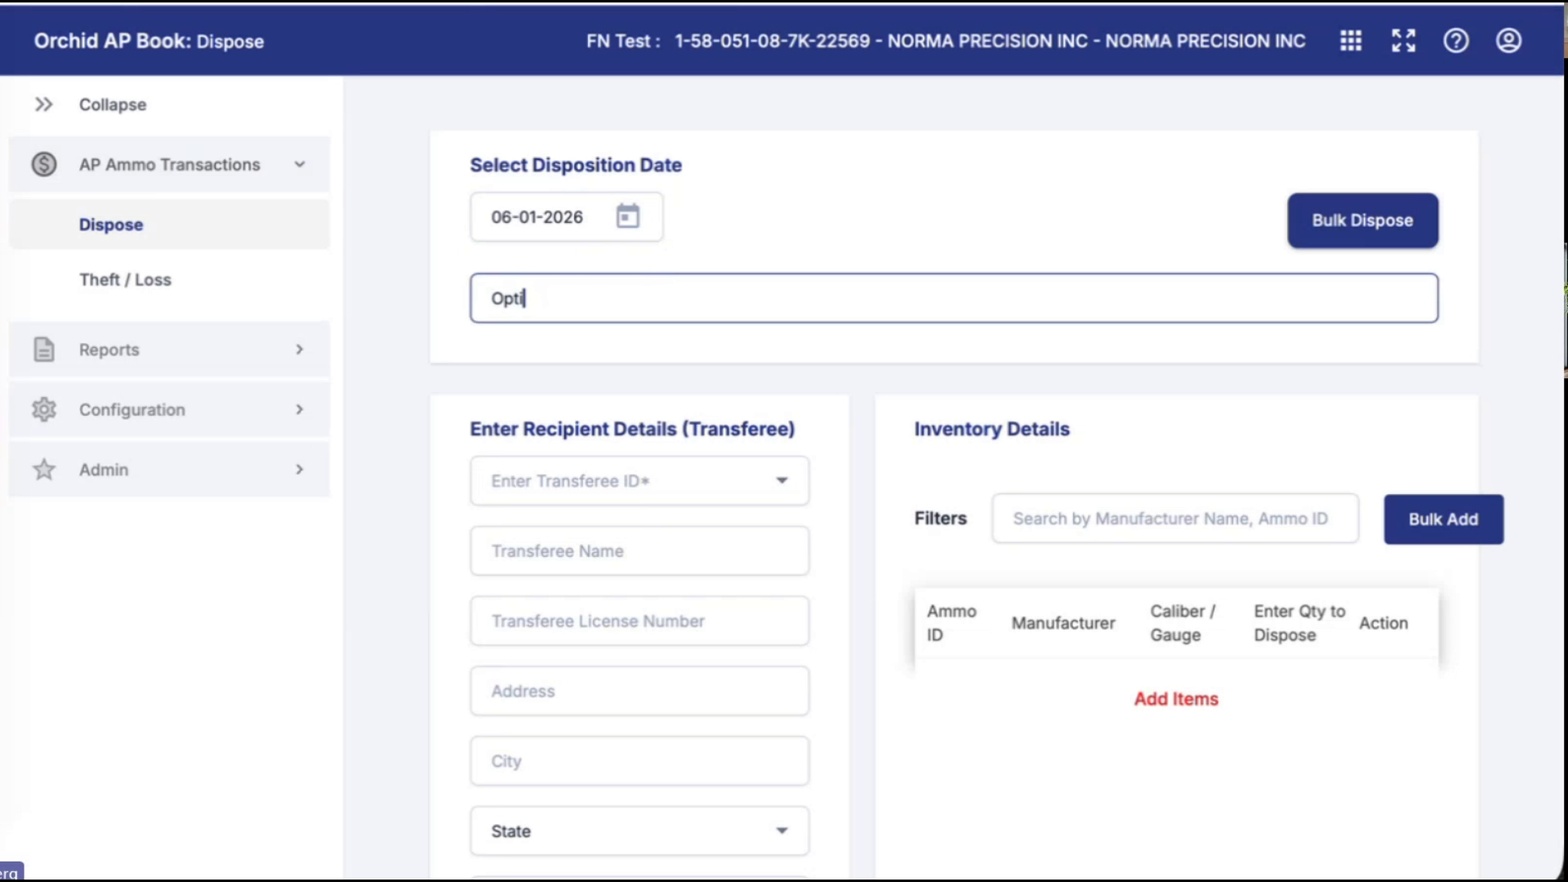
- Select the Disposition Date. Use the date picker to select the date of the disposition.
- Add an optional note. Type any notes into the Optional note field.
- Open the Transferee ID dropdown. Click Enter Transferee ID under Enter Recipient Details (Transferee) to view existing transferees or add a new one.
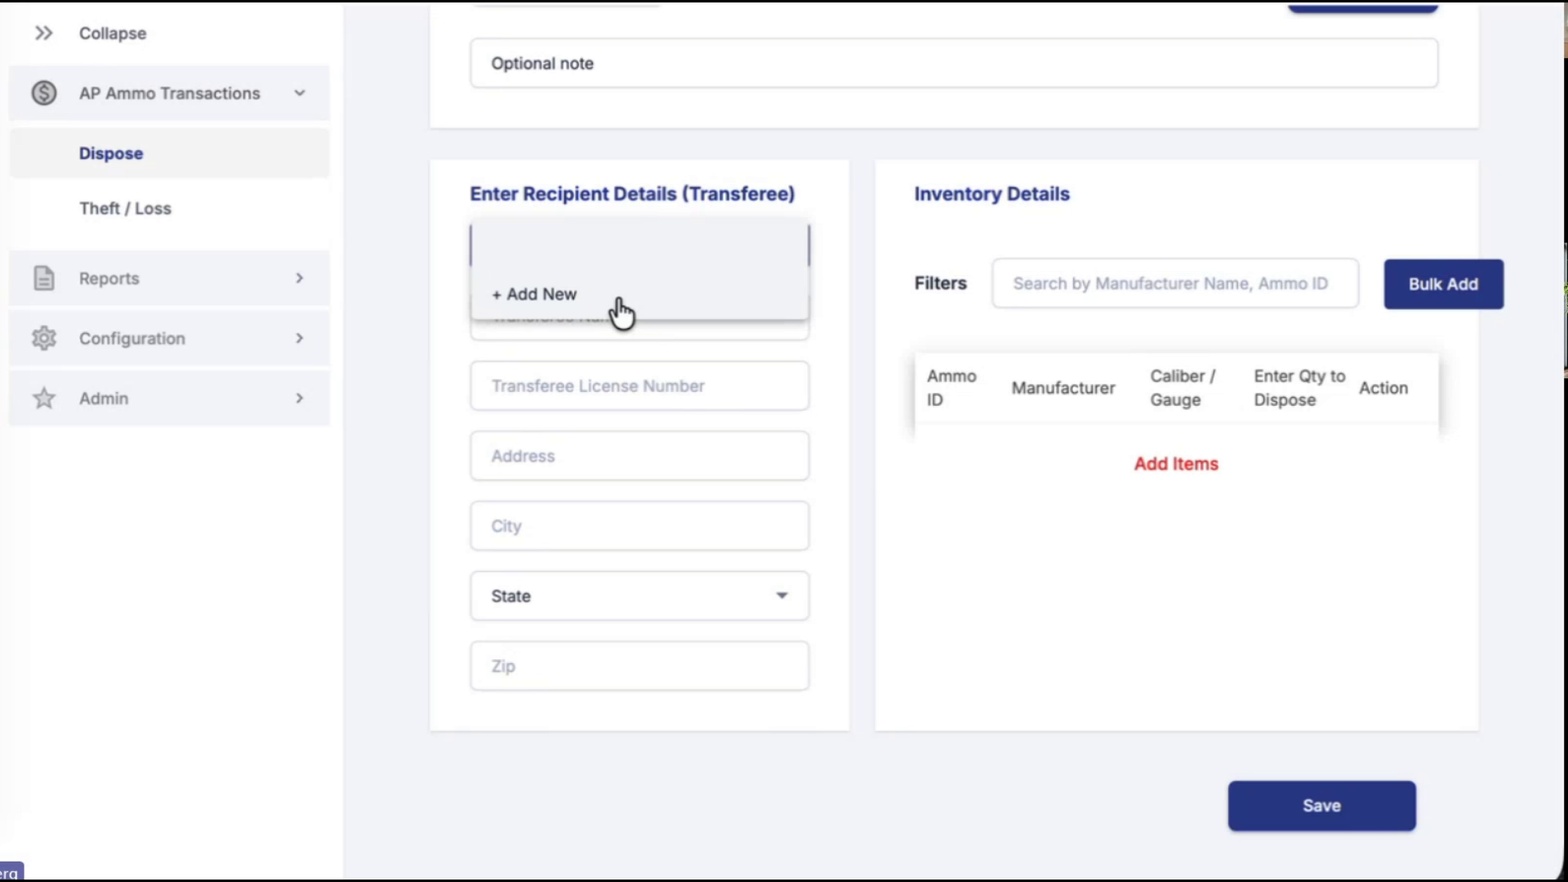
- Click + Add New to create a transferee. This opens the Create Transferee dialog.
- Choose a Customer type. Select Government, Law Enforcement, or FFL from the Customer type dropdown.
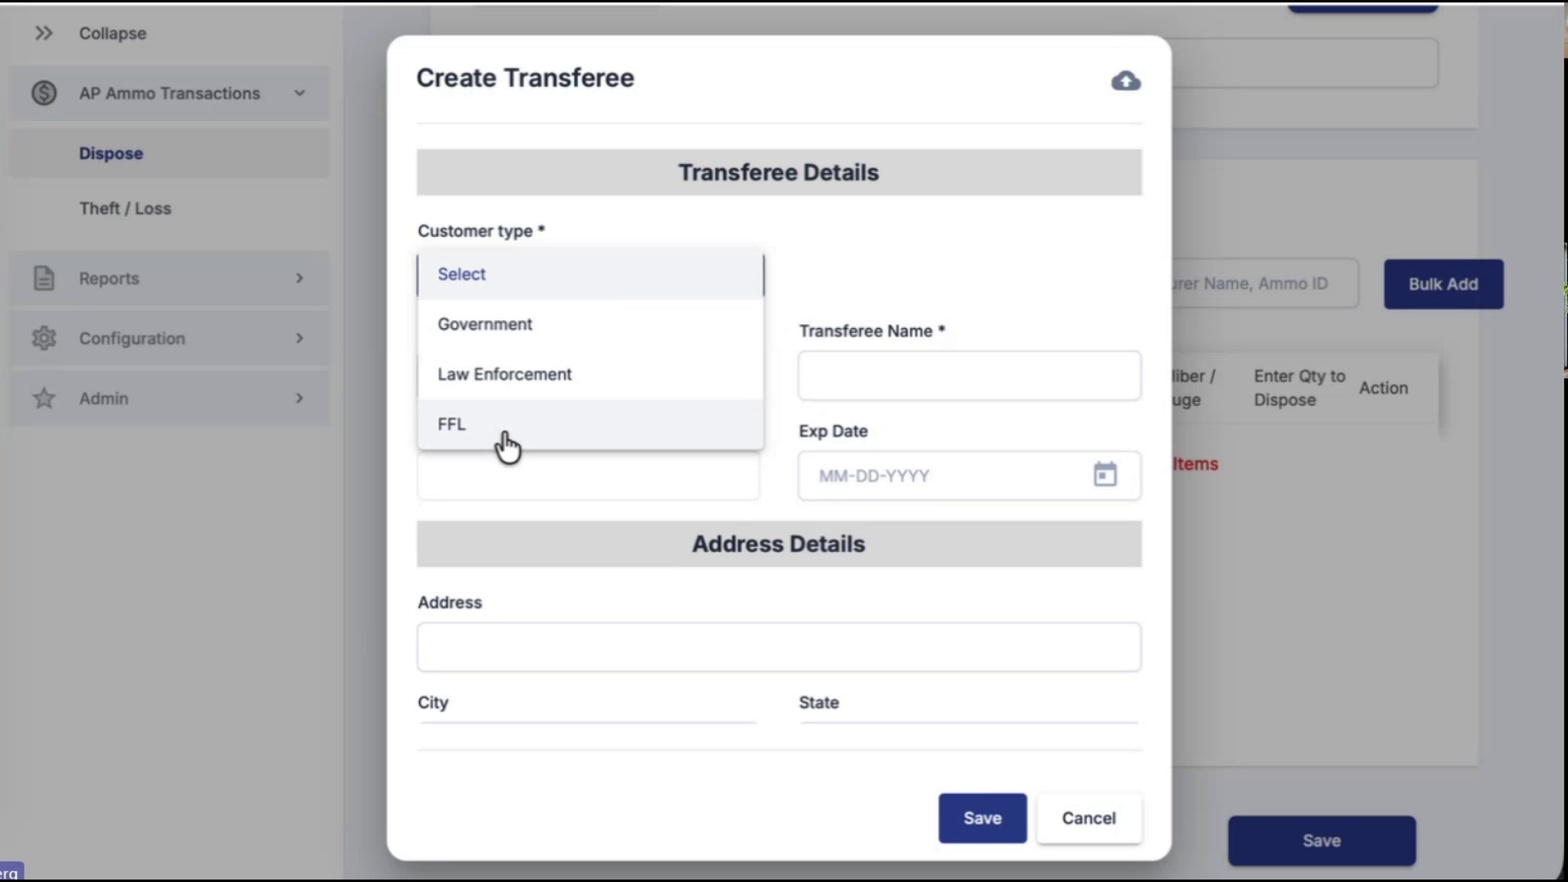
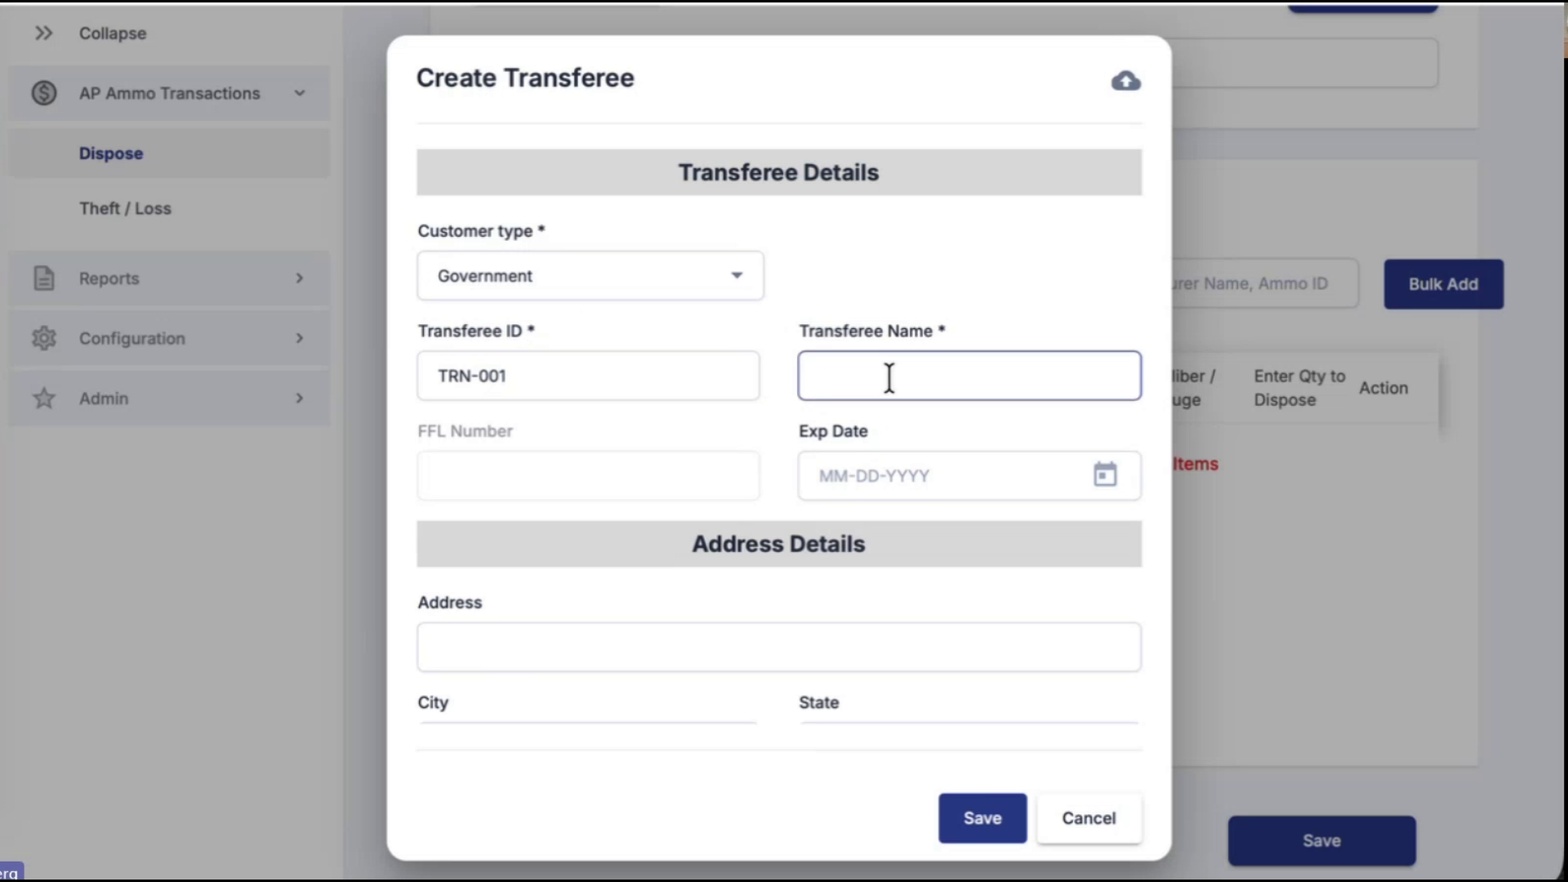
- Enter the Transferee ID. Type a unique ID (for example, TRN-001) into the Transferee ID field.
- Enter the Transferee Name. Type the recipient's full name into the Transferee Name field.
- Enter the FFL Number (if applicable). When Customer type is FFL, the FFL Number field is required. For Government transferees, this field is optional.
- Select the Exp Date. Click the calendar icon and choose the expiration date from the date picker.
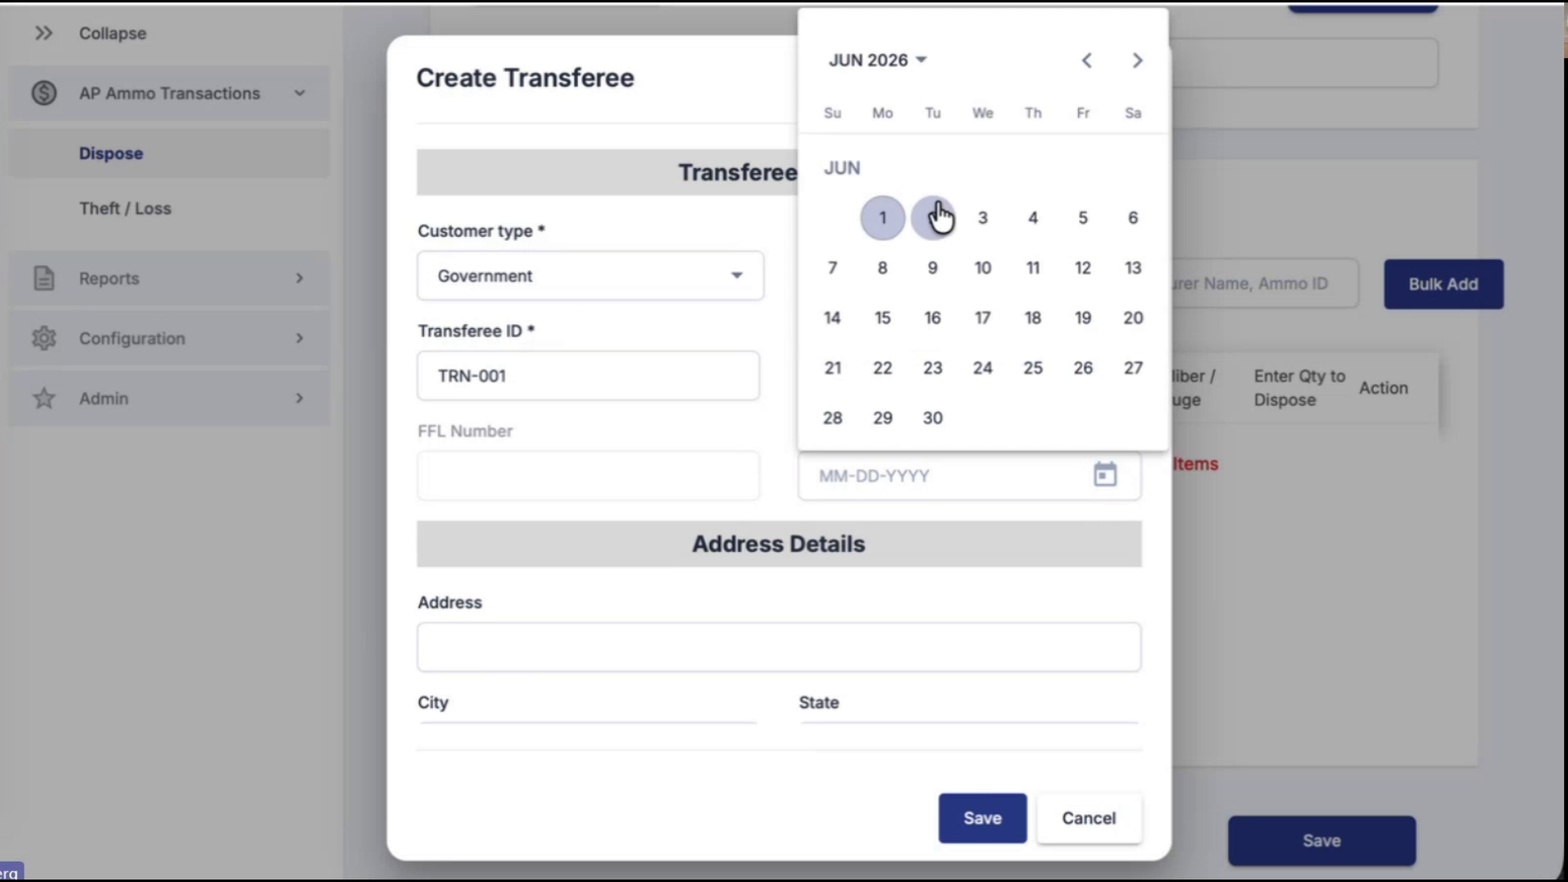
- Complete the Address Details. Fill in the Address, City, and State fields under Address Details.
- Save the transferee. Click Save to add the recipient to your transferee list.
- Add Inventory Details to the disposition. In the Inventory Details panel, use the Filters search box to find ammunition by Manufacturer Name or Ammo ID, or click Bulk Add to add multiple items at once.
- Enter the quantity to dispose. For each line item, enter the value in the Enter Qty to Dispose column.
- Save the disposition. Click Save at the bottom of the Dispose screen to record the disposition.
Expected Result
Your AP Ammo Book is now configured with company settings, users and roles, an active FFL license, ammunition records, transferees, and caliber gauges. The dashboard header displays your active license, and you can record AP ammunition dispositions from the Dispose screen.
Tip: Set your TimeZone and Date Format before creating any users or recording dispositions — these settings affect how timestamps appear throughout the system and on reports.