Section 1: Fel Quick Start
How to Complete the Orchid FEL Quick Start Setup
Get your Orchid FEL Book account configured and ready to track explosives acquisitions and dispositions. This quick start walks through selecting your default FEL record, setting account preferences, creating users and roles, and reviewing the configuration tables that drive your A&D book.
Steps
- Sign in to Orchid FEL Book and review the Dashboard. The Dashboard displays Total Lbs of On-hand Inventory, Oldest Inventory On-hand, Average Age of Inventory, and an Acquisitions and Dispositions chart for the last 30 days.
- Confirm the active FEL record displayed in the header. The top banner shows the FEL number, license type, and business name currently in use (for example, 5-AR-119-23-7B-00837 - Strategic Global Defense).
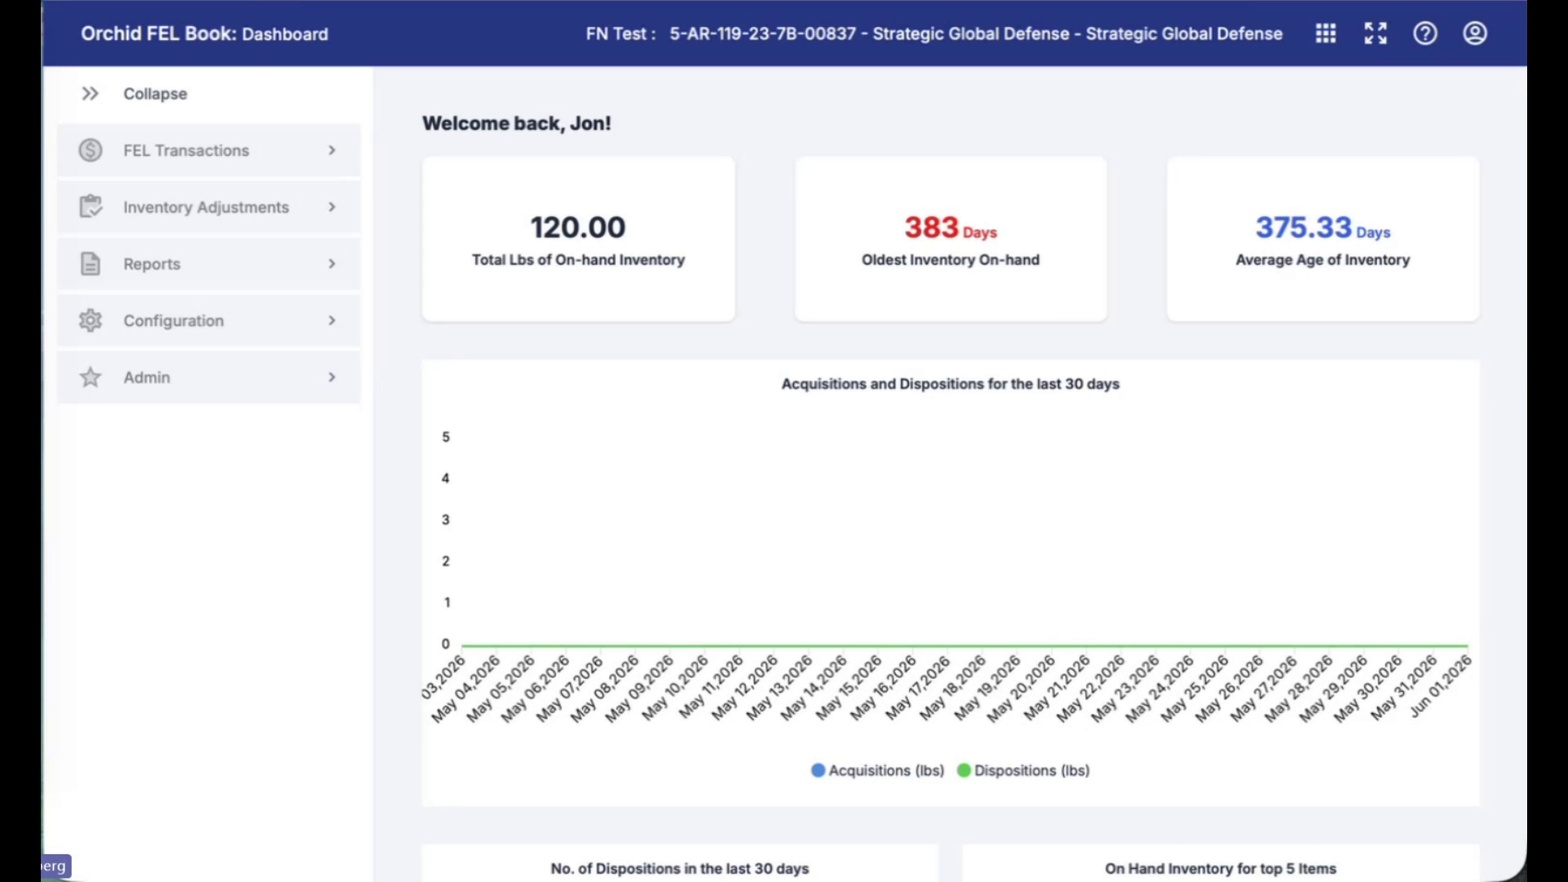
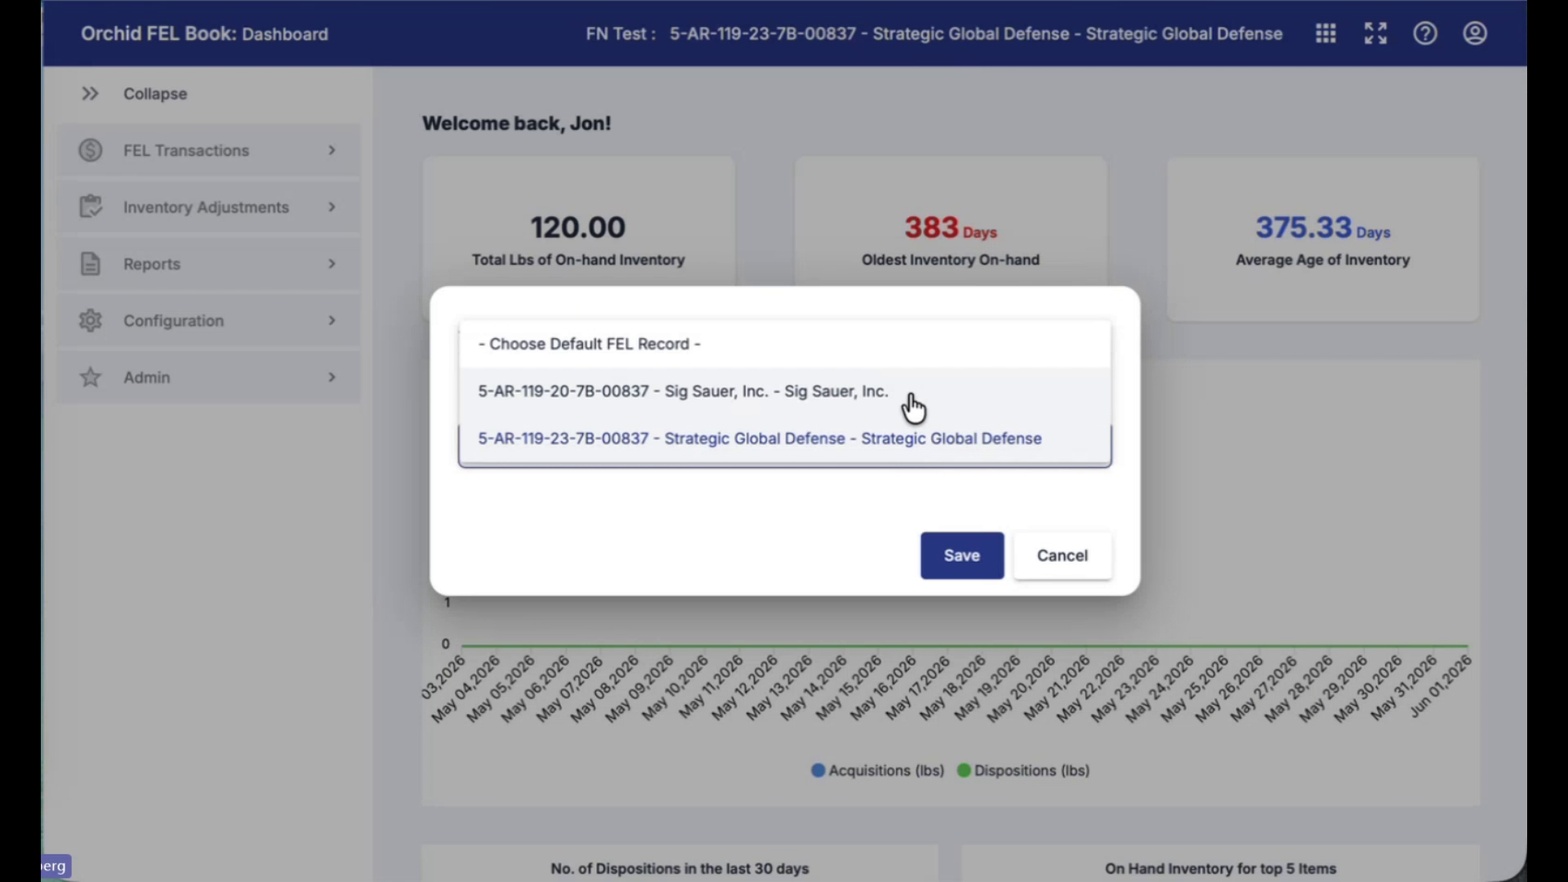
- Open the FEL record selector to change the default record. If you manage multiple FELs, click the FEL number in the header to open the Choose Default FEL Record dialog and pick the license you want to work in.
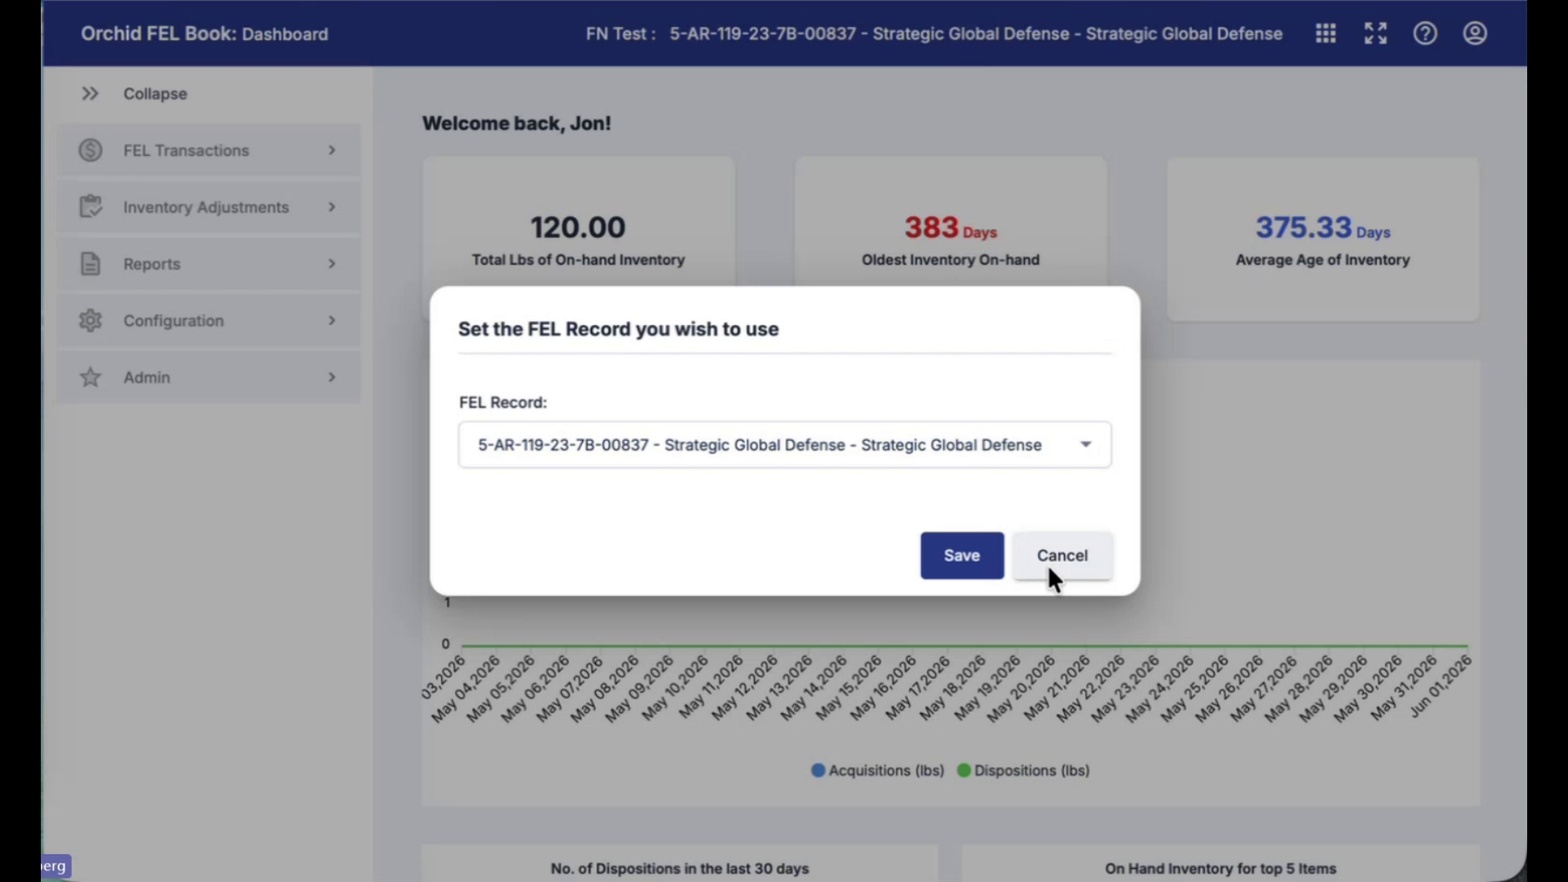
- Set the FEL record you wish to use and click Save. In the Set the FEL Record you wish to use dialog, choose the record from the dropdown and click Save (or Cancel to back out).
- Locate the Support (?) icon in the top-right toolbar. Hover the question mark icon to access support resources at any time during setup.
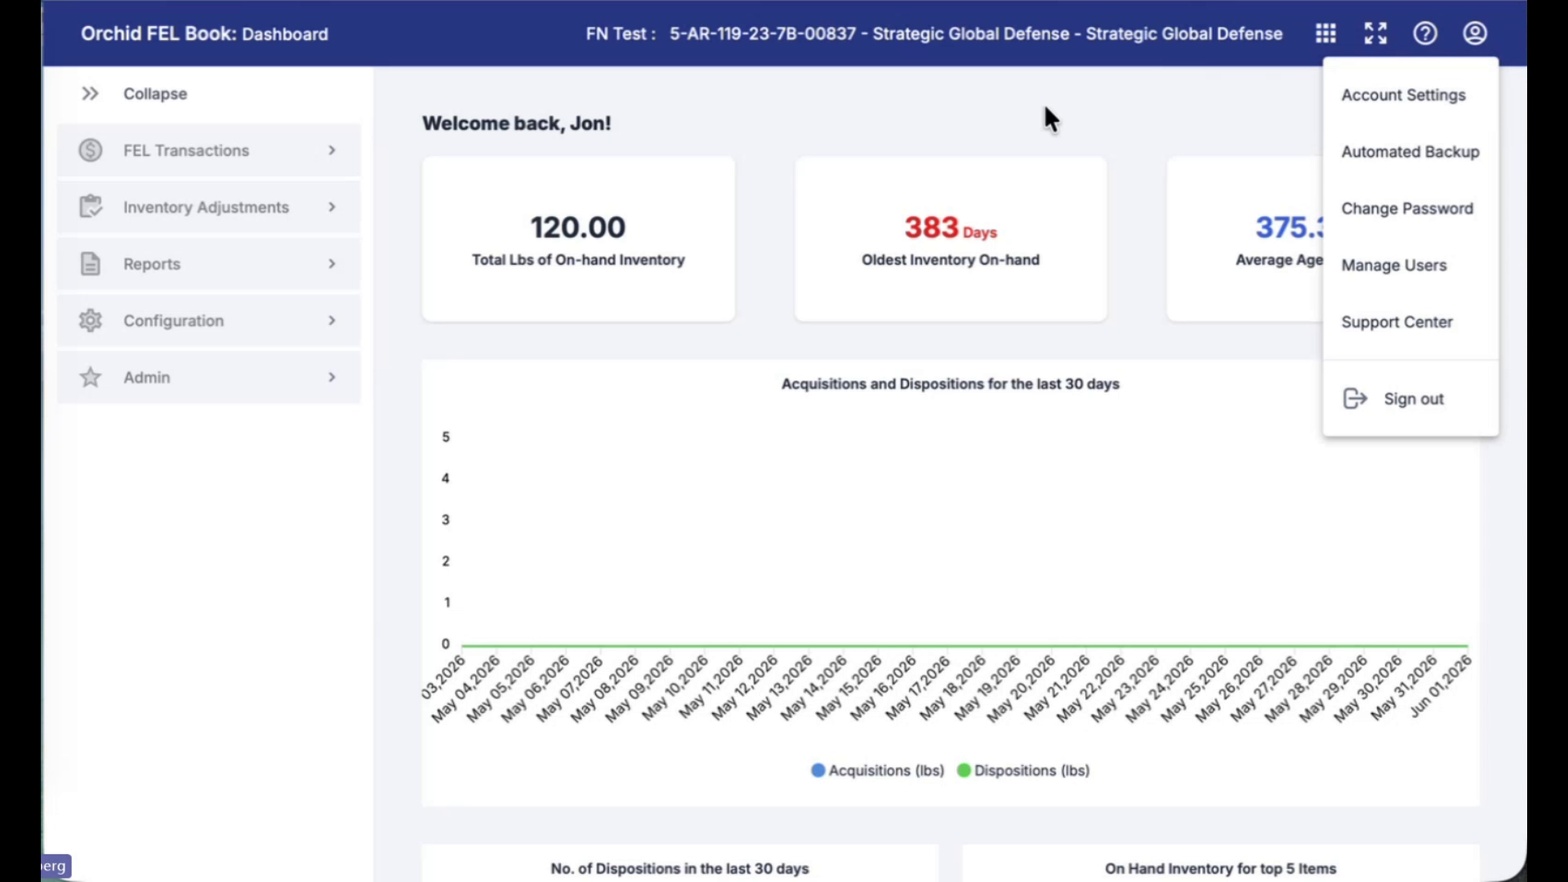
- Open the user profile menu. Click the profile icon (far right) to access Account Settings, Automated Backup, Change Password, Manage Users, Support Center, and Sign out.
- Expand the Admin section from the left navigation. Click Admin in the left menu to reveal Account Settings, Automated Backup, Manage Users, Manage Roles, and Support Center.
- Open Account Settings to configure company and user preferences. Click Account Settings under Admin. The page displays Company Details, User Account TimeZone Settings, Date Format, and Time Format options.
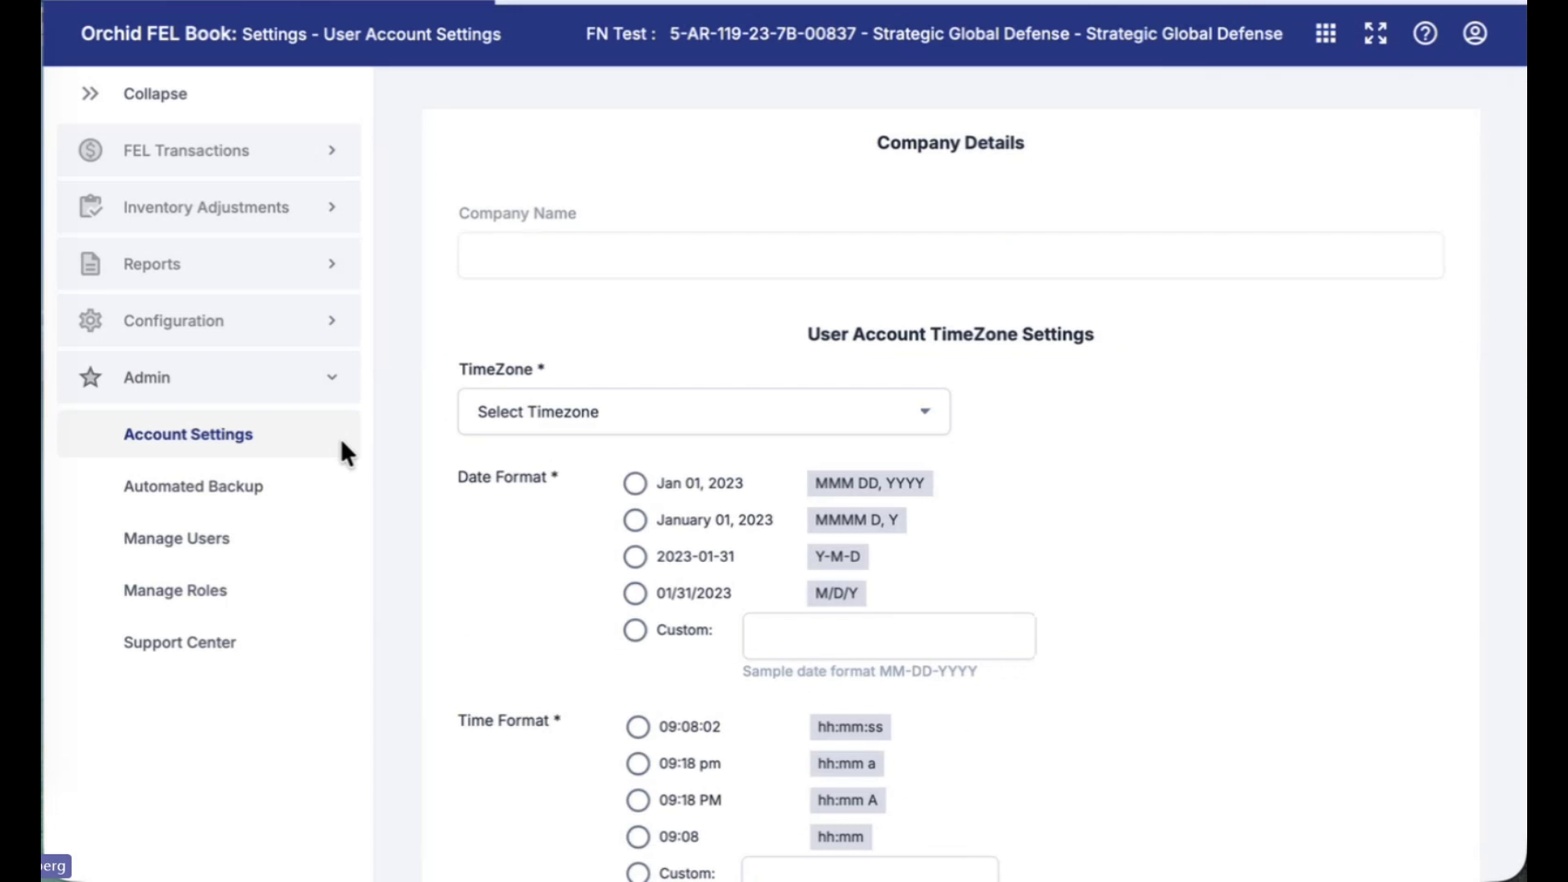
- Enter your Company Name. Type the legal company name into the Company Name field at the top of Account Settings.
- Select your TimeZone. Use the TimeZone dropdown to choose your local zone (for example, (GMT-05:00) Eastern Time (US & Canada)).
- Choose a Date Format. Select one of the radio options — Jan 01, 2023, January 01, 2023, 2023-01-31, 01/31/2023, or Custom (with a sample format of MM-DD-YYYY).
- Choose a Time Format. Pick 09:08:02 (hh:mm:ss), 09:18 pm (hh:mm a), 09:18 PM (hh:mm A), 09:08 (hh:mm), or Custom.
- Set the Manage Weight unit. Toggle the Manage Weight switch to either Lbs or Kg depending on how you want to track explosive weights.
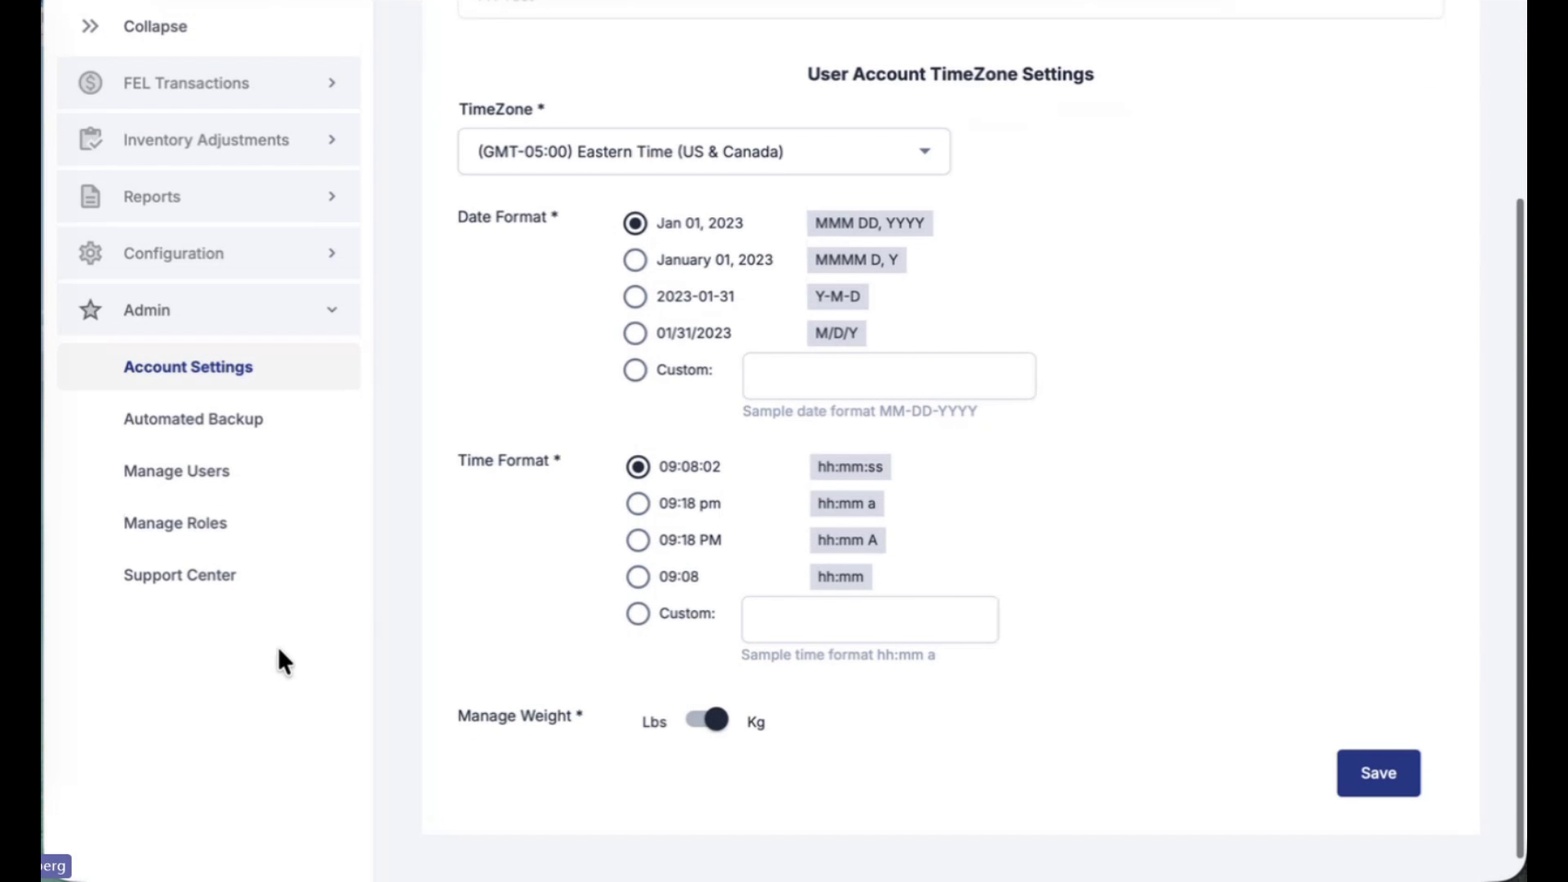
- Click Save to apply Account Settings. The Save button in the lower right commits all Company Details and User Account TimeZone changes.
- Open Manage Users. Click Manage Users under Admin to view existing users, search by email or name, and create new ones.
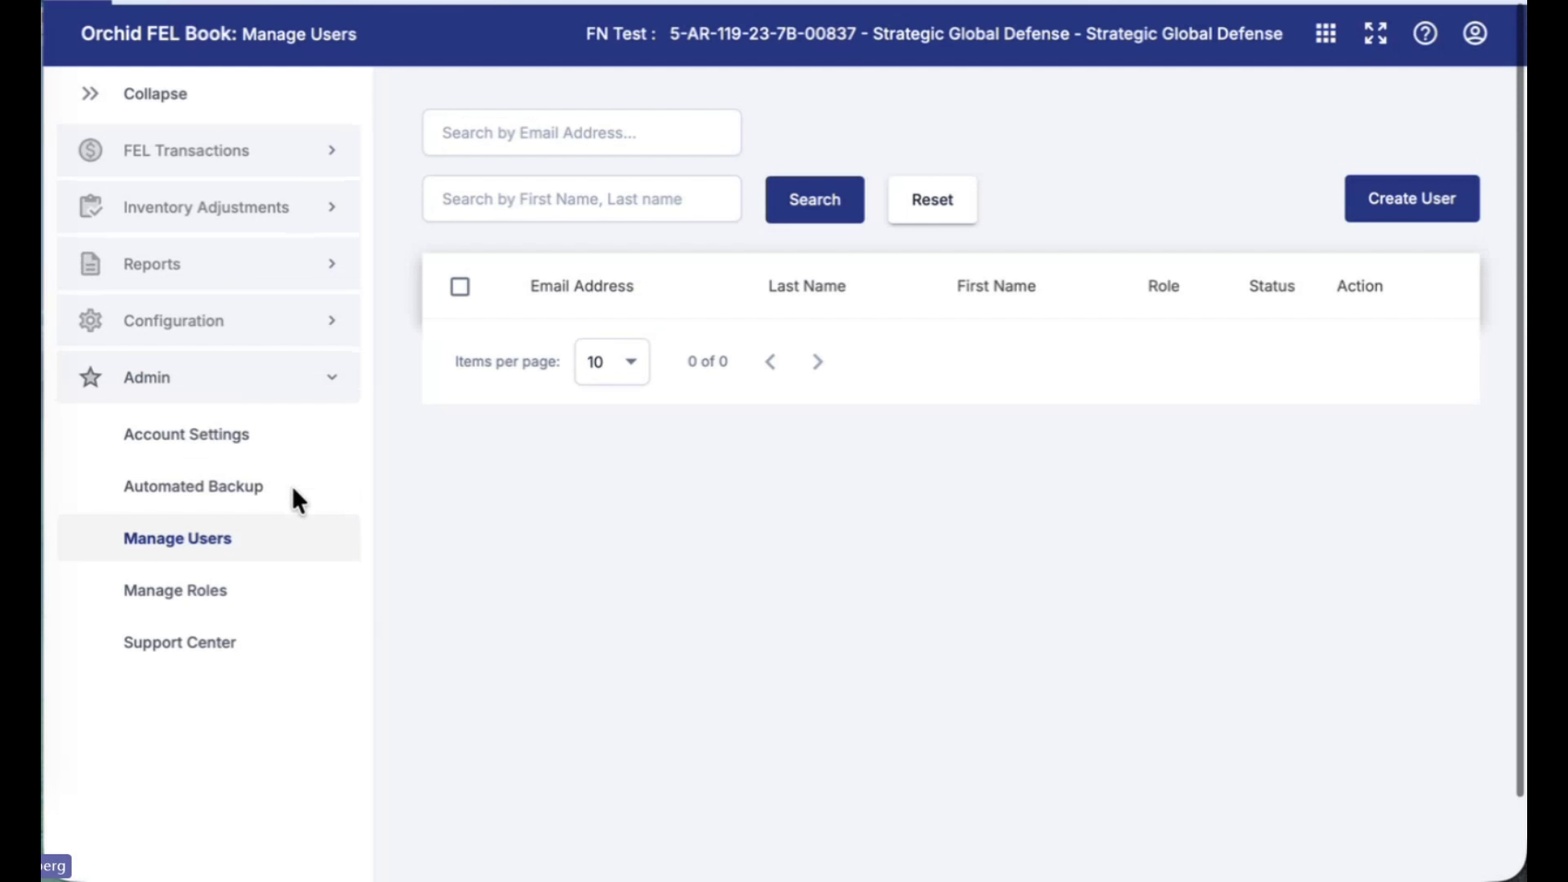
- Click Create User to add a new user. The Create New User dialog opens with fields for First Name, Last Name, Role, Email, Password, and Confirm Password.
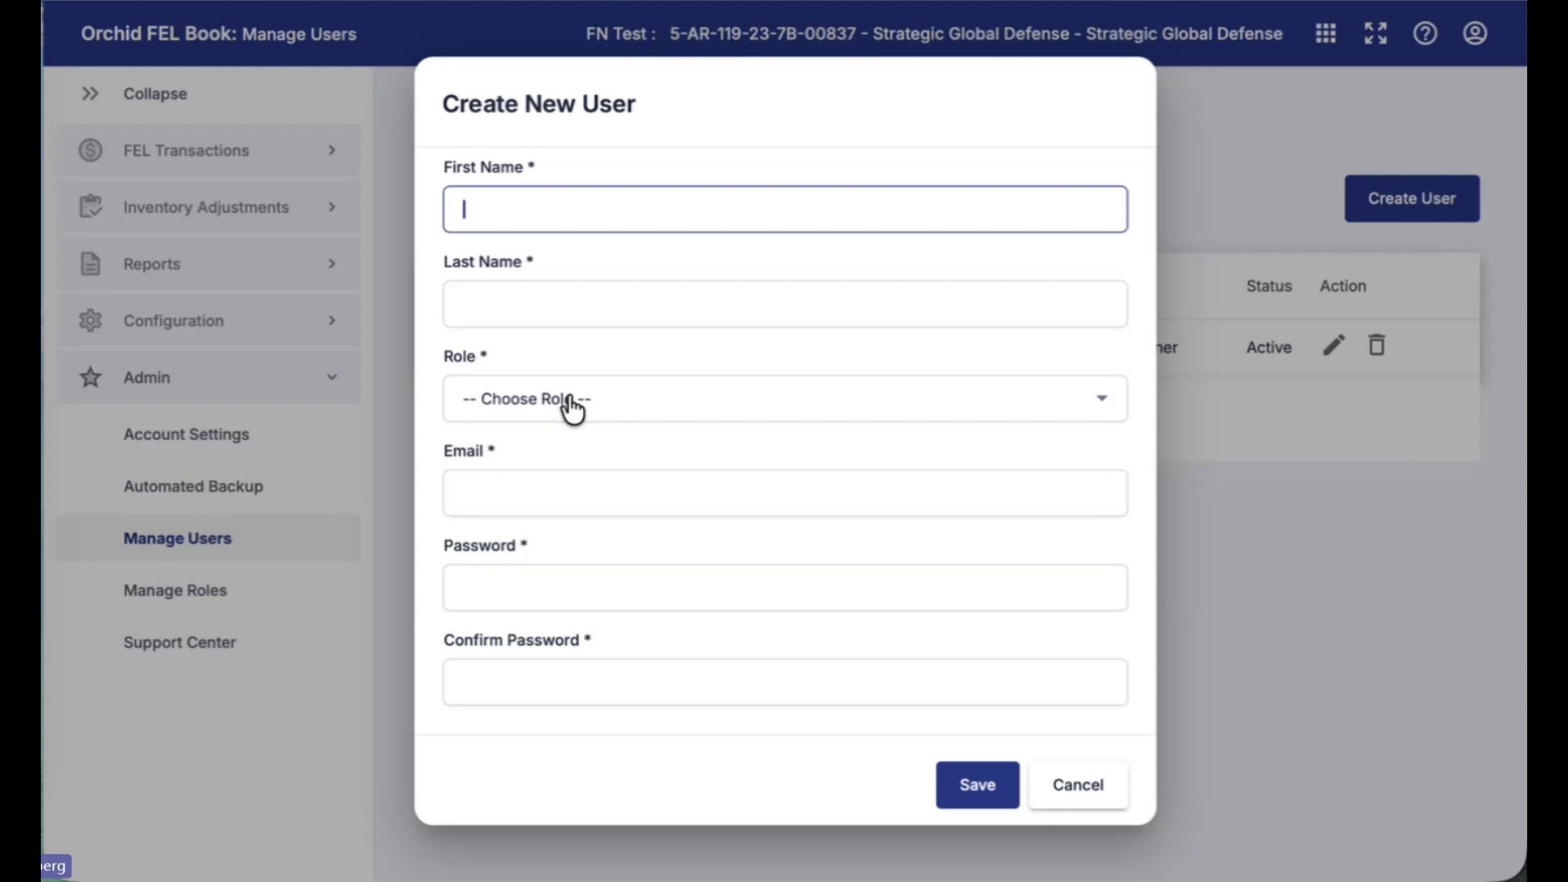
- Complete the Create New User form and Save. Enter First Name, Last Name, choose a Role from the dropdown, enter Email, Password, and Confirm Password, then click Save (or Cancel to abandon).
- Open Manage Roles. Click Manage Roles under Admin to see the existing roles (for example, User Admin and Basic User).
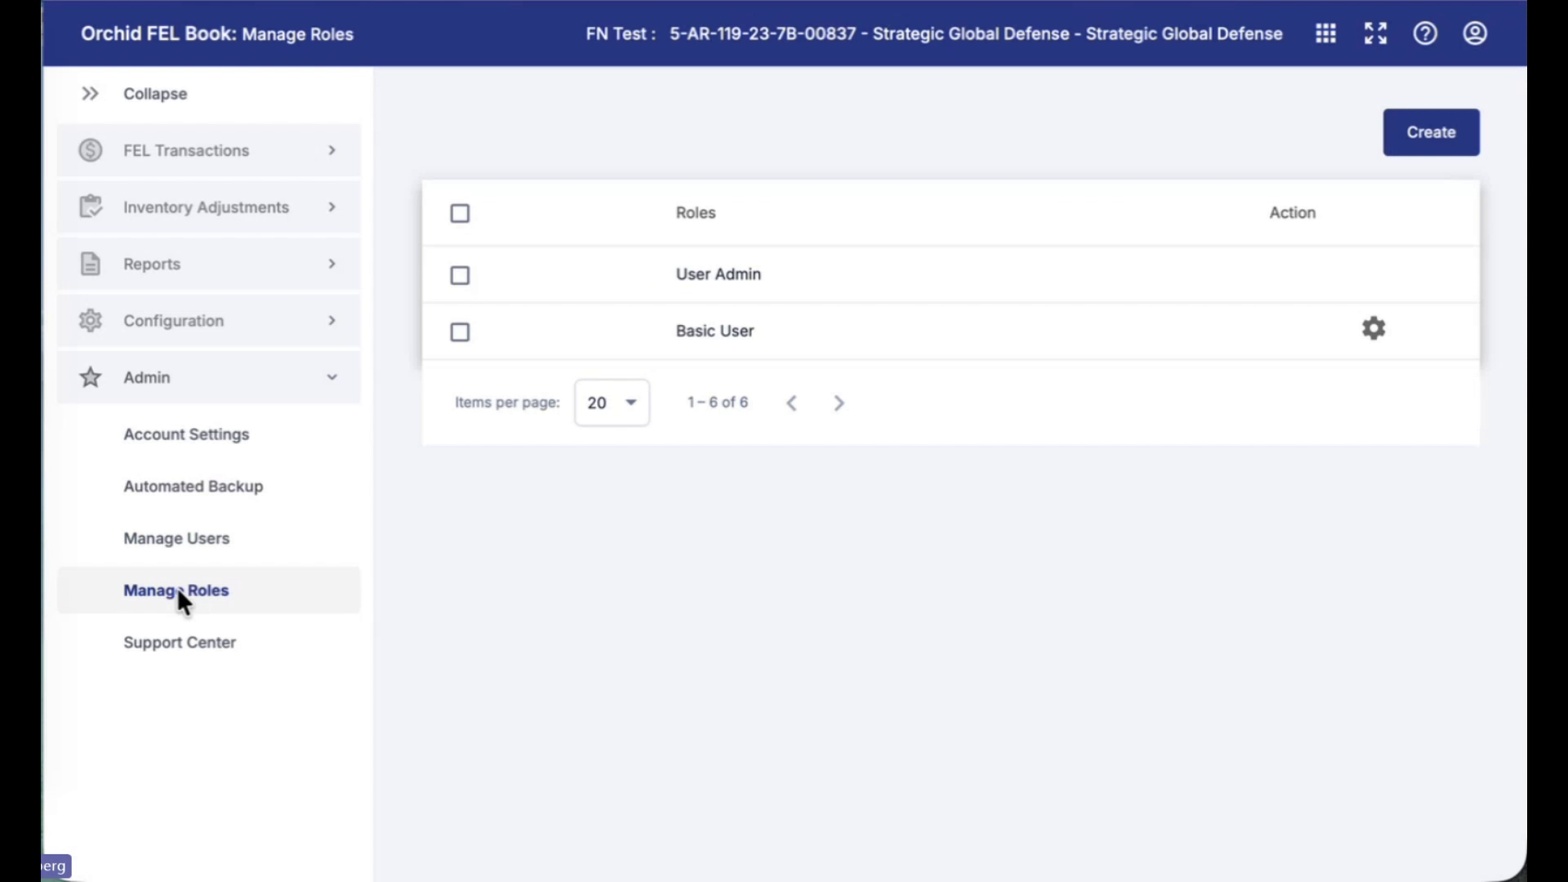
- Click Create to add a new role. The Create Role dialog opens. Enter a Role Name (such as New Role) and click Save.
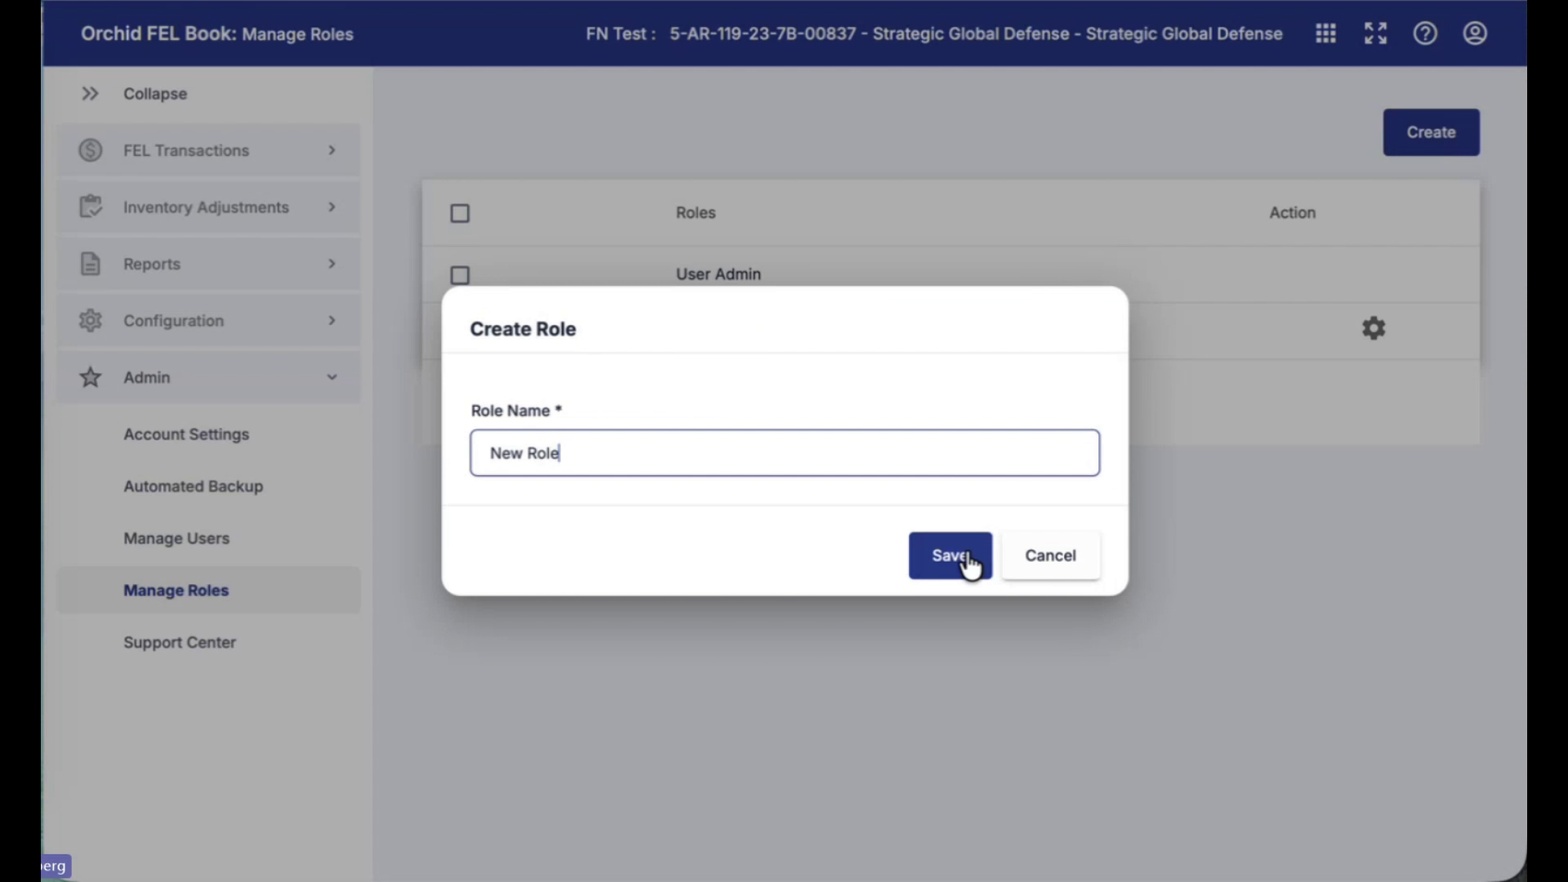
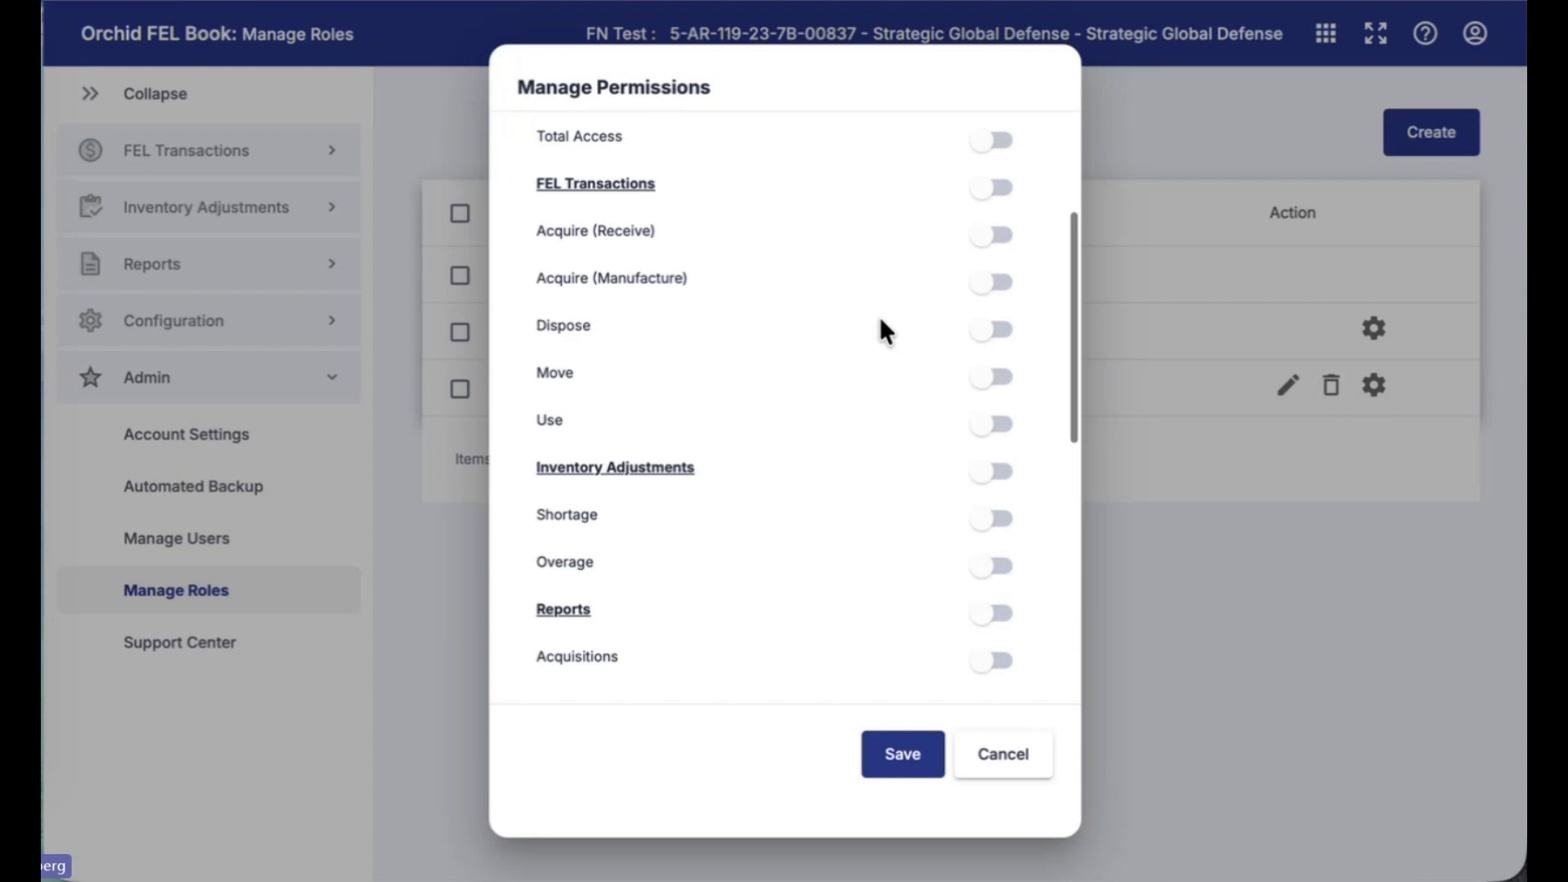
- Open Manage Permissions for the new role. Click the gear icon next to the role to open the Manage Permissions dialog.
- Toggle permissions for FEL Transactions, Inventory Adjustments, and Reports. Enable or disable Total Access, Acquire (Receive), Acquire (Manufacture), Dispose, Move, Use, Shortage, Overage, and Acquisitions (Reports). Click Save when finished.
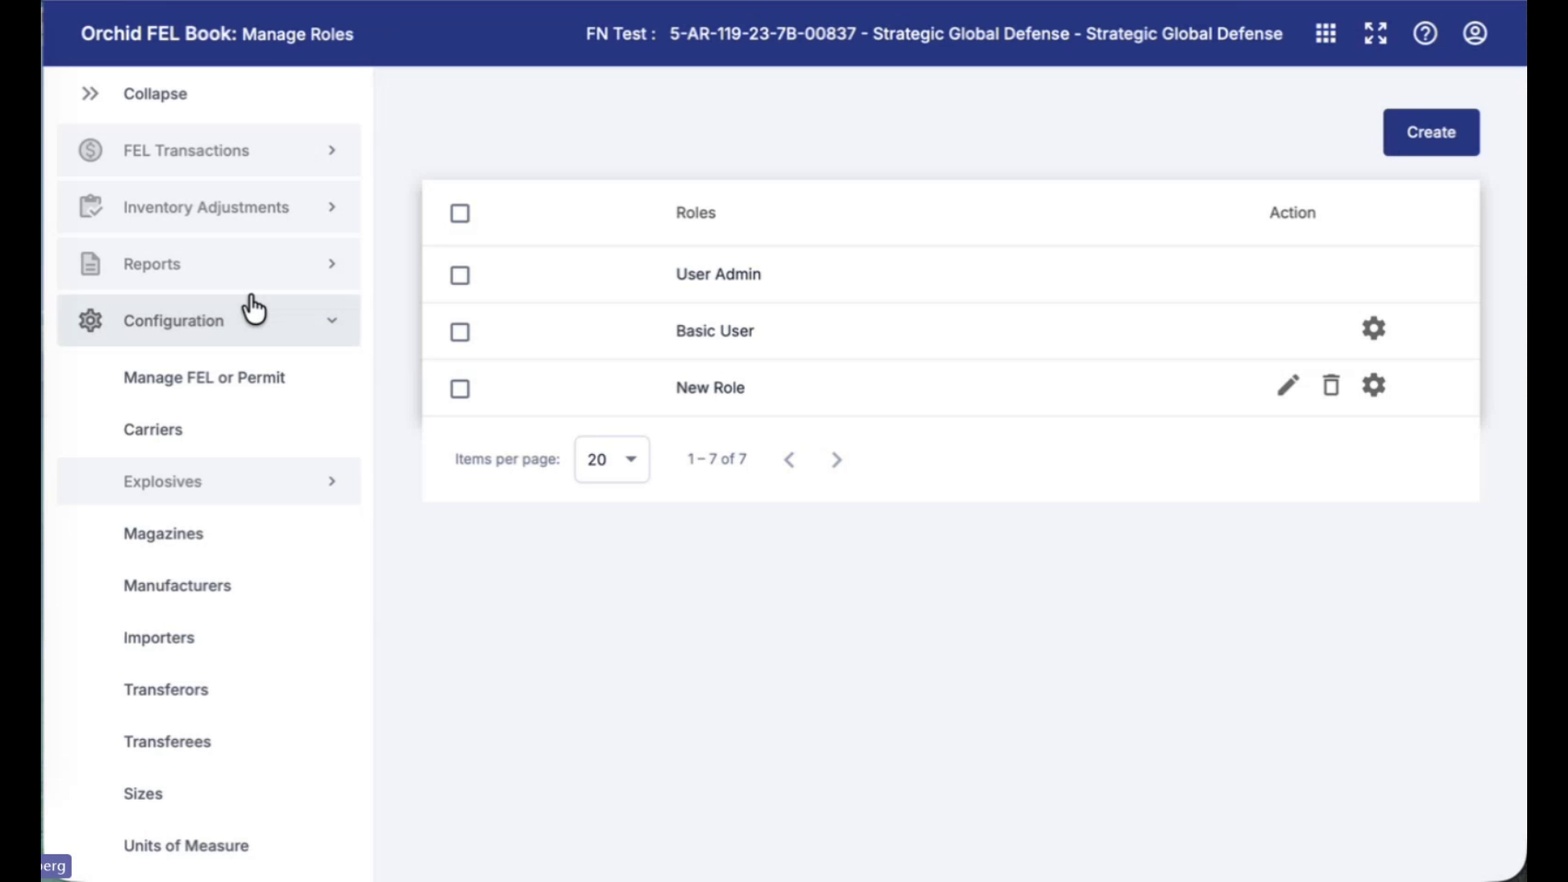
- Confirm the new role appears in the Manage Roles list. The new role displays with edit, delete, and permissions (gear) action icons.
- Expand the Configuration menu in the left navigation. Click Configuration to reveal Manage FEL or Permit, Carriers, Explosives, Magazines, Manufacturers, Importers, Transferors, Transferees, Sizes, and Units of Measure.
- Open Manage FEL or Permit. Click Manage FEL or Permit to view all FEL/permit records with Number, Type, Exp Date, License/Permittee Name, Business Name, and Address columns.
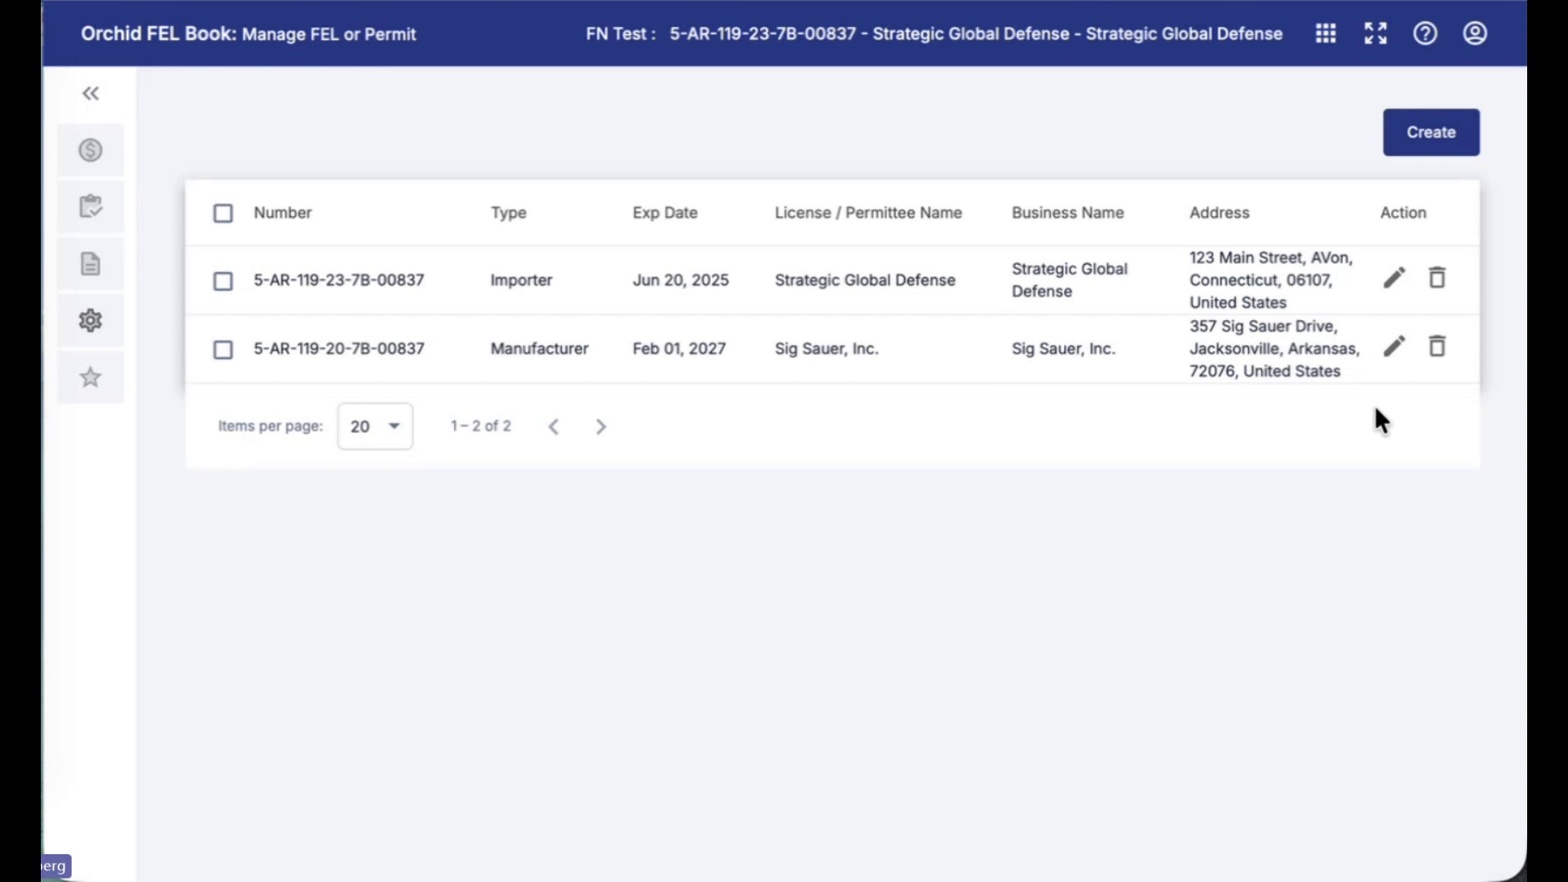
- Click Create to add a new FEL License or Permit. The Create FEL License or Permit dialog opens with fields for Type, Licensee/Permittee Name, Expiration Date, Business Name, and Business Address (Address, City, State, Zip, Country).
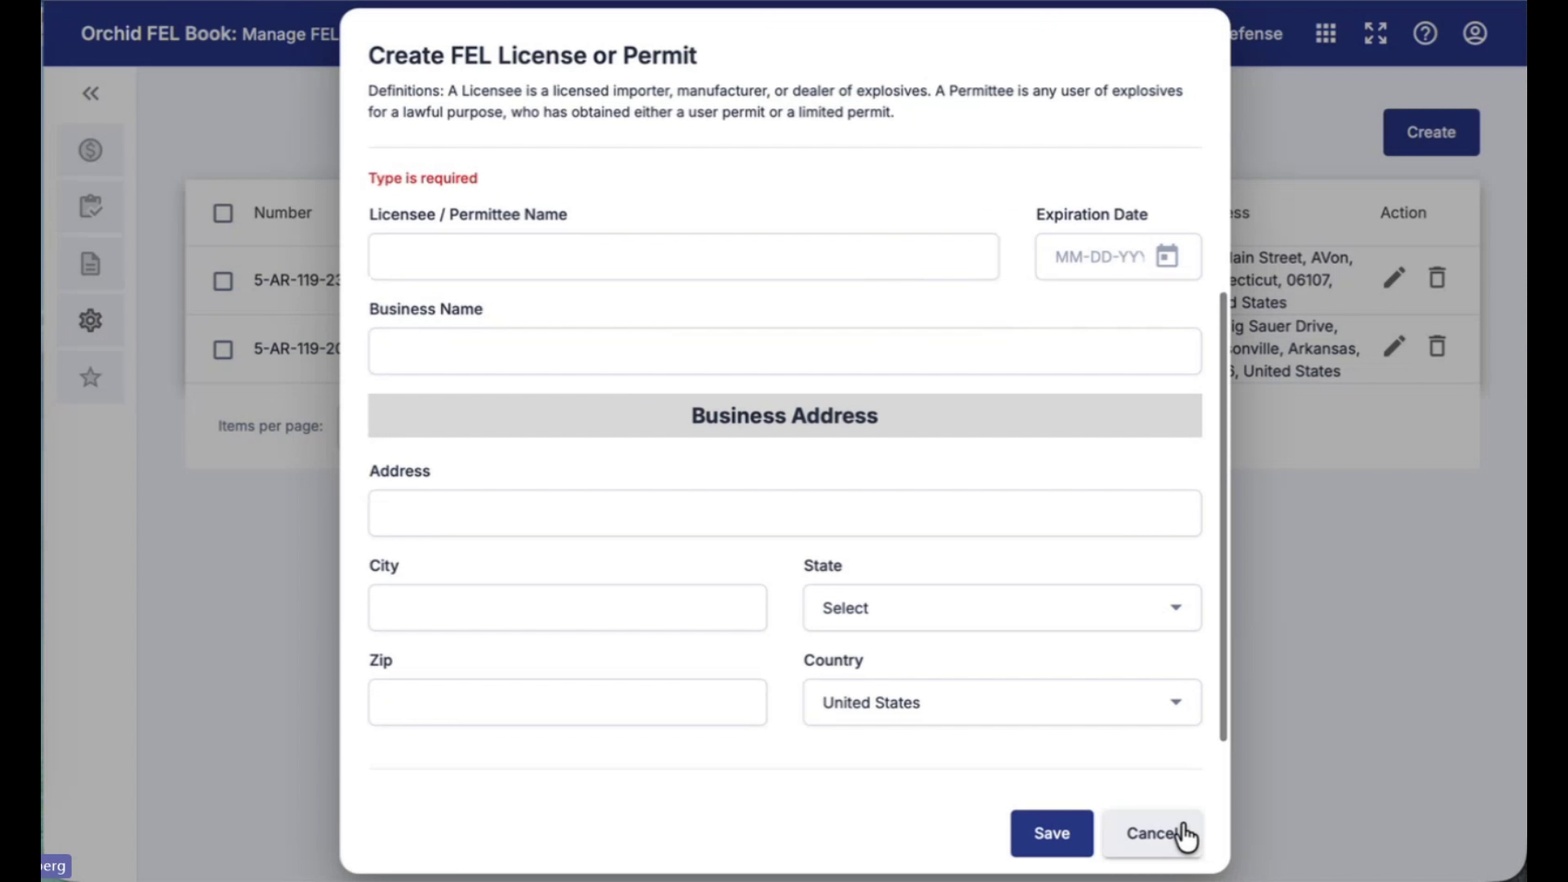
- Fill in all required fields and click Save. Type is required — choose Importer, Manufacturer, Dealer, or Permittee as applicable, then complete the address block and click Save.
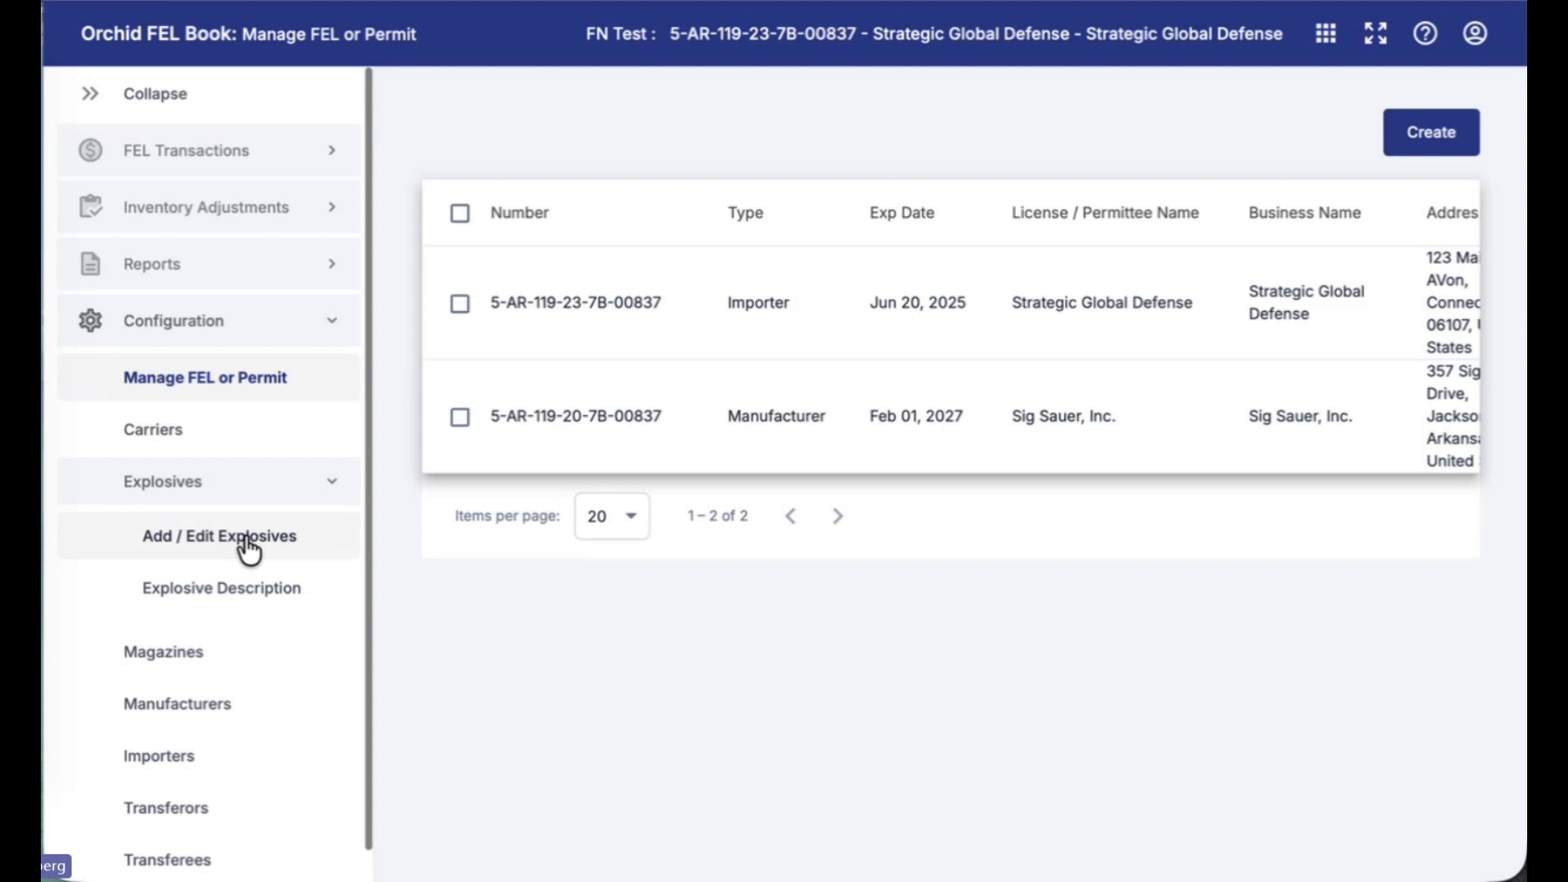
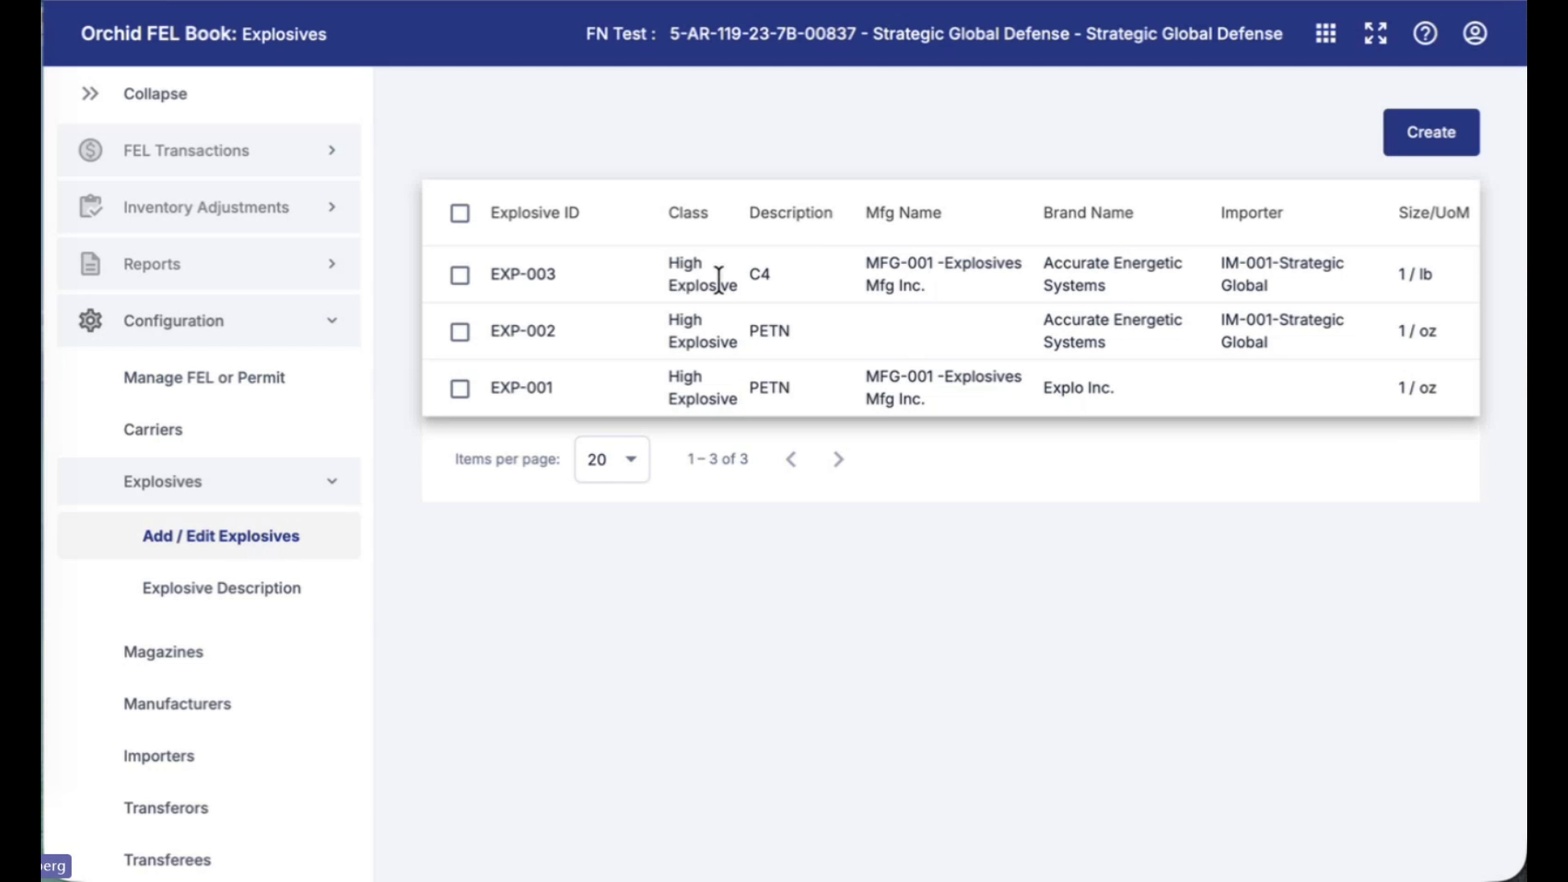
- Open Explosives → Add / Edit Explosives. Under Configuration, expand Explosives and click Add / Edit Explosives to manage explosive items by Explosive ID, Class, Description, Mfg Name, Brand Name, Importer, and Size/UoM.
- Review the Explosives list and Create as needed. Existing entries (such as EXP-001, EXP-002, EXP-003) display class and description. Click Create to add a new explosive item.
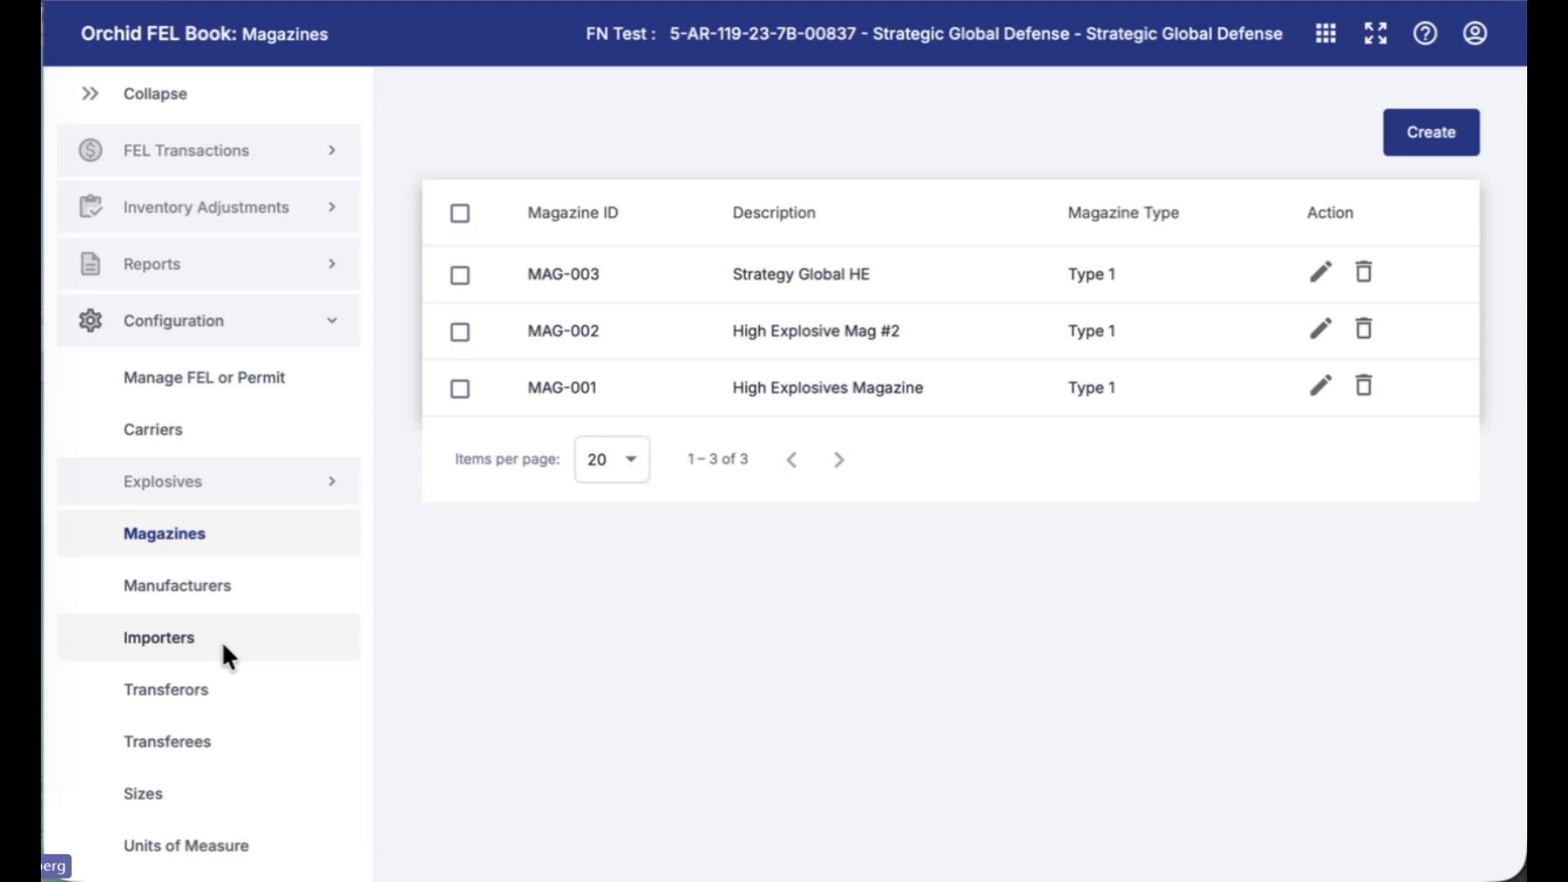
- Open Magazines. Click Magazines to view storage magazines by Magazine ID, Description, and Magazine Type.
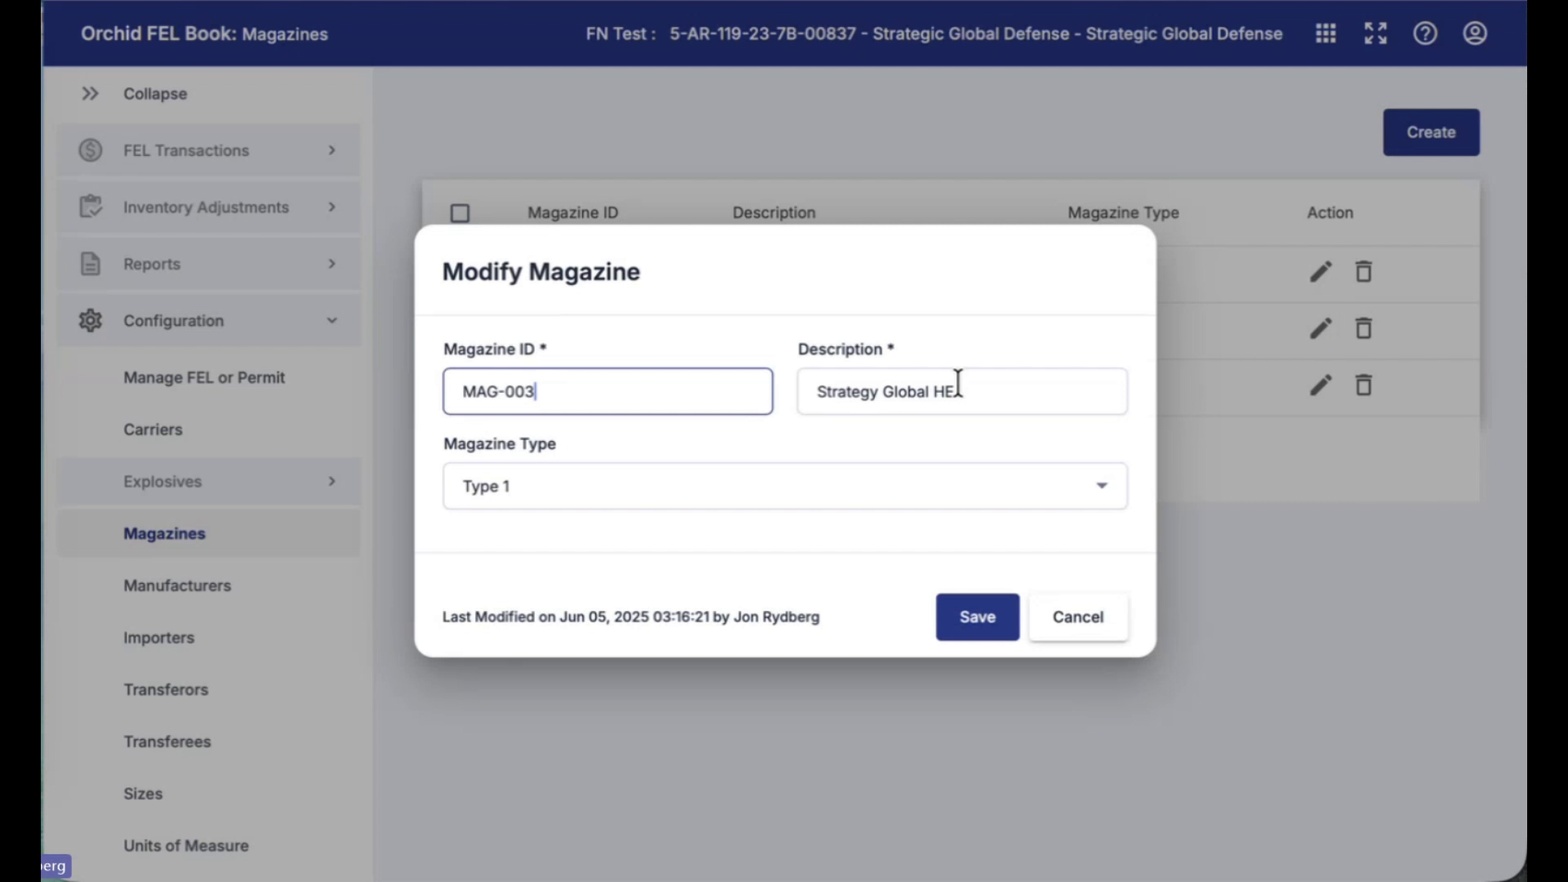
- Edit a magazine using the pencil icon. Click the pencil on a row to open Modify Magazine, where you can change Magazine ID, Description, and Magazine Type, then click Save.
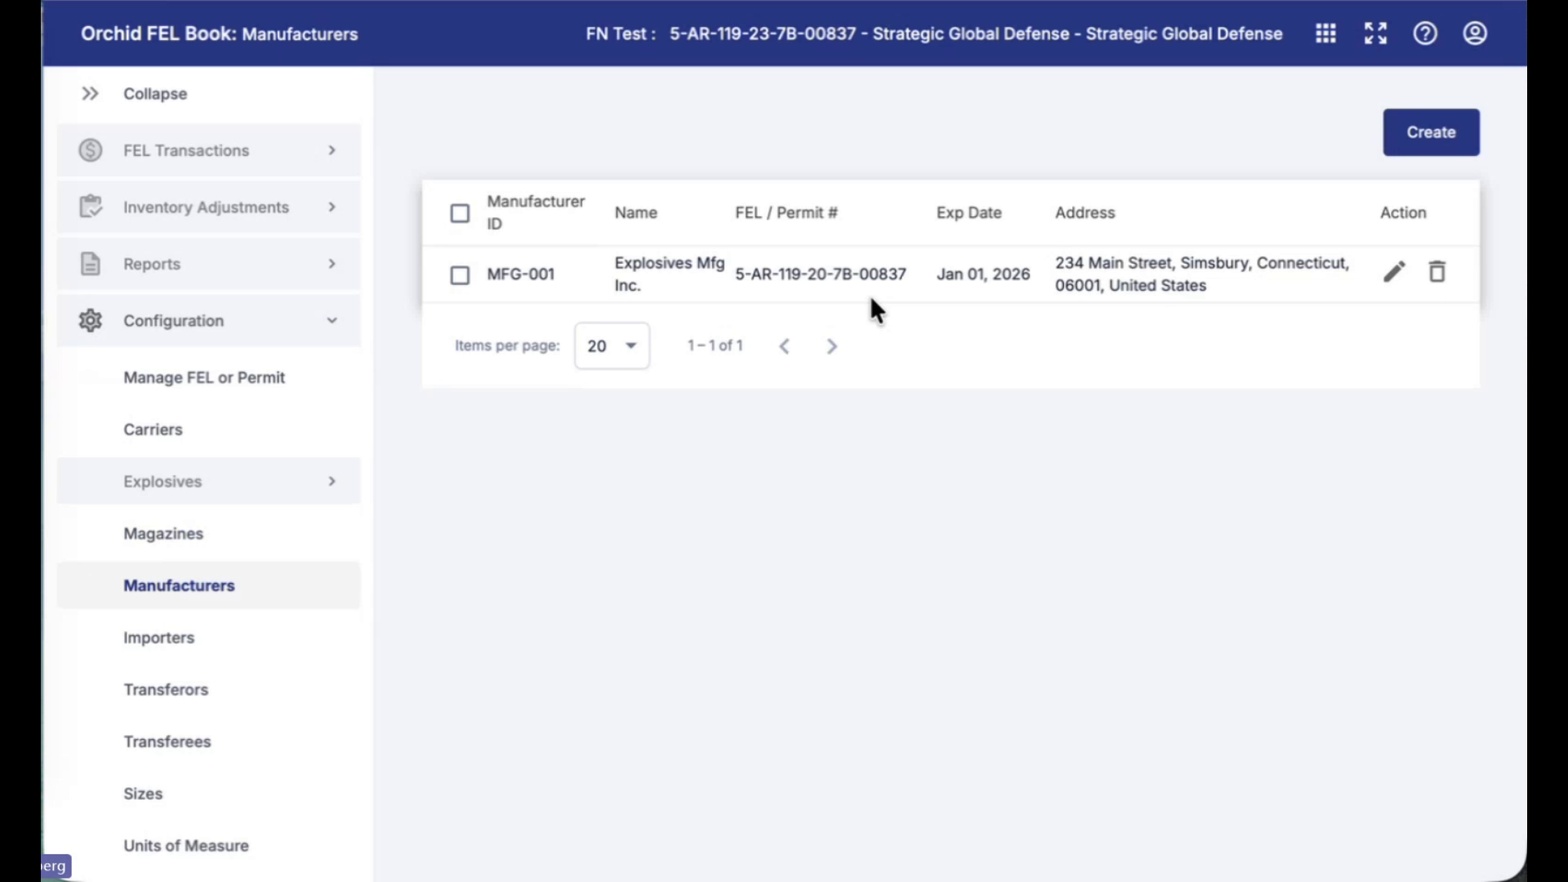
- Open Manufacturers. Click Manufacturers to view manufacturer records with Manufacturer ID, Name, FEL/Permit #, Exp Date, and Address. Use Create to add a new manufacturer.
.
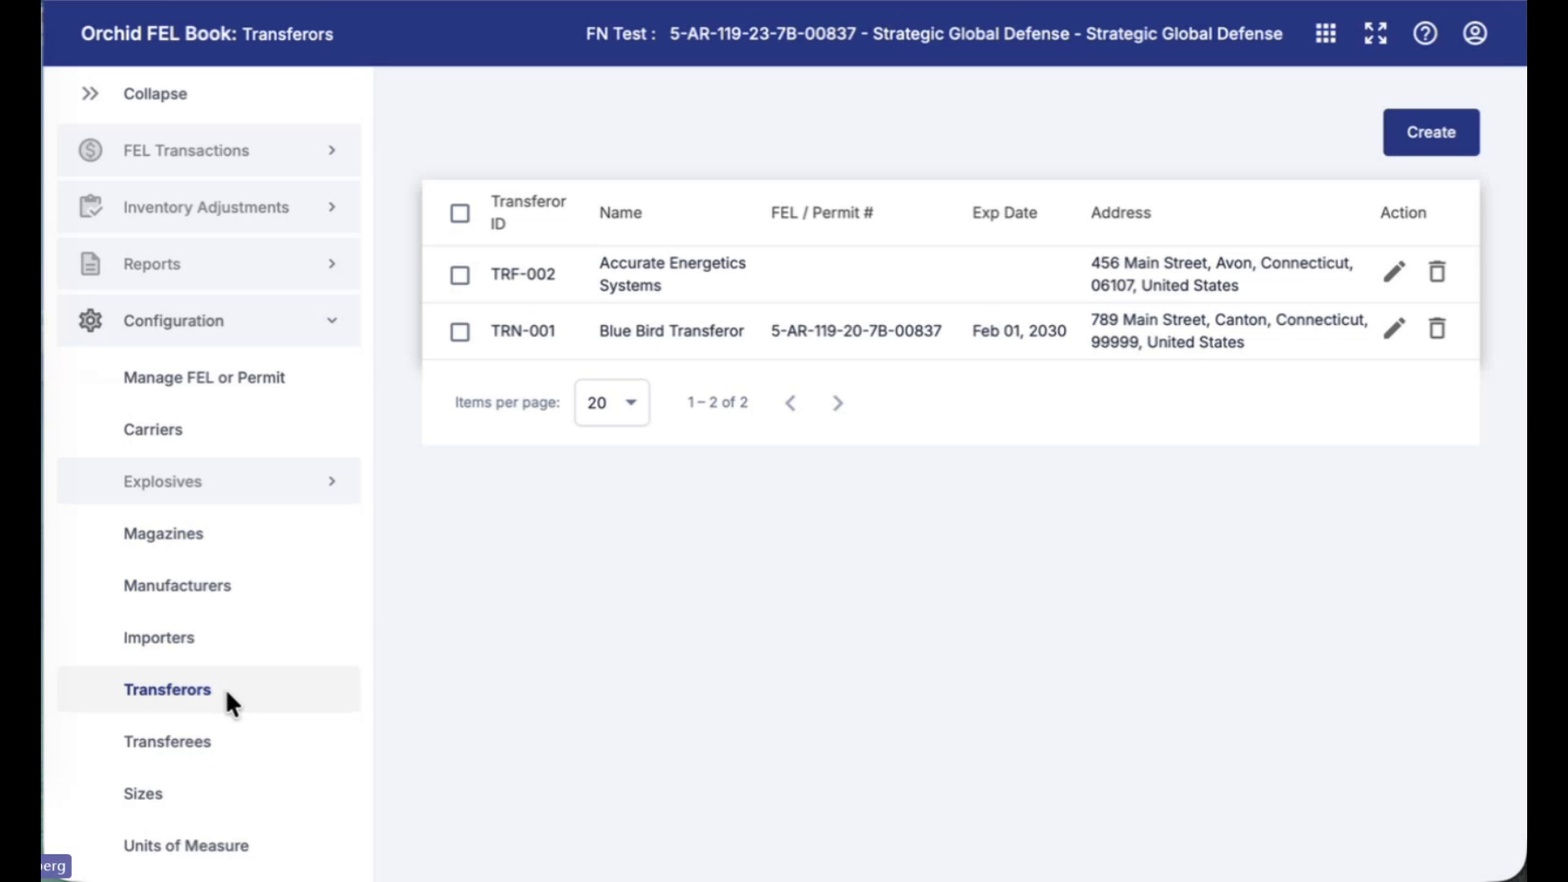
- Open Transferors. Click Transferors to manage entities you receive explosives from, with Transferor ID, Name, FEL/Permit #, Exp Date, and Address.
- Review Transferees similarly. Click Transferees under Configuration to manage entities you transfer or dispose explosives to.
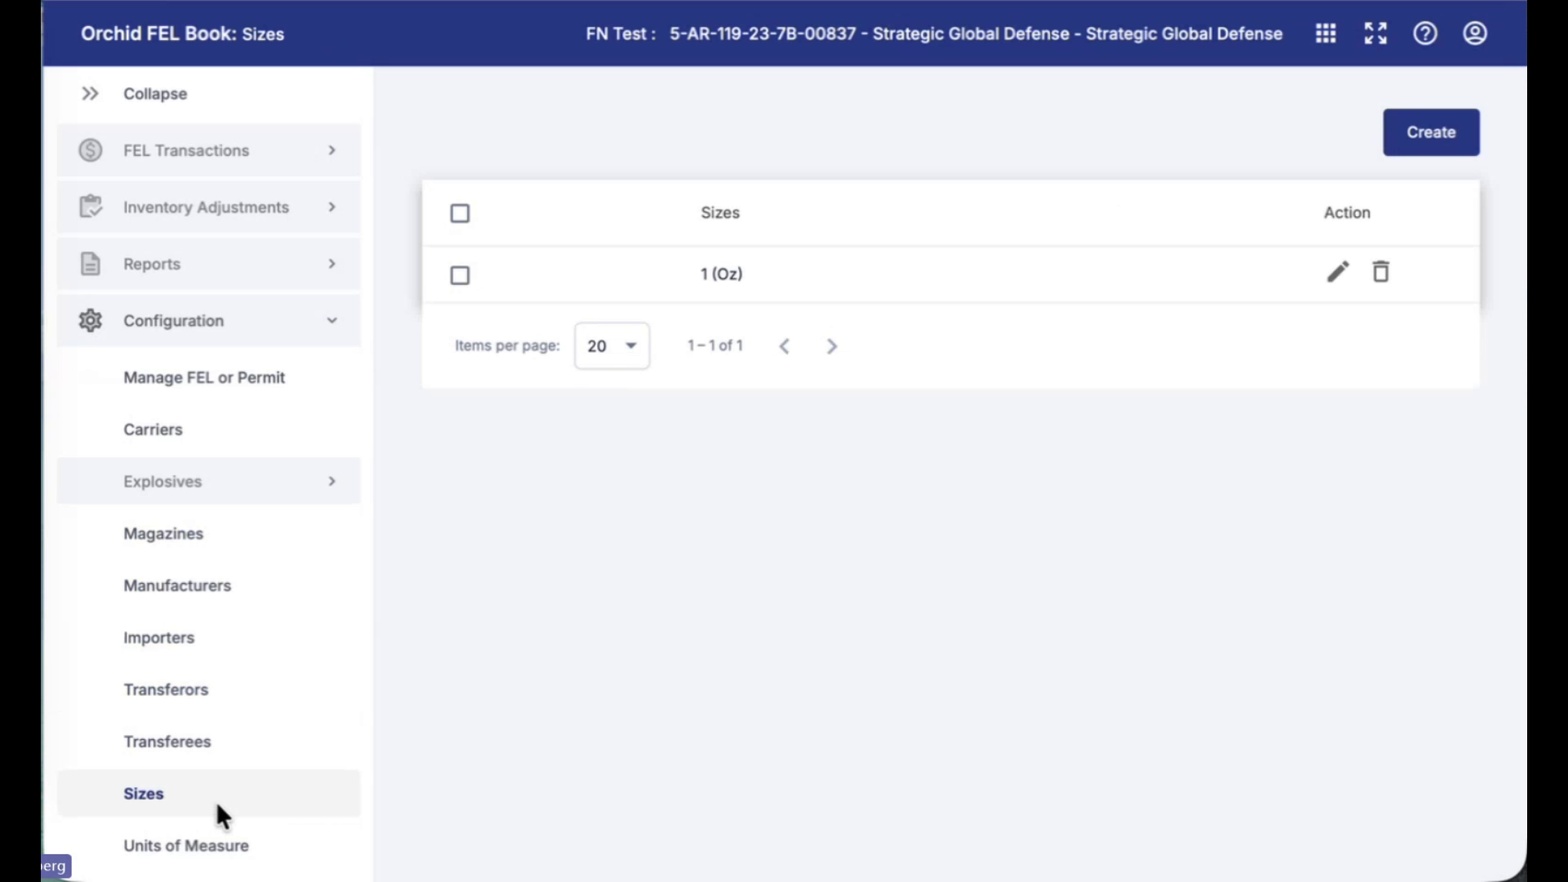
- Open Sizes. Click Sizes to manage size values (for example, 1 (Oz)) used when describing explosive items. Use the pencil or trash icons to edit or remove, or Create to add a new size.
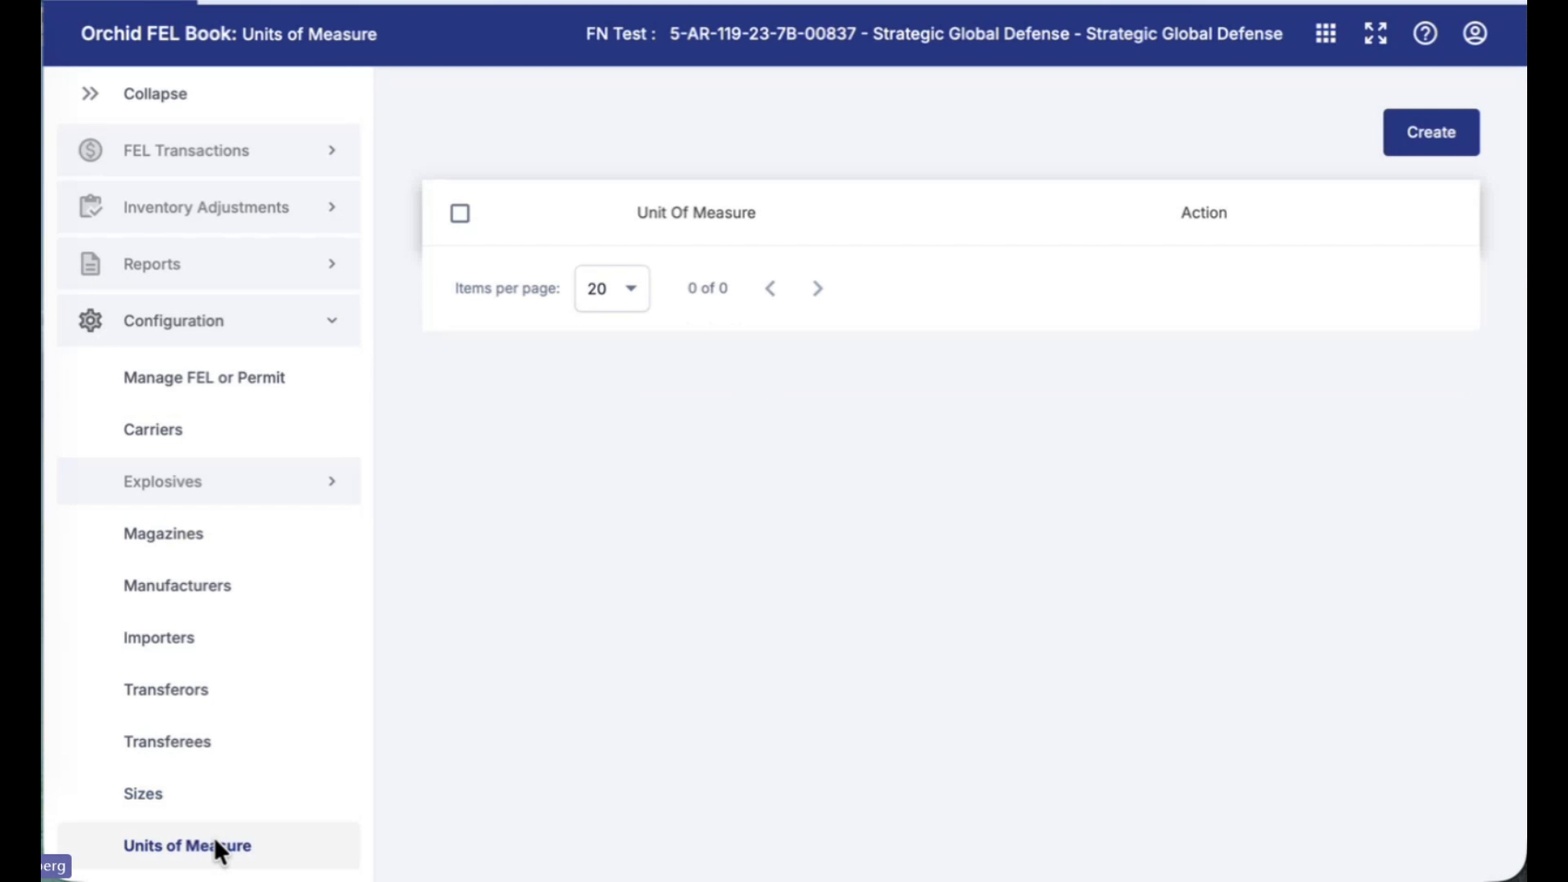
- Open Units of Measure. Click Units of Measure to manage UoM entries. Click Create to add a new unit if the list is empty.
Expected Result
Your FEL Book is now configured with the correct default FEL record, account preferences (timezone, date/time format, and weight unit), at least one user and role with the appropriate permissions, and all Configuration tables — FEL/Permits, Explosives, Magazines, Manufacturers, Transferors, Transferees, Sizes, and Units of Measure — reviewed and populated. The Dashboard will reflect activity for the selected FEL once acquisitions and dispositions are recorded.
Tip: Set up your Configuration tables (Manufacturers, Transferors, Magazines, Explosives) before entering your first acquisition. Pre-populating these lists makes A&D entry faster and prevents typos that cause reconciliation headaches later.